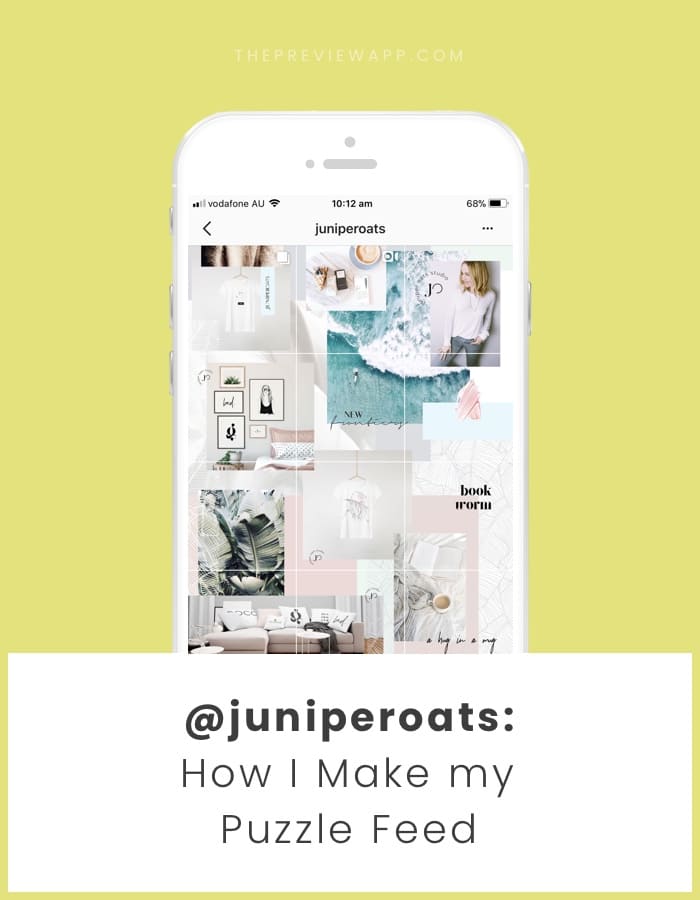
Not too long ago – round about last summer – I hit a real slump with Instagram. All those algorithm changes and rumours about shadowbans plus a huge dip in my posts’ engagement had me at a low point. Or actually a high point; a high point of frustration!
But I didn’t want to give into the temptation of just giving up, I wanted to find a way to have fun with Instagram again and to create a feed that adds value to my audience by brightening up their day one little tile at the time.
And I knew I wanted it to be a cohesive look that tells visitors something about me and my designs. I wanted my feed to really evoke the emotions JuniperOats is all about: Designs that bring a smile to your day and remind you that paradise is not just a place but a state of your mind. Designs that make you feel alive, mindful and in touch with your inner romantic.
So I set out on a mission to find other accounts I found inspiring and upon oozing over @twigyposts‘ feed and how uniquely she arranged her gorgeous photographs, I knew what I wanted: A feed in which each post is meaningful on its own but also part of a bigger picture. Part of my entire brand’s story; represented through my feed.
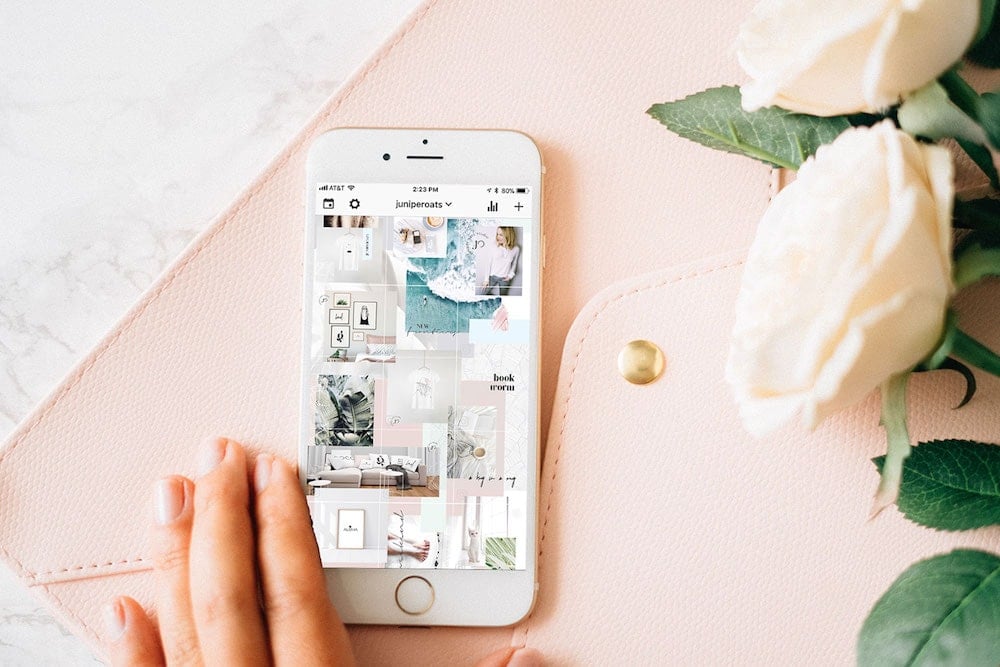
Now, ever since I did, I have been getting many many requests from followers and fans, about how I create my feed. And when the amazing peeps at the Preview App asked me if I was open to share my secret I said: “You know what I should write a blog post about it”.
So without further ado, here are the 5 steps I take and the tools I use to create my Puzzle feed:
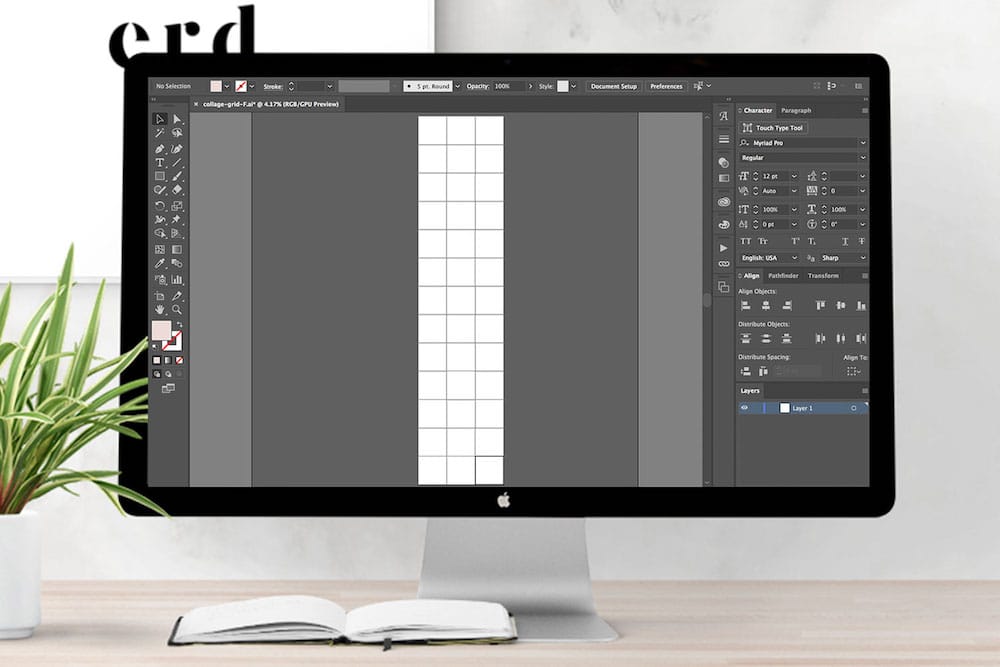
Step 1: Prepare your puzzle Instagram grid in Adobe Illustrator
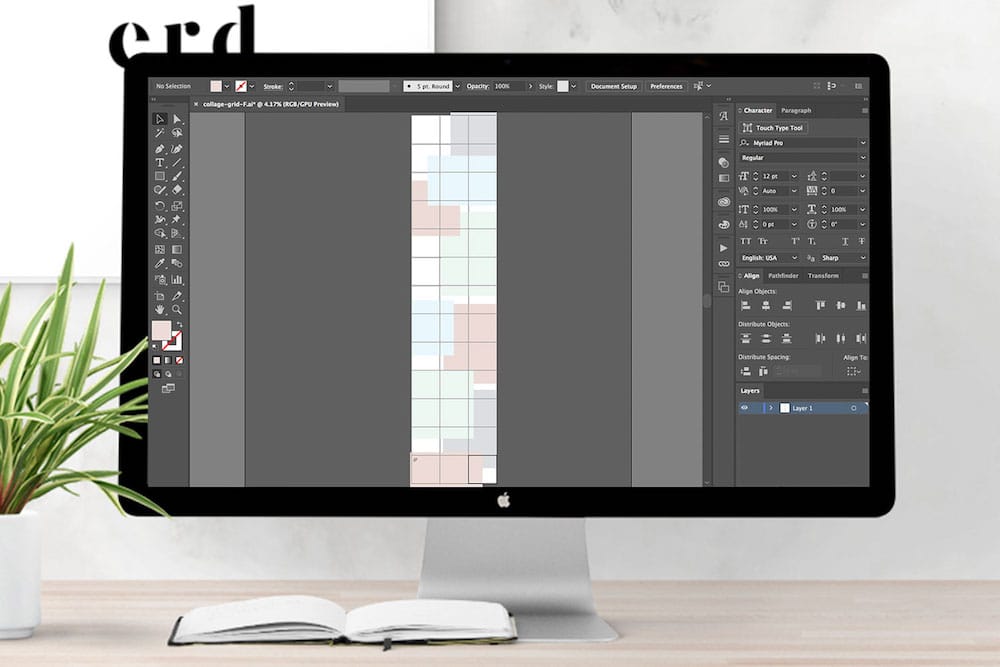
I create a blank grid of 3×13 squares using Adobe Illustrator. You could also use Photoshop but I like that, by using Illustrator’s artboards, I can easily export each individual tile later, once I am done designing the feed.
Click here to download for free my Instagram Grid Template.
Step 2: Design the basic outline of your Instagram grid
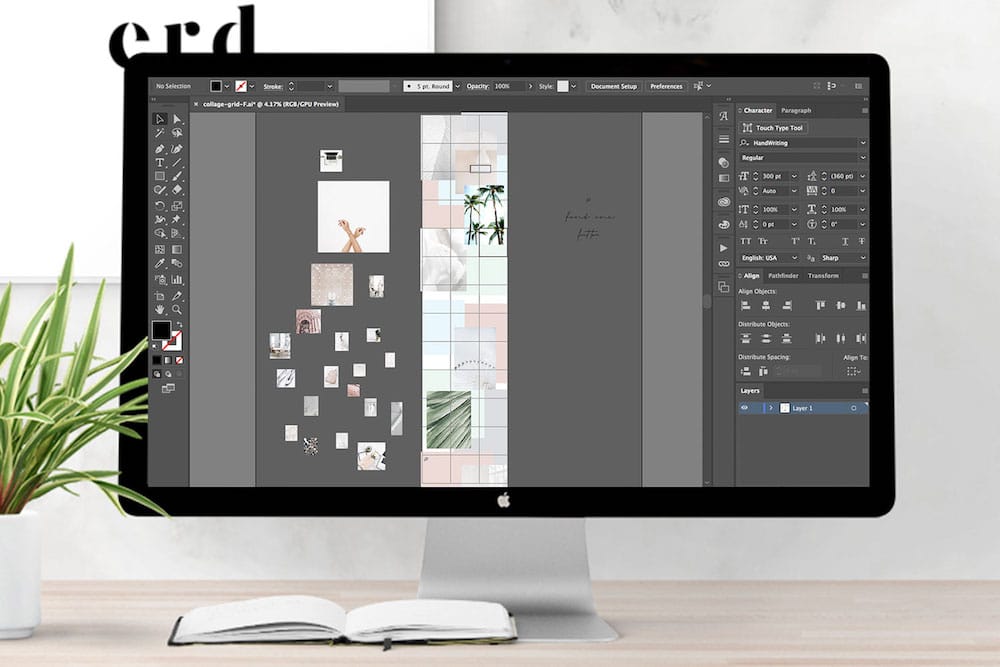
I chose my color palette and start layering from the background up. Meaning just like a good old collage back in our school days, I add basic shapes first and then work my way to the foreground with more and more photos.
Note: I use some photos as backgrounds (usually more neutral tones like whites and greys) while other photos will become my “hero” images, the ones that will make up the main focus of a post.
Step 3: Add your “Hero” photos and text
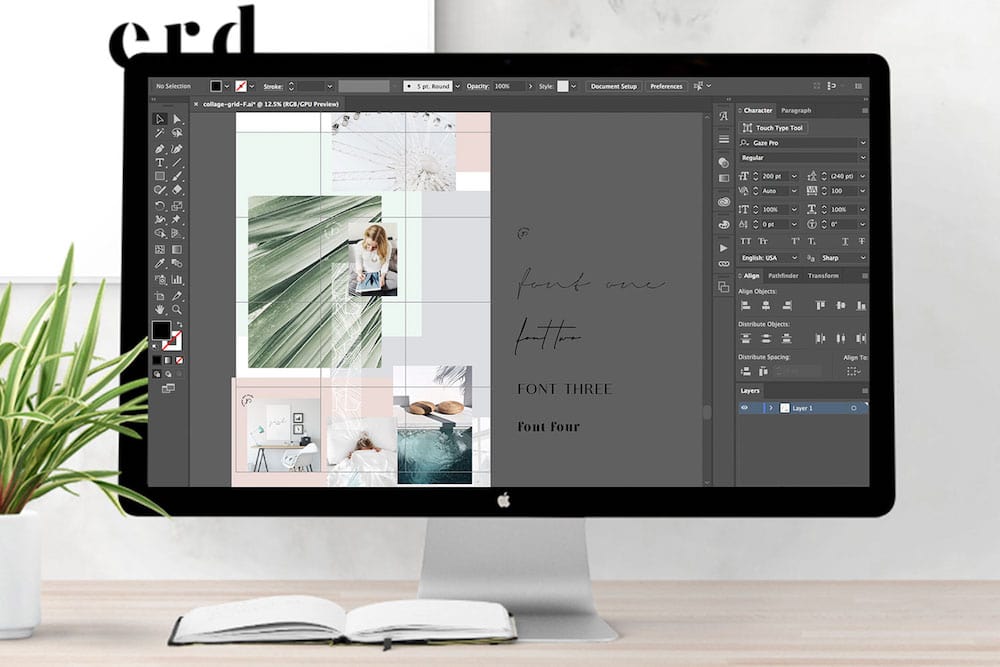
Now that the basic outline is taking shape I start layering in those “hero” images and picture by picture create the overall content flow. For that I already keep my favorite fonts that I chose for my designs as well as my logo next to the artboards – ready to use.
I LOVE LOVE typography so I like to incorporate it into my feed not only to make verbal statements but also as a way to further style my page – to create that “vibe” I am all about.
This is the most labour intensive step and can sometimes take me a couple days, as I go back and forth until it all just feels right. I also pay a lot of attention to how each individual tile will turn out. You will end up with some “filler” posts and that’s ok, it allows the overall feed to breathe but more or less I try that each little square has something visually pleasing or a small story to tell.
Note: When it comes to my content I follow the 80/20 rule, which means 80% of my content is lifestyle & storytelling while 20% focuses on my actual products and designs.
Step 4: Save your individual images
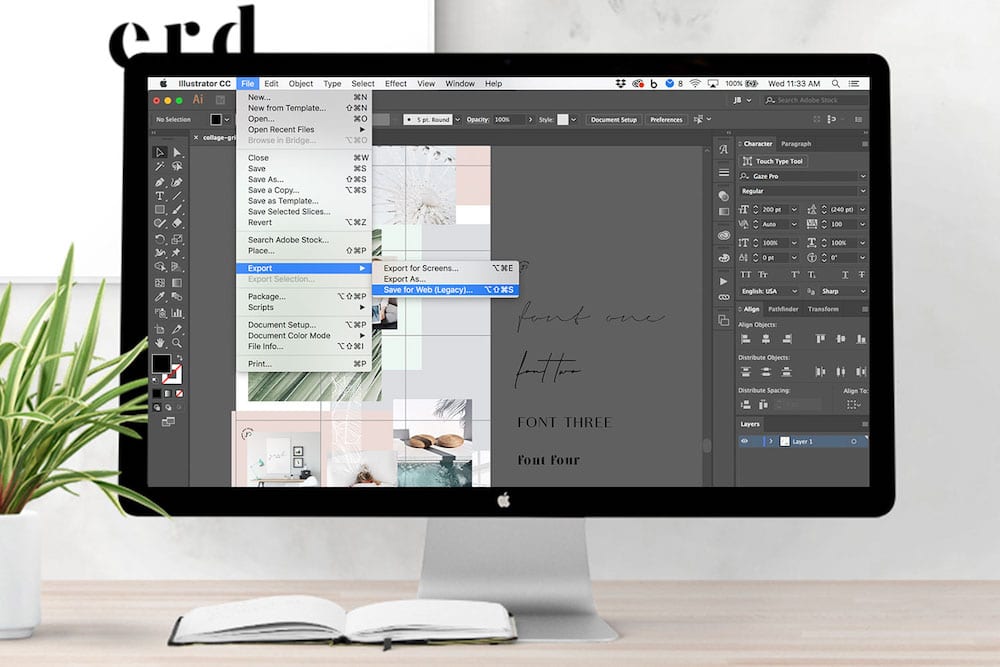
Once I am happy with how everything looks (including image resolutions) I export the artboards as individual JPGs:
- File > Export > Save for Web (Legacy)… function
Note: I like to use the shortcut for my mac, which is OPTION+SHIFT+COMMAND+S
If you are using Photoshop instead, you will have to create a grid using the ruler tool first and then figure out a good way to slice up the canvas. There are some free apps like Instagrids that can assist you with this but it will take a little bit more trial and error to make sure everything lines up again in the end.
Step 5: Add the images in Preview App to plan your feed
Once I saved all the posts as JPGs I then airdrop them to my iPhone, (Ha, can you tell yet I am a total Apple geek?! Even all my drawings for the shop are created in my iPad Pro.)
I then upload them into my beloved Preview App from where I can schedule them and make sure they always come out exactly in the order I had intended.
It also allows me to see it all in context of Instagram’s life size: the phone. And if you then find some or your elements (type, patterns, images, etc.) end up way too small, you can always go back and edit your source file. But if everything looks good, you are now ready to rock the Instagram world – one gorgeous puzzle piece at a time!

That’s it!
If you’re looking for beautiful images for your puzzle Instagram grid, here are my favorites.
My favorite image resources
01 – My Social Curator: Jasmine Star’s subscription shop offers captions + images curated for your feed, monthly.
02 – Kate Max Stock: Kate Max offers a pay-per-photo shop as well as monthly free photos if you sign up for her mailing list.
03 – Stock That Rocks: The Bloguettes have both a pay-per-photo model and two different membership options to get strong stock photography.
04 – Twigyposts: Omg, Jana’s Styled Stock Photos are not only affordable Stock Photos but they are warm, inviting & unique and I am simply her biggest fan! She has a membership option as well as a pay-per-photo one-stop shop.
05 – Stocksy: At Stocksy, you get stock photography + cinematography, made with love. Stocksy is home to a highly curated collection of royalty-free stock photography and video footage that is beautiful, distinctive, and highly usable.
06 – Death To Stock: Every month Death to Stock taps our team of photographers around the world to produce “photopacks” — these packs are carefully crafted stories accompanied with 12+ photos from the perspective of the artist. Get two packs a month with their membership.
07 – Unsplash: Unsplash offers FREE photos for you to download that have been gifted by a generous community of photographers.
08 – Kaboom Pics: Another FREE stock photography resource that provides beautiful photos for your feed.
Your turn to make your puzzle feed! I hope this tutorial was helpful. Please leave me a comment below if you have any questions.
Author: Judith Brieger
Owner of and designer behind JuniperOats Studio and Co-founder of White Space Studio. Judith is a marketeer turned designer with a big love for minimalism, white space and all things beautiful. Graduating in Europe with a Master’s in Business and having worked in Germany, Dublin, London, Milan, and Honolulu for big brands such as LEGO, she has a unique and playful perspective on the latest trends of design & branding from around the globe. Her creativity and marketing brilliance has helped many small and large companies to get to a new level of success.

