Want to see how to use Instagram Reels? Want to create your first Instagram Reel video?
Instagram Reels are 15 second videos (or shorter if you want to).
They’re a new type of content you can create on Instagram.
Instagram Reel videos can be super fun and engaging.
You can create a “Day in the life” video, or show the “Behind the Scenes” of your Business, or share your favorite tips, tricks and hacks, this new feature offers endless possibilities.
I’m going to show you how to use Instagram Reels and some fun editing tricks (like how to make text appear and disappear where you want in your video).
It’s so easy, you’re going to love it!
Let’s start.
PS: If you prefer to watch a video, scroll to the bottom of the blog post.
1. Open your Instagram Story and press “Reel”
Open your Instagram app, and go to your Instagram Stories.
Press on “Reel” at the bottom of your screen:
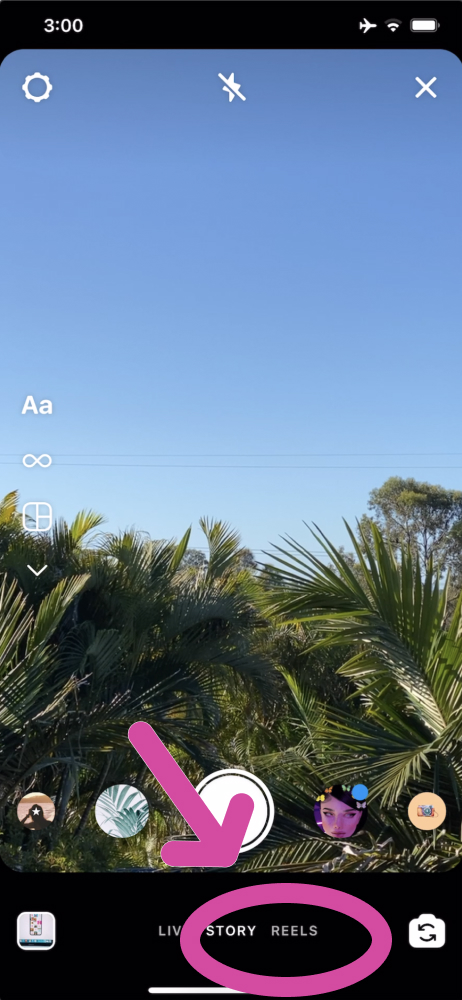
Welcome to Instagram Reels!
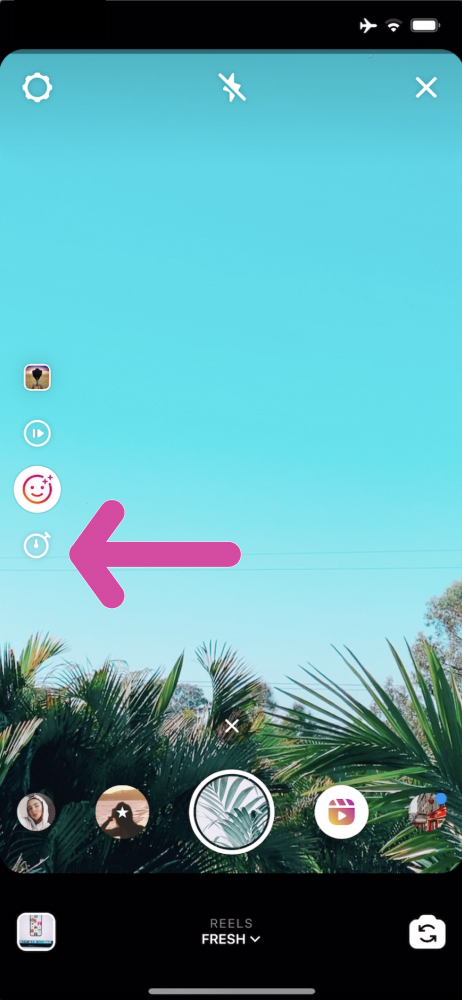
Let’s look at the options on the side of your screen first:
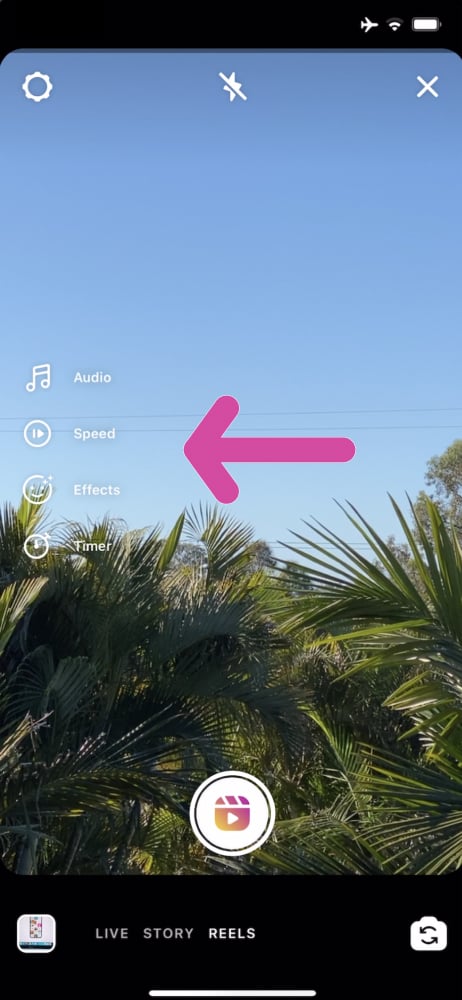
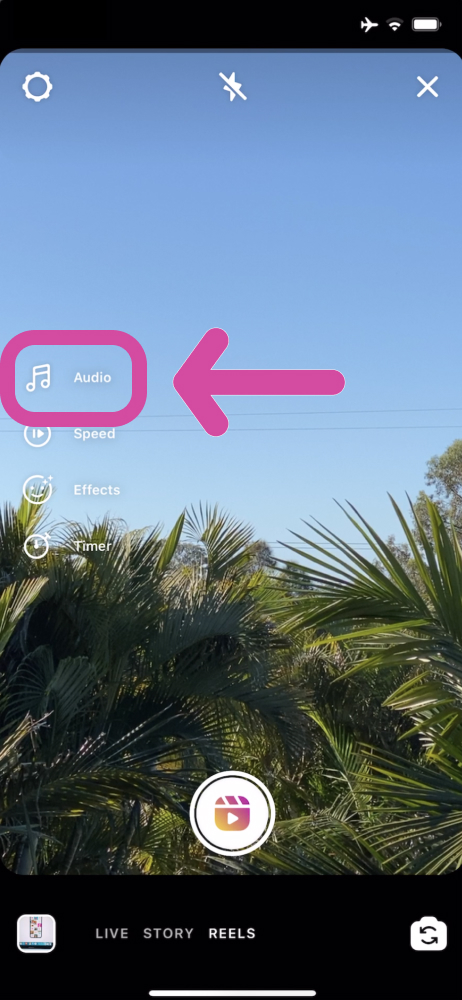
2. Choose Music
Choose a background music for your video.
If you don’t have the Music feature yet, click here to see how you can get it.
3. Video Speed
This is optional.
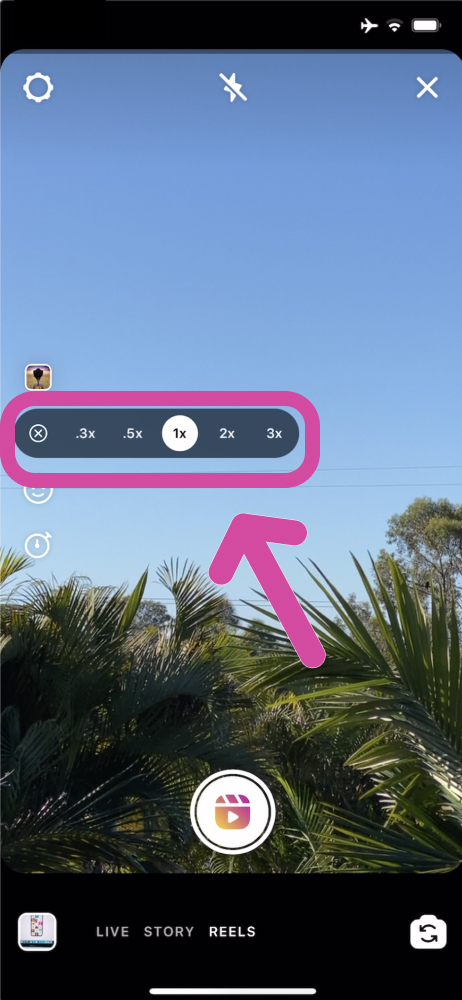
You can choose the speed of your video:
- 1x = normal speed / normal video
- .5x = slower
- .3x = even slower (good to create slow motion Reel videos)
- 2x = 2 times faster than normal speed
- 3x = 3 times faster than normal speed
Press this to choose your speed:
4. Choose a filter
Optional.
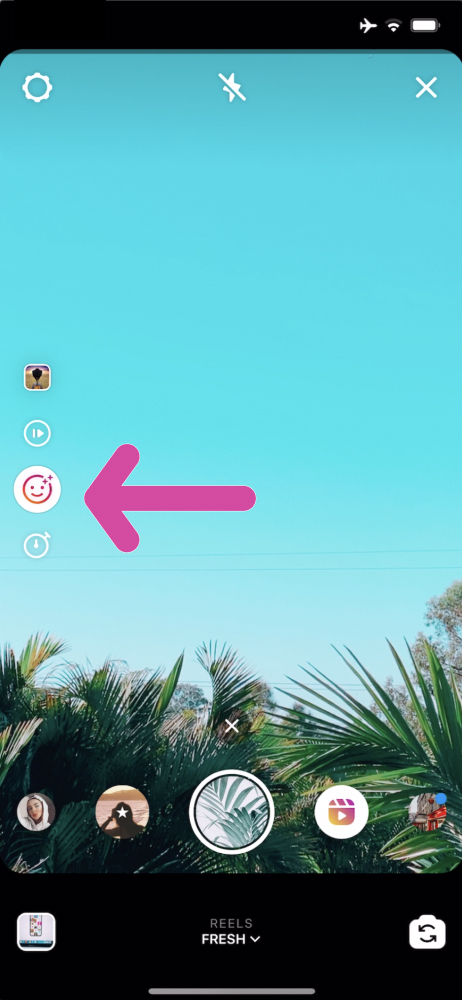
You can record your video using a filter / effect.
To add a filter, press on the “smiley face” button.
Tip: You can use @preview.app filters and games to create your Reel (coming soon).
5. Set a timer
This is optional.
This feature is awesome if you want to:
- Choose how long you want your clip to be (for example, you might want to record a 5 second clip, and then a 10 second clip), or
- If you want to record your Instagram Reel video hands-free (for example, you might want to do a dance, or a challenge, or a Q&A, or run wild in a field of flowers and you don’t want to hold your phone).
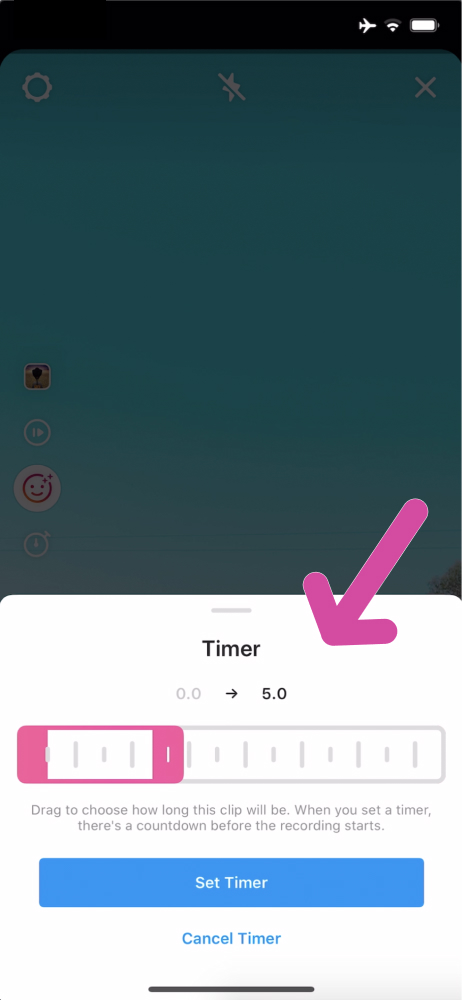
To set up your Timer:
- Press on the “Timer” button
- Select how long your clip will be (it can be up to 15 seconds)
- Set your phone somewhere
- A countdown will appear before the recording starts
- Go in front of your phone
- Record
Done!
Ok, let’s create an Instagram Reel now.
You have 2 options:
- Upload a video from your phone’s camera roll, or
- Press on the Reel button to take a photo / record a video
Let’s have at the first option first.
6. Upload a photo or video from your camera roll
This is so awesome if:
- You already have edited videos on your phone
- You want to upload your TikTok videos on your Instagram Reel
- You saved Insta Stories on your phone and want to share them as video Reels
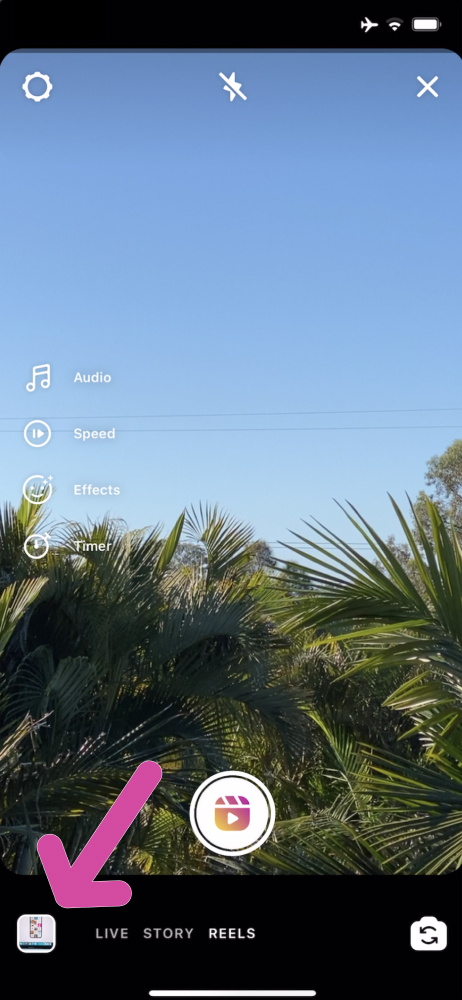
To upload a photo or video from your phone’s camera roll:
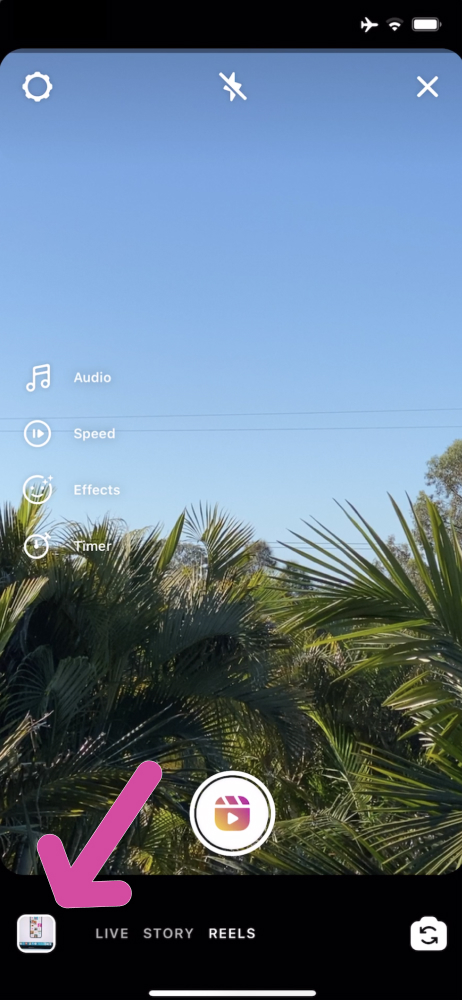
- Swipe up on the screen, or
- Press on the little “square” on the bottom left corner of your screen
- Choose your photo or video
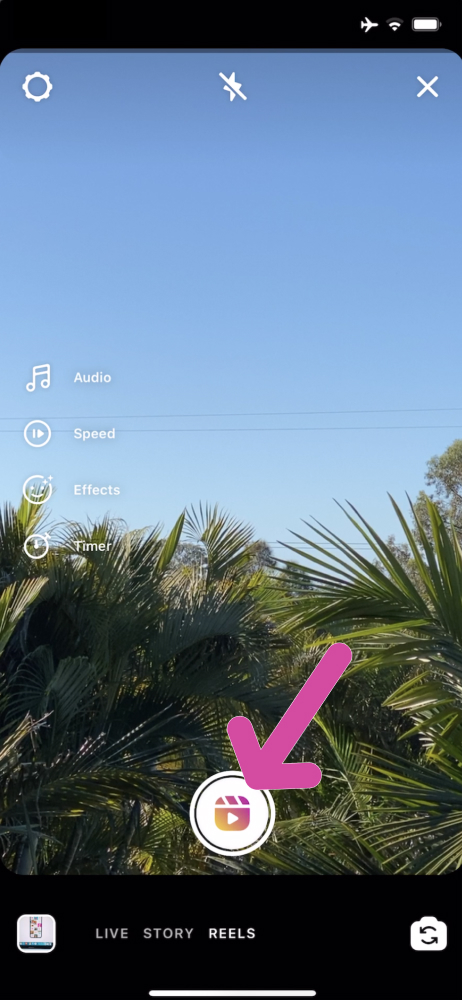
7. Press on the “Reel” button to record a video
To record a video in the moment, press on the Reel button:
8. Trim your video
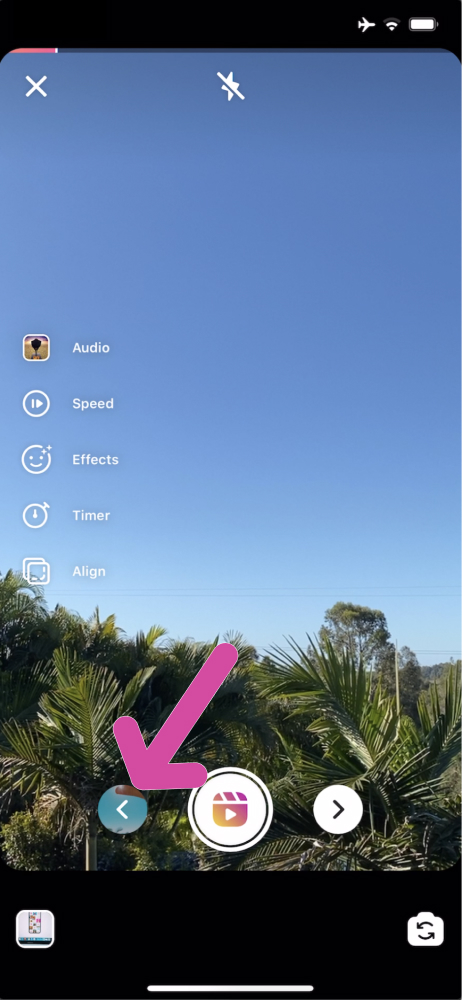
If you just recorded a video, Instagram will jump straight away to the next clip for you to create.
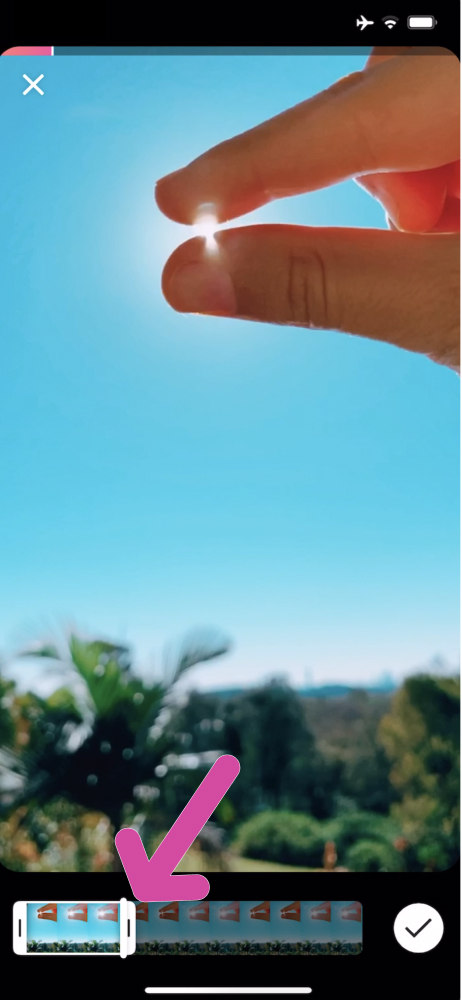
You can check out the clip you just recorded.
- Just press on the “Back” button if you want to see how it looks
- You can trim the video by sliding the extremities of the videos left and right
9. Add more video clips
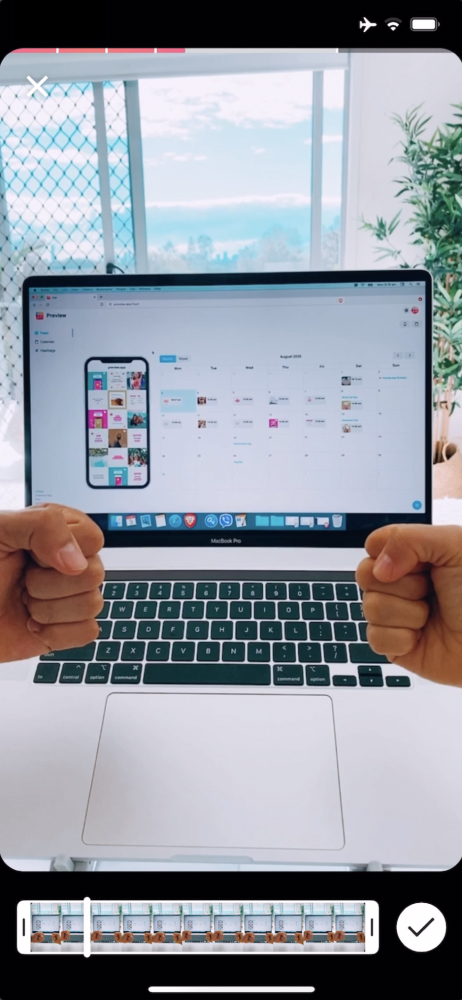
Now keep going. Add more video clips (or upload more videos from your camera roll).
Until you’ve added all the clips you wanted.
Tadaaaa!!
10. Press the “Next” button
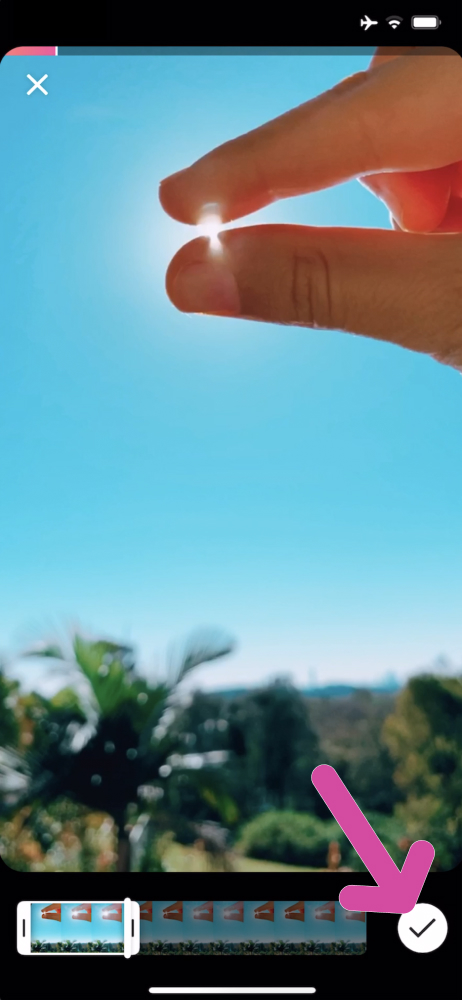
Once you’re done adding clips, press on the “Next” button.
11. Final edits
You can watch your Instagram Reel video before you post it, and you can also do more edits.
Look at the top of your screen.
This is what you can do:
- Back” button: press on this button if you want to add more clips, or delete clips in your Reel
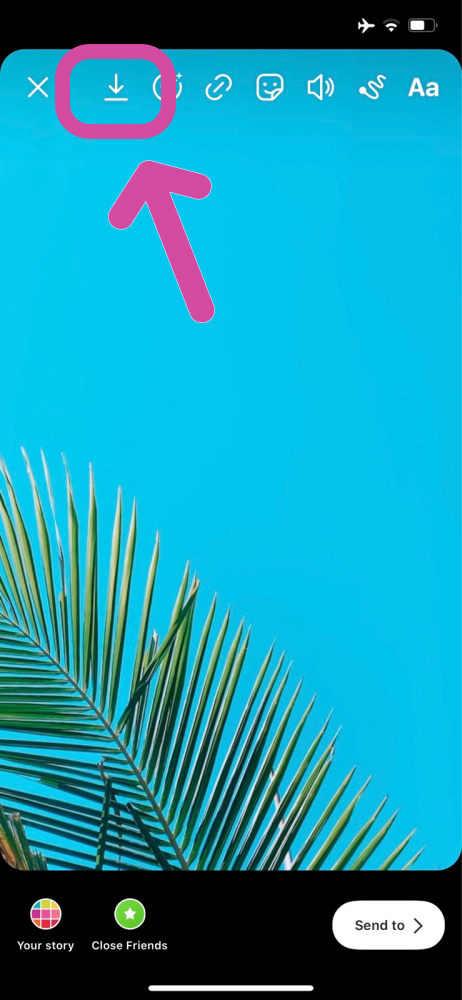
- “Save” button: to save your video Reel to your camera roll (perfect if you want to schedule your Instagram Reel videos in your Instagram Feed Planner)
- “Sticker” button: to add stickers and GIFs
- “Drawing” button: to draw / doodle on your screen
- “Text” button: to add text on your video
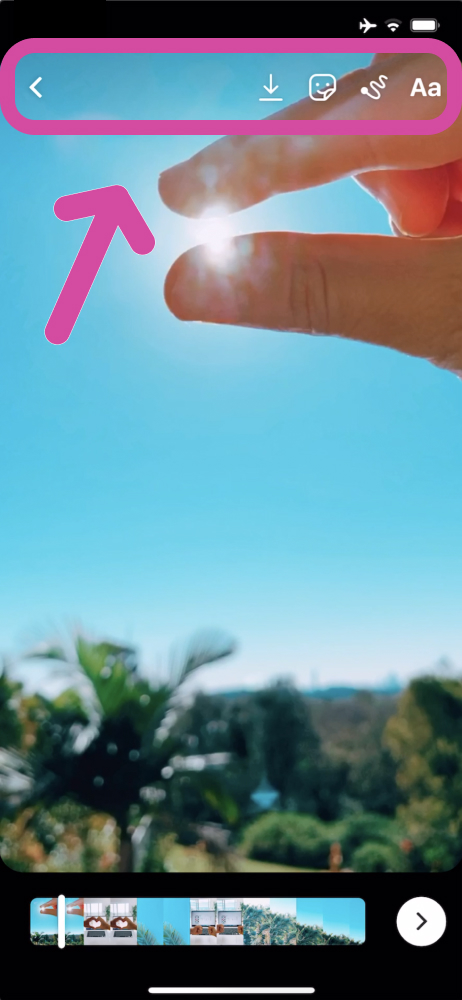
Here’s is an example:
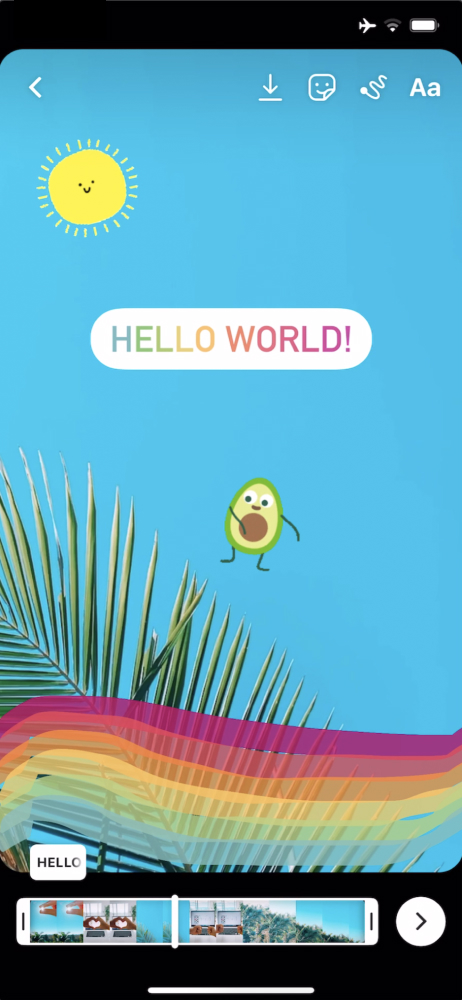
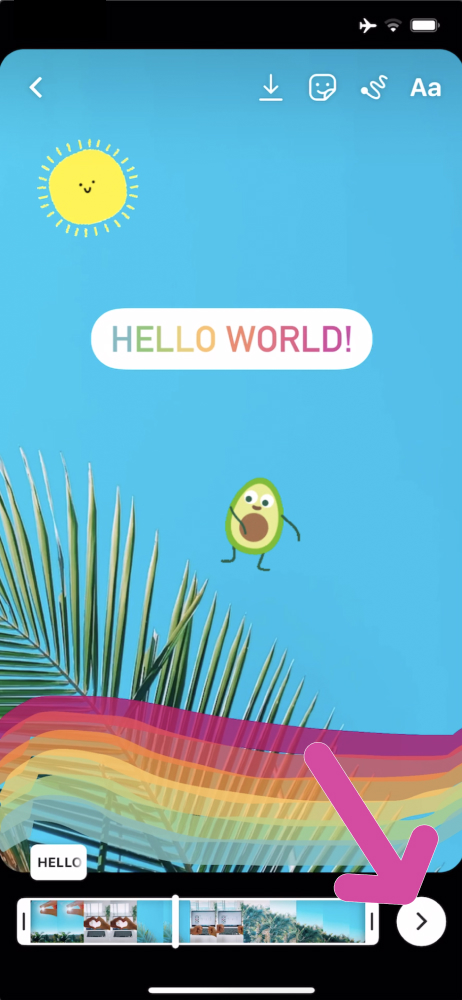
12. Press “Next” to post your Instagram Reel
Press the “Next” arrow when you’re done editing:
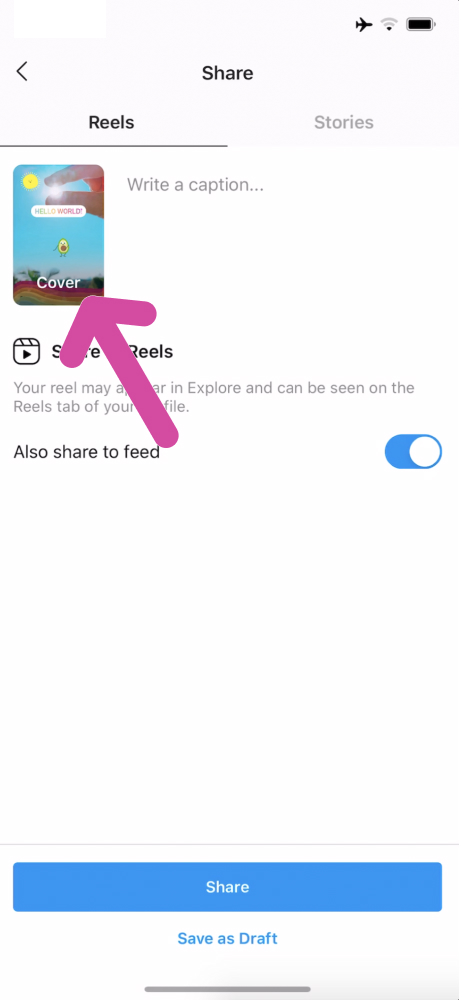
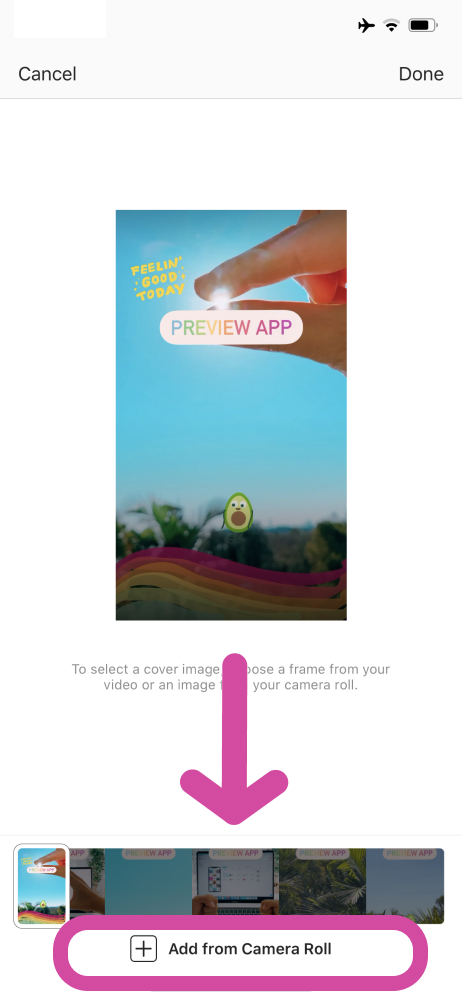
13. Choose a cover
The cover is the thumbnail of your post. This is what people will see on your profile.
Click on the image to change your cover image.
You can:
- Choose a clip from your video, or
- Upload an image from your camera roll
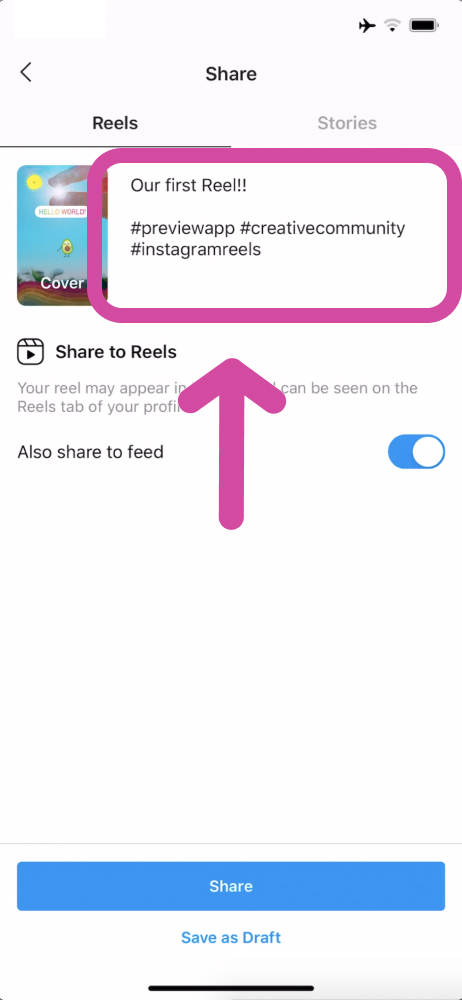
14. Write your Instagram Reel Caption
Write your caption and hashtags.
If you need help finding awesome hashtags to connect with Instagram communities, check out the Instagram Hashtag Finder in Preview App.
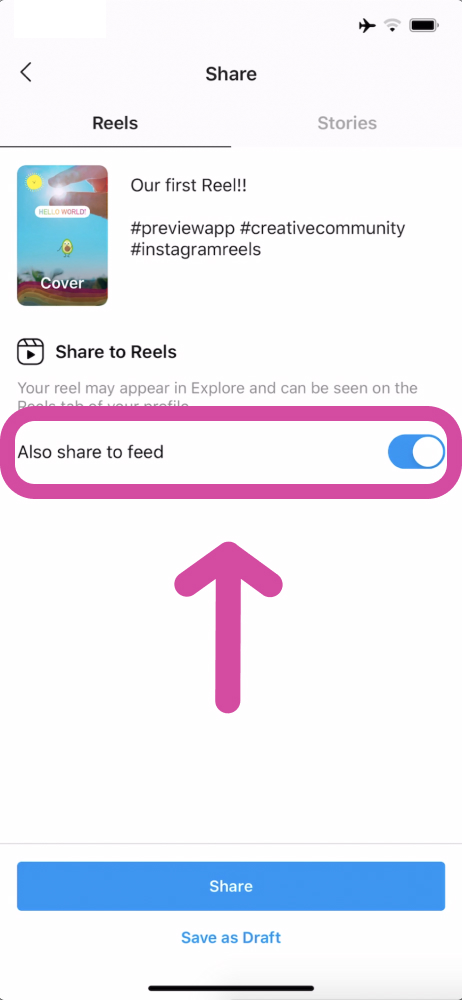
15. Share your Instagram Reel video to your Instagram feed
Turn on the “Also share to feed” if you want your Instagram Reel video to show up in your Instagram feed, amongst your other Instagram posts.
I highly recommend doing this because the first thing people will see when they visit your profile is your Instagram feed.
Catch their attention with your content straight away so they can start tapping and scrolling through your posts.
However, if you don’t want your Instagram Reel video to be in your feed, turn it off. It will only appear in the “Reels” tab, separate from your feed.
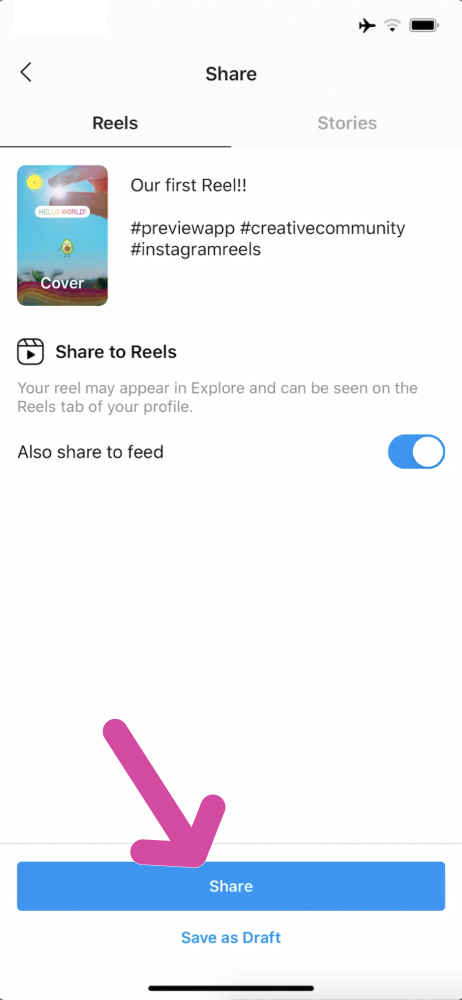
16. Press “Share” to post it
Press on the “Share” button at the bottom of your screen to post your Instagram Reel!
Congratulations!! You’ve posted your Instagram Reel!!
Here are some Instagram Reel Tricks:
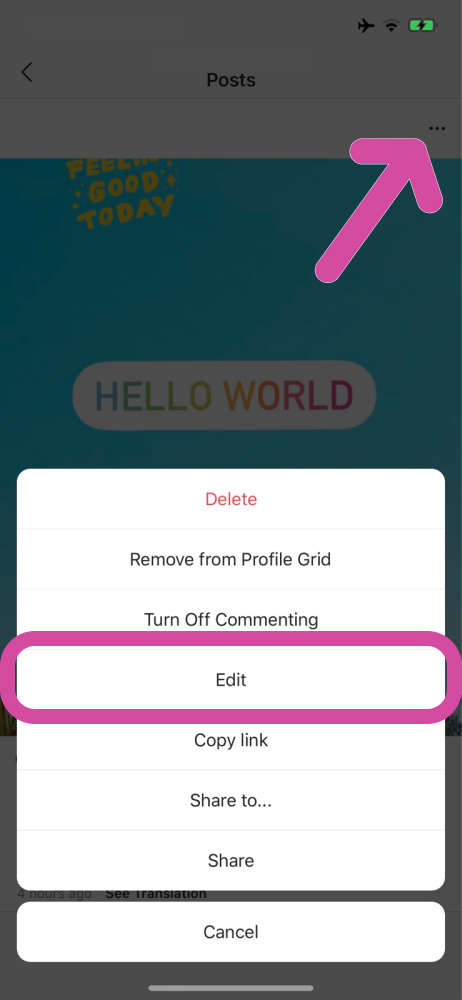
17. Tag people and location on your video Reel
At the moment, you can only tag people and location in your Reel video after you post it on Instagram.
To tag people and location on your Instagram Reel video:
- Post your video Reel
- Press on the three dots “…” on top of your Reel post
- Press “Edit”
18. Remove a Reel video from your Instagram feed
Imagine this:
- You posted your Instagram Reel video.
- It’s on your Instagram feed with your other posts.
- One day, you decide you don’t want your Instagram Reel videos to be seen in your feed.
- You only want them in the “Reel” tab.
Good news:
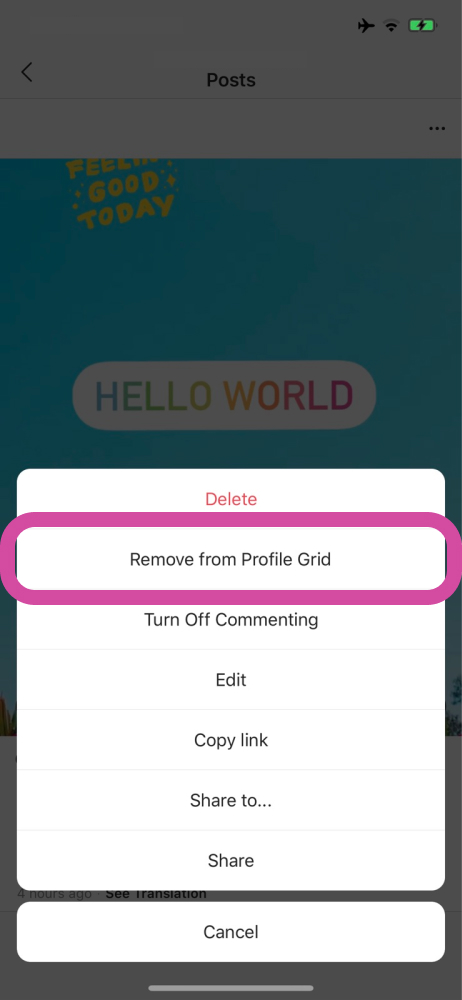
You can remove the Reel Videos from your Instagram feed. They will only show up in your “Reels” tab.
- Press on the three little dots “…” on top of your post
- Select “Remove from Profile Grid”
18. Video Reel length
This is a useful trick:
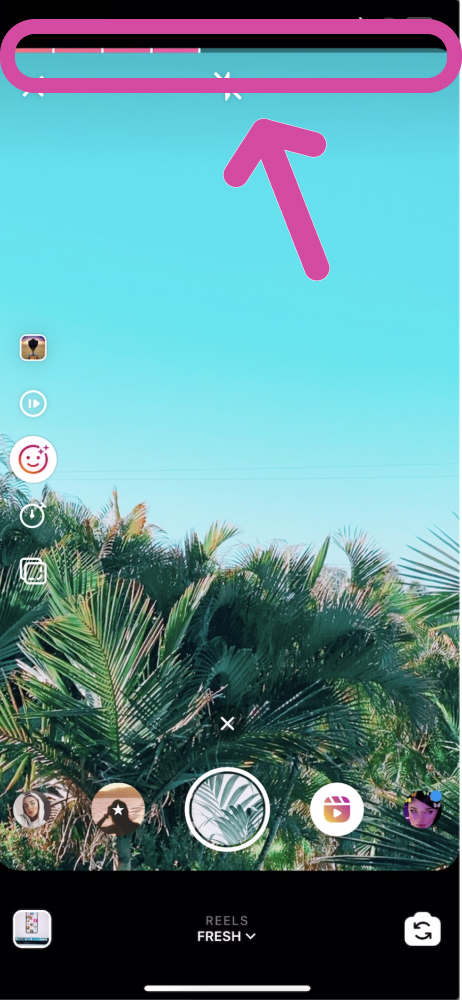
Look at the top of your screen to see how long your Instagram Reel video is.
There is a red line that will appear on top of your screen.
It shows you how long your Reel video is and how long each of your clips are.
15 seconds = the full width of your screen.
19. How to delete a video clip in the middle of your Instagram Reel
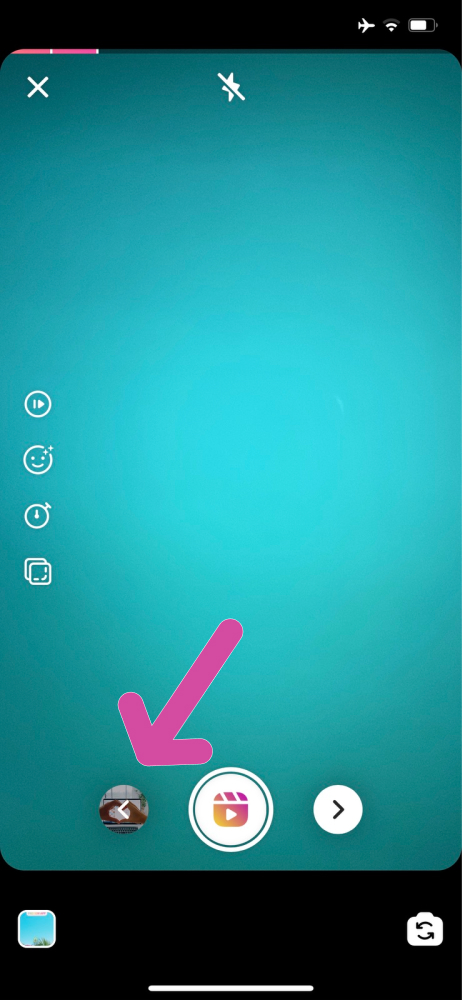
At the moment, Instagram only allows you to delete the last clip in your Reel.
To delete the last clip, go to back to it and press on the “bin” button:
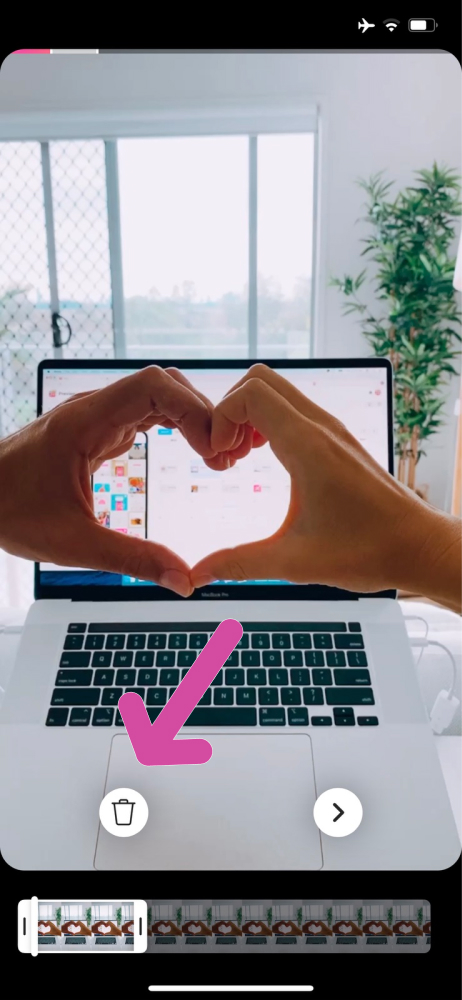
You can’t delete a video clip that is at the beginning or in the middle of your Reel video.
This means that if you want to delete a video clip that is in the middle of your video, you’ll have to delete all the video clips that are after it first.
This can be annoying because there’s no way you can save your last clips to your camera roll before you delete them.
But there’s a way to avoid this and make sure you are always happy with your clips!
Here’s the trick:
- Record your video as an Insta Story
- Save the Insta Stories to your camera roll
- Open Instagram Reel
- Upload the Insta Story videos from your camera roll
Done! No frustration!
20. Zoom in and out effect
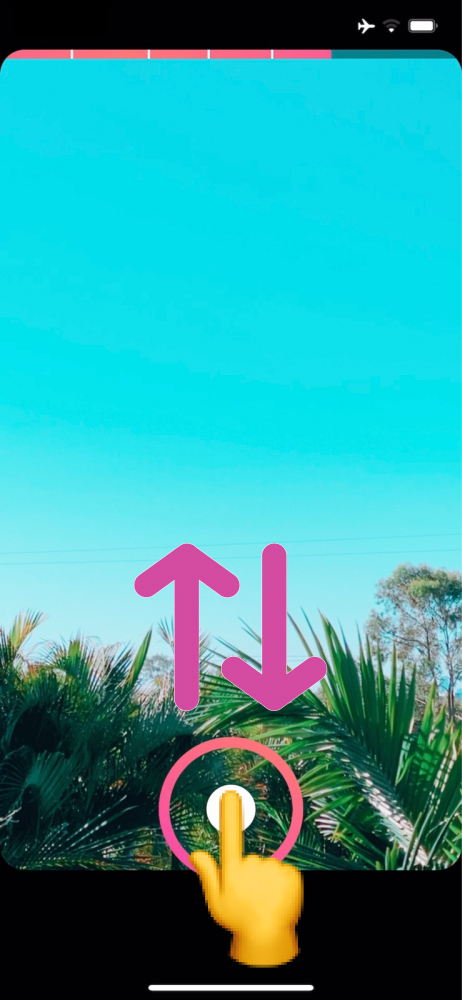
Did you know you can zoom in and out when you record your video?
Hold your finger on the record button and slide your finger up and down your screen.
21. Make a text or emoji appear in the middle of your Reel video
Want a text, emoji or GIF to appear at a specific moment in your video only? On a specific clip?
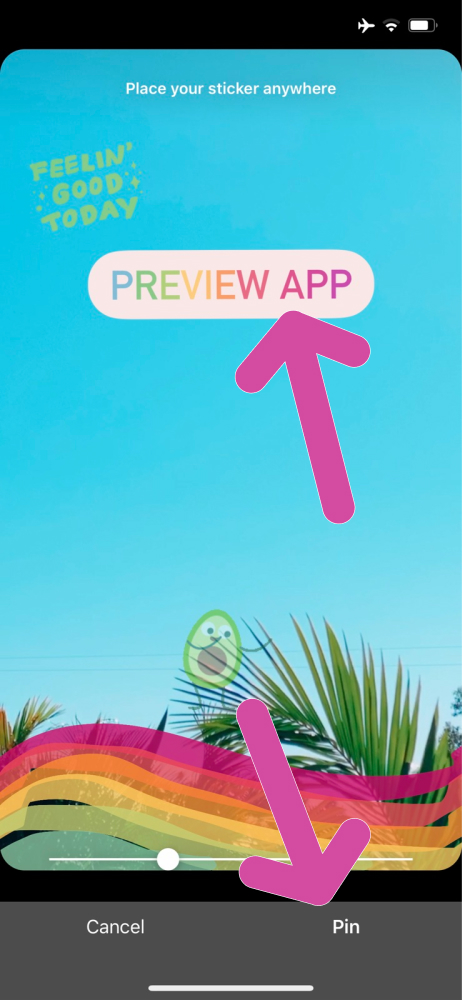
You can “pin” it to the part of your video. And it will appear where you pin it.
To pin:
- Add your text
- Hold your finger pressed on the text
- Slide the slider at the bottom of your screen to choose where you want your text to appear
- Press “Pin”
22. Make a text appear and disappear
One more cool trick:
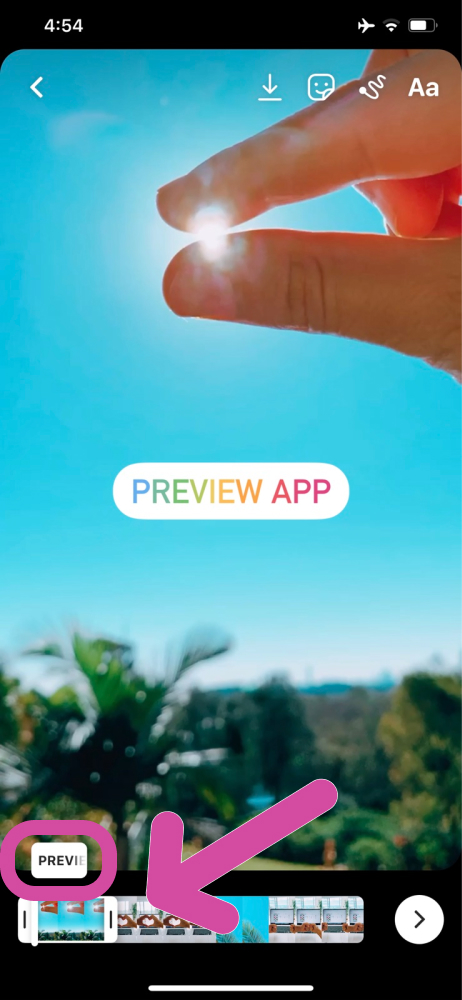
You can select the duration for how long the text on the screen should appear. You can select when it should appear, and when it should disappear in your video.
Here’s how to do it:
- Select the text box above the video preview
- Select the part of the video when you want it to appear and disappear
Done!
That’s it!
Now you know how to use Instagram Reels!
Your turn to create one!
Tag us @preview.app on your Reel if you create one. We’d love to come check it out and re-share it in our Instagram Stories!
Or share your Instagram username in the comments below so we can come check it out, and so that other people can get some video inspiration too!
Don’t hesitate to ask in the comments below if you have any questions about Instagram Reels.
And until next time…
See you on Instagram!
Alex

