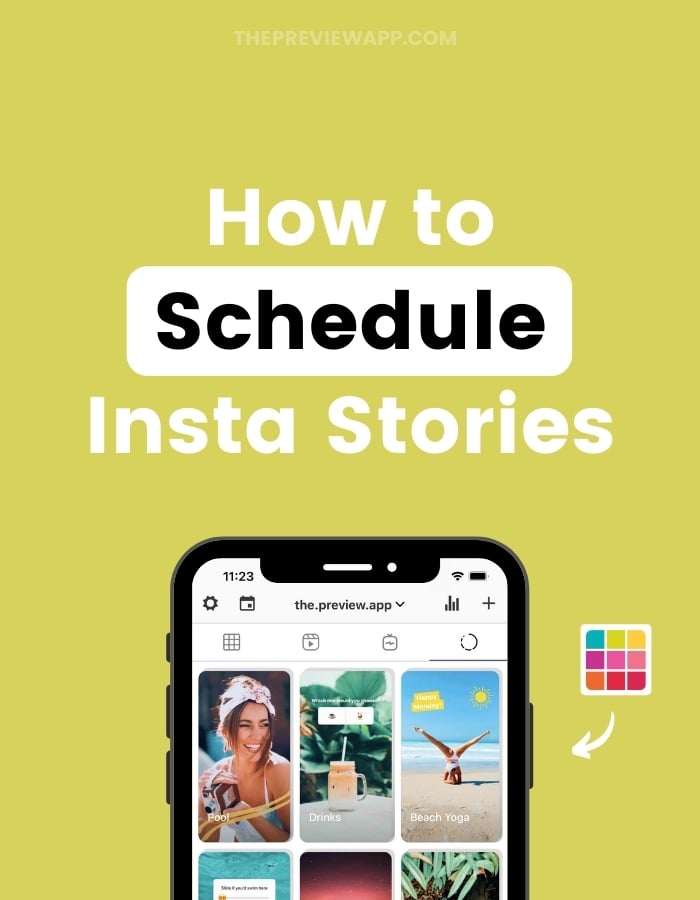
You can schedule your Instagram Stories in Preview App, on your phone and computer.
For this blog post, I’m going to show you how to do it on your phone.
Click here for the computer tutorial.
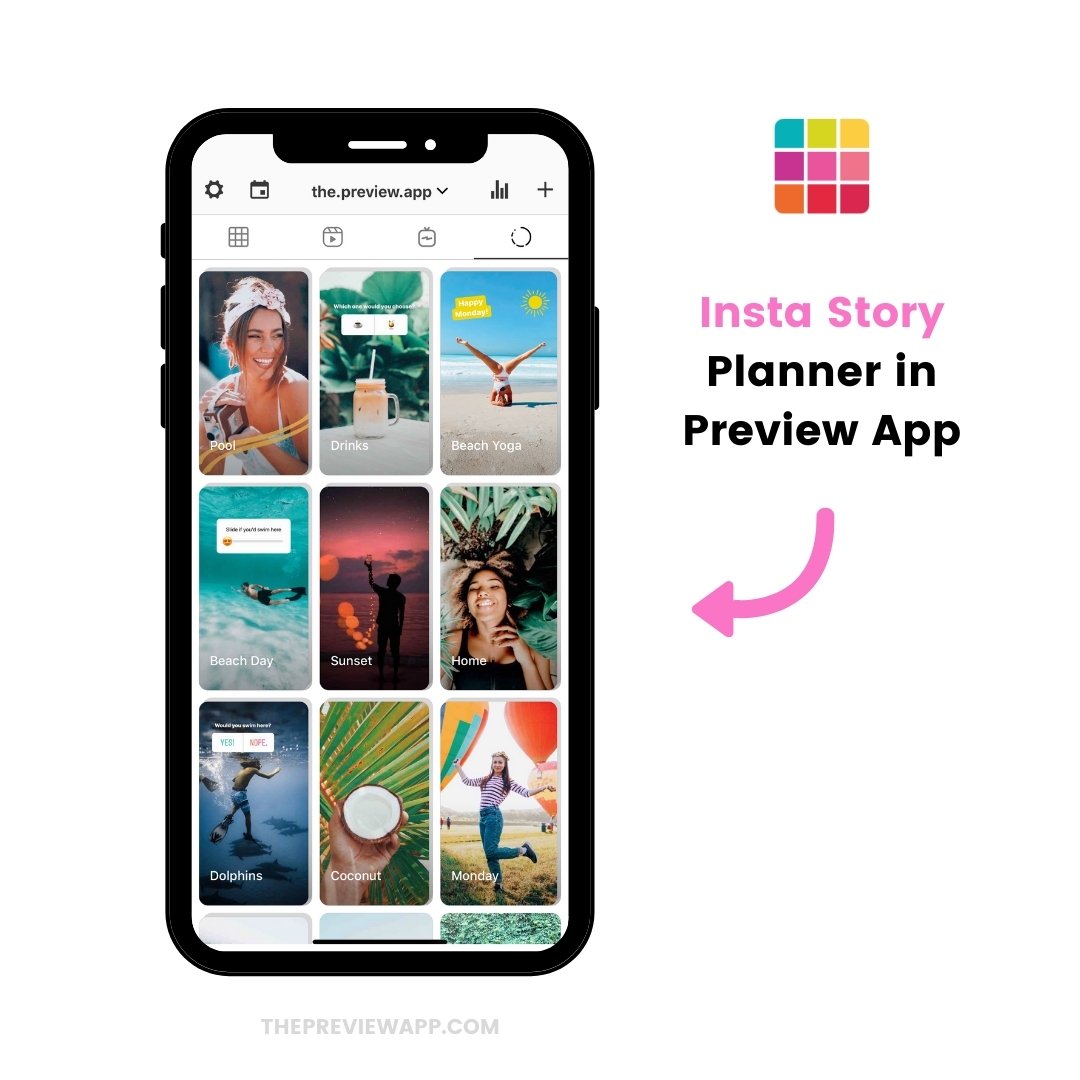
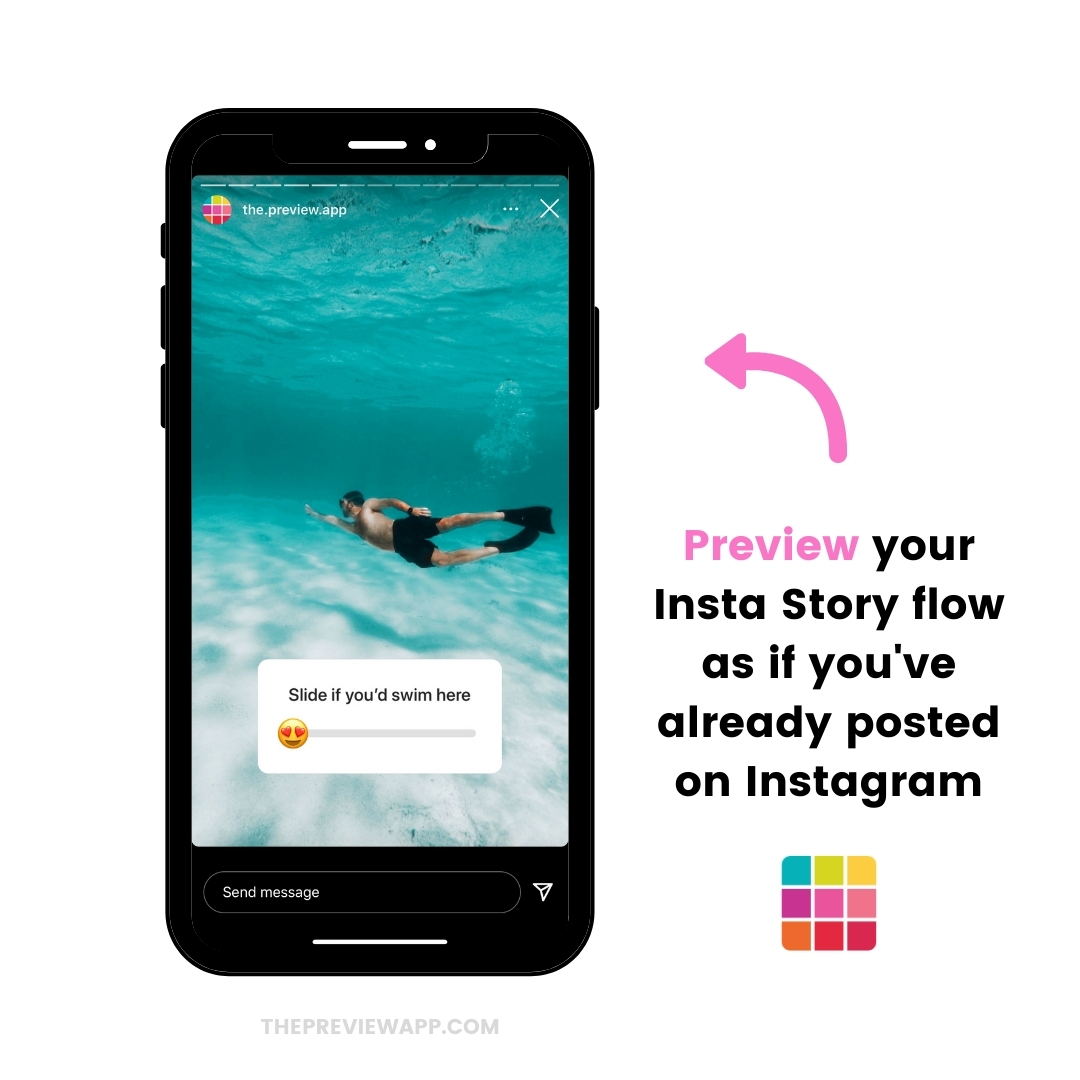
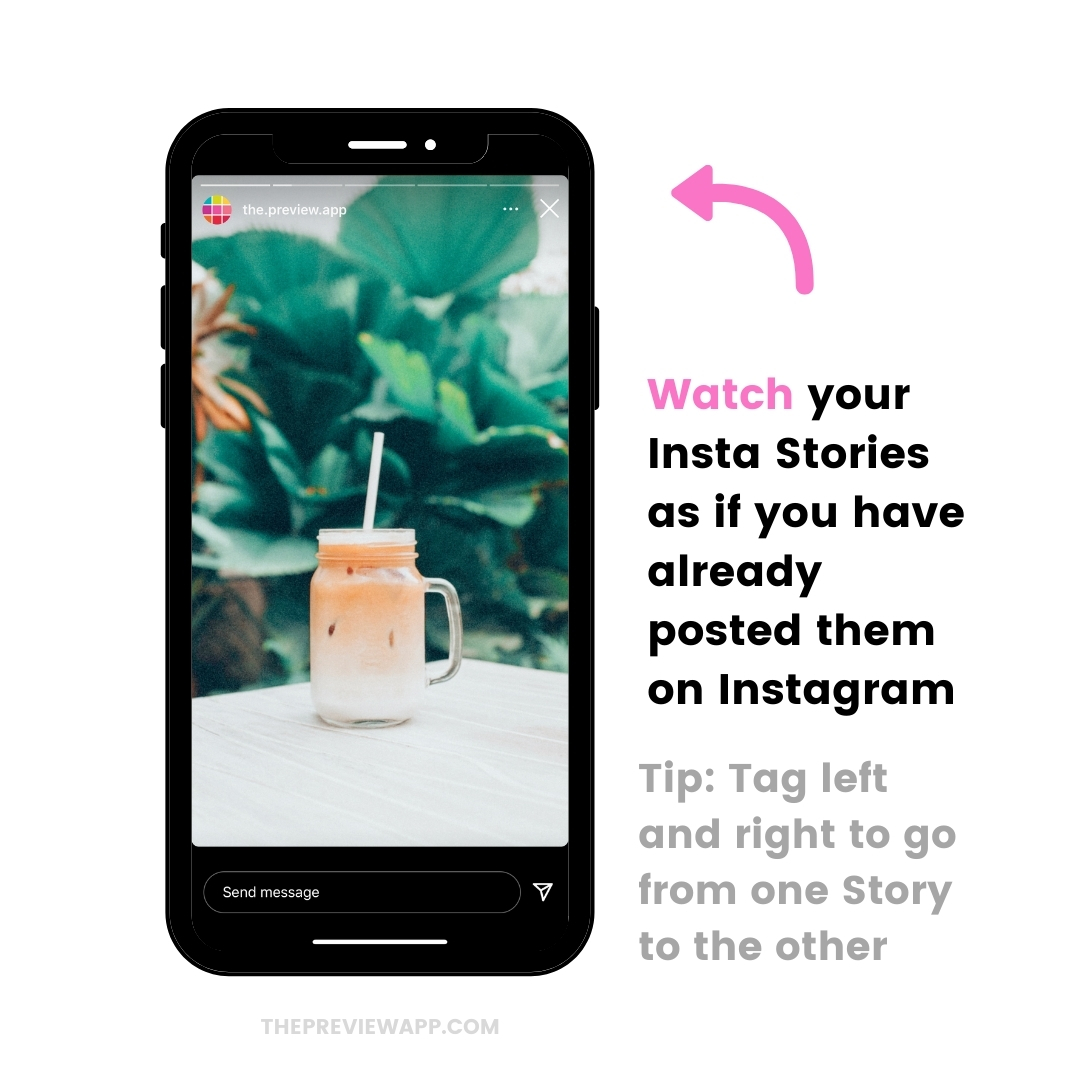
And you can literally “preview” the flow of your Instagram Stories before you post on Instagram.
Tap left and right to watch your Stories just like on Instagram:
You can edit your photos (so they match your feed too) and prepare your “Swipe up” link.
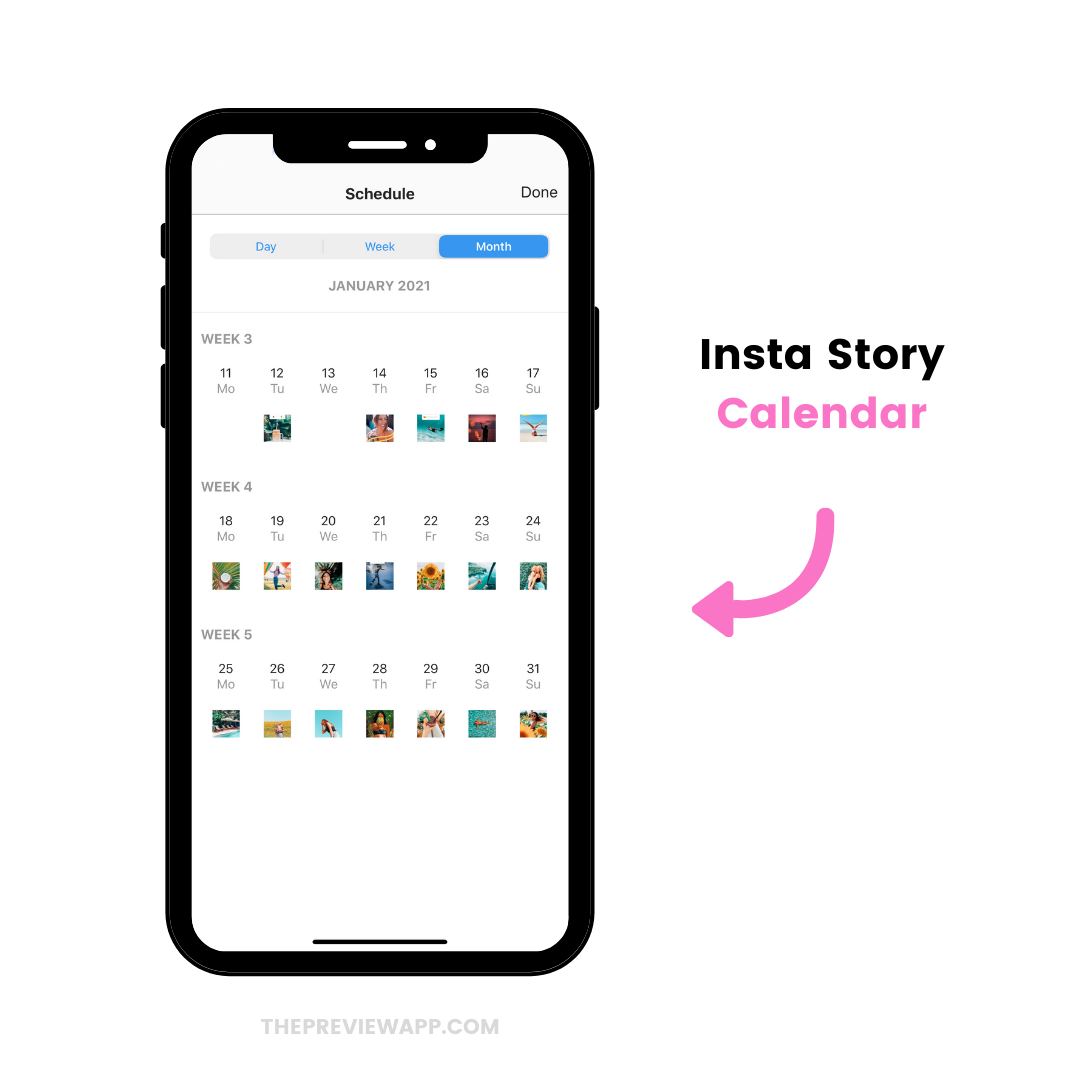
And you can also see your Instagram Stories in the calendar:
Ready?
Here’s how to schedule your Instagram Stories in Preview.
1. Upload your Instagram Stories in Preview
The first step is to upload your photos and videos in Preview.
To do upload them:
- Press on the “+” button
- Select “Library”
- Select your photos and video
Done.
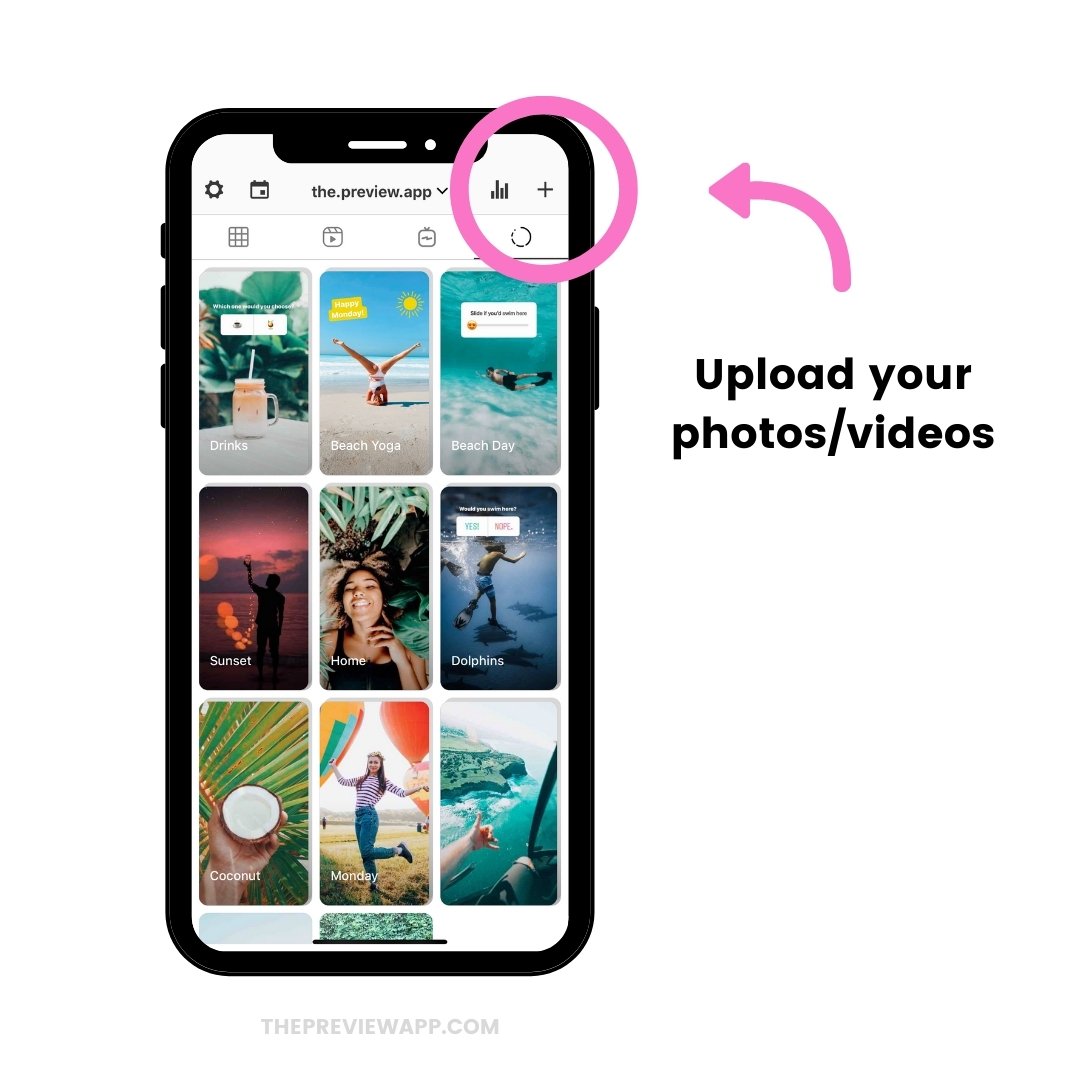
These photos and videos will be added in your “Story Group“.
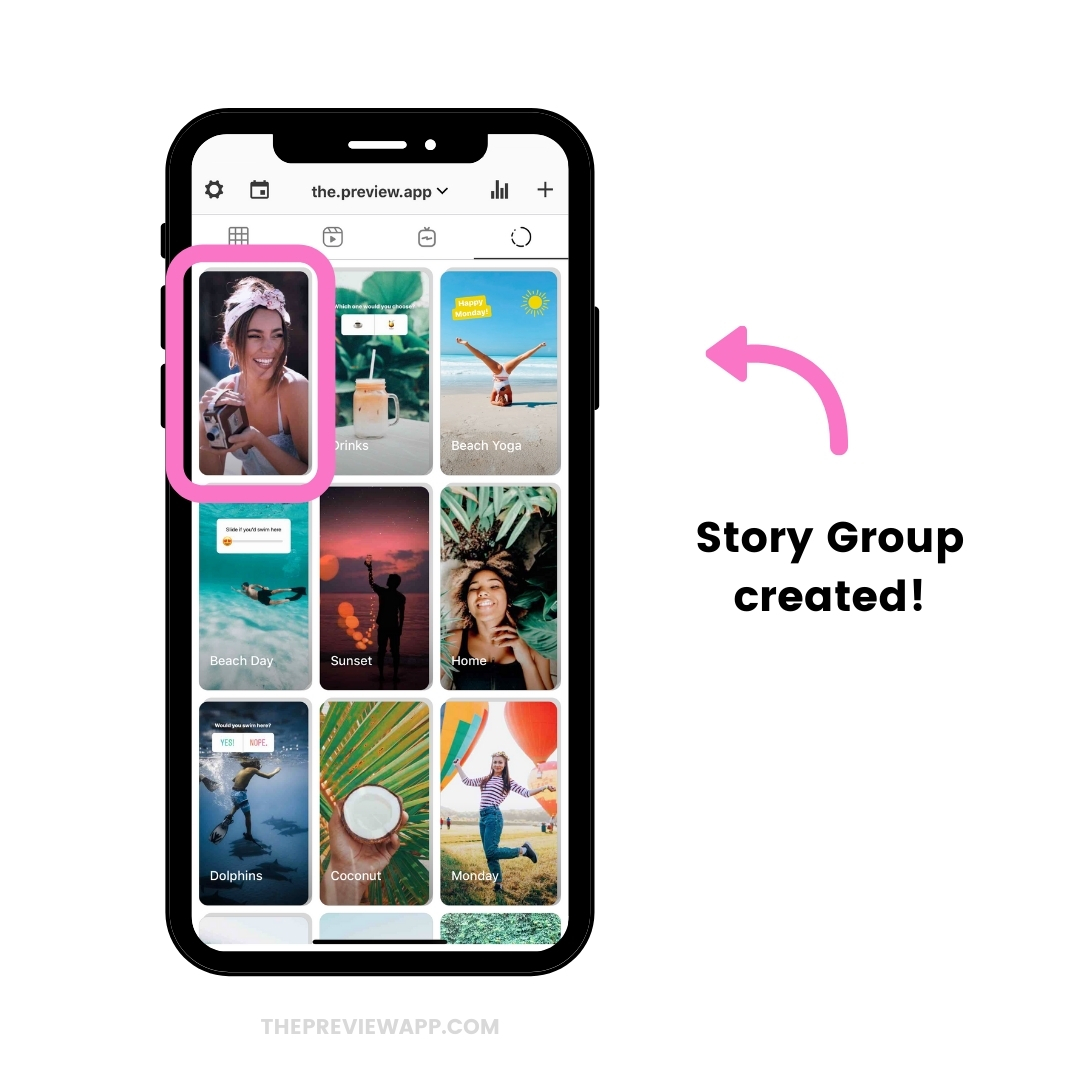
Think of your Story Group as an album or folder. Add in your Group the Instagram Stories you’d like to post at once. If you want to post them at different times, then press “+” again to create another group.
You can create a bunch of different Story Groups.
YOU choose how YOU want to organize your Stories.
For example, you can have groups for:
- Different Stories that you want to post at different times of the day
- Each day of the week
- Campaigns
- Launches
- Specific photos or videos
- Different products or services
- An event
- Throwbacks
- Accounts you want to feature
- Quotes you want to share
- Posts you want to repost
- Backgrounds you want to use to add text on top of it later
I’m sure you have some ideas in mind already.
As you can see there are other options available:
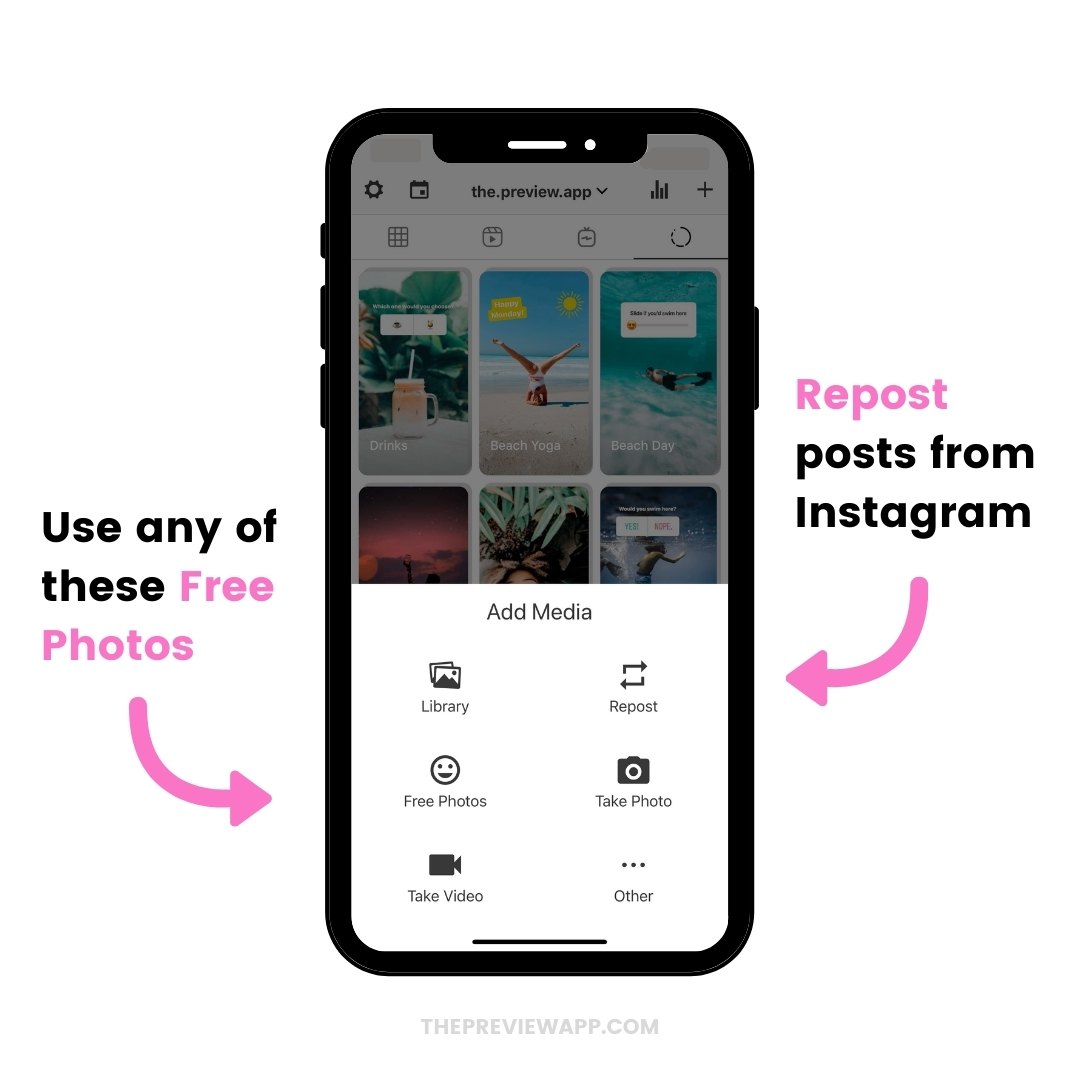
The other options:
- Repost: perfect if you want to repost other people’s posts in your Stories (if you want to share your customers’ photos for example)
- Free Photos: if you need beautiful photo backgrounds for your Instagram Stories
- Take Photo / Video: Record your video and add it in Preview straight away
Let me show you the other tools you can use.
2. Rearrange the order of your Instagram Story Groups
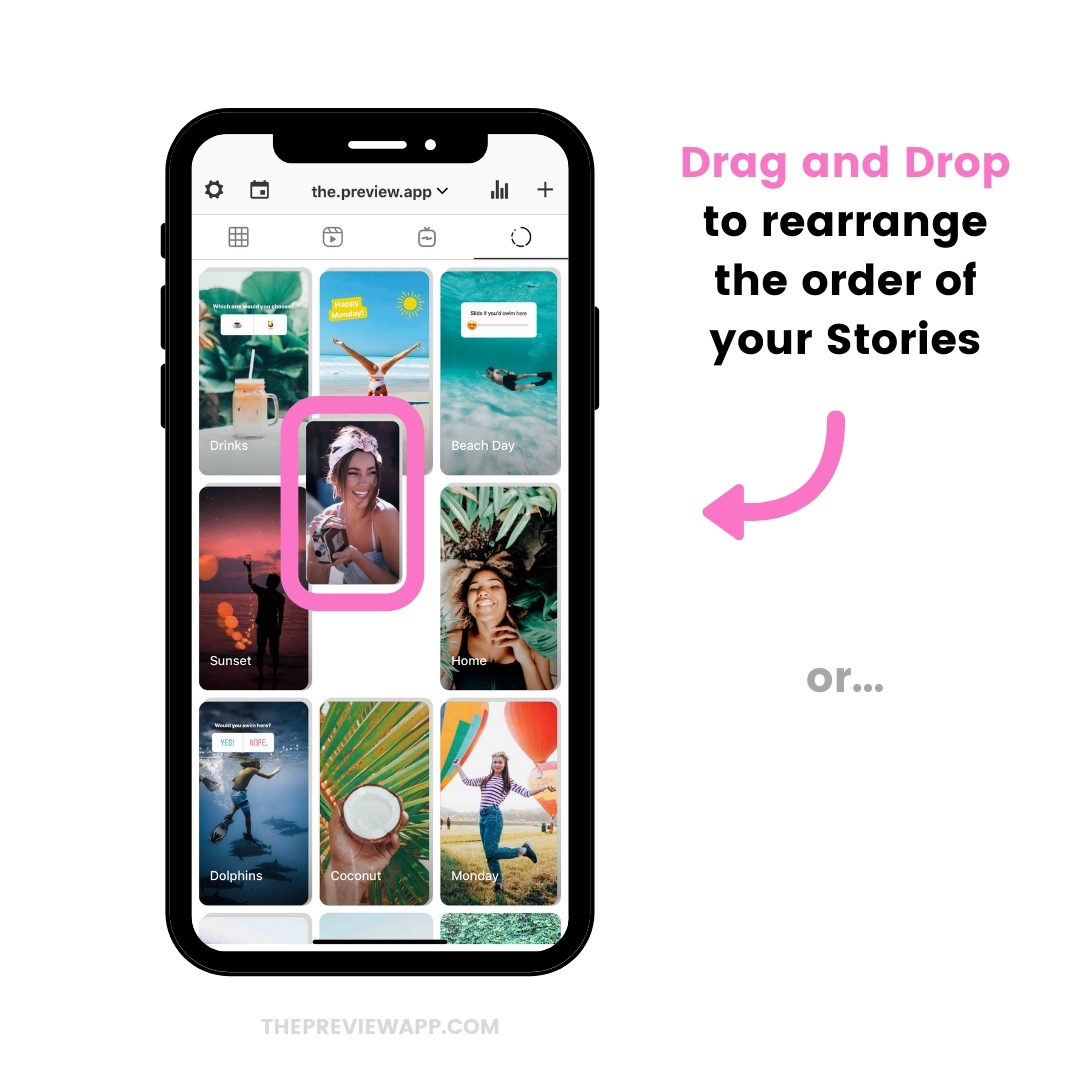
As always, you can rearrange the order of your posts.
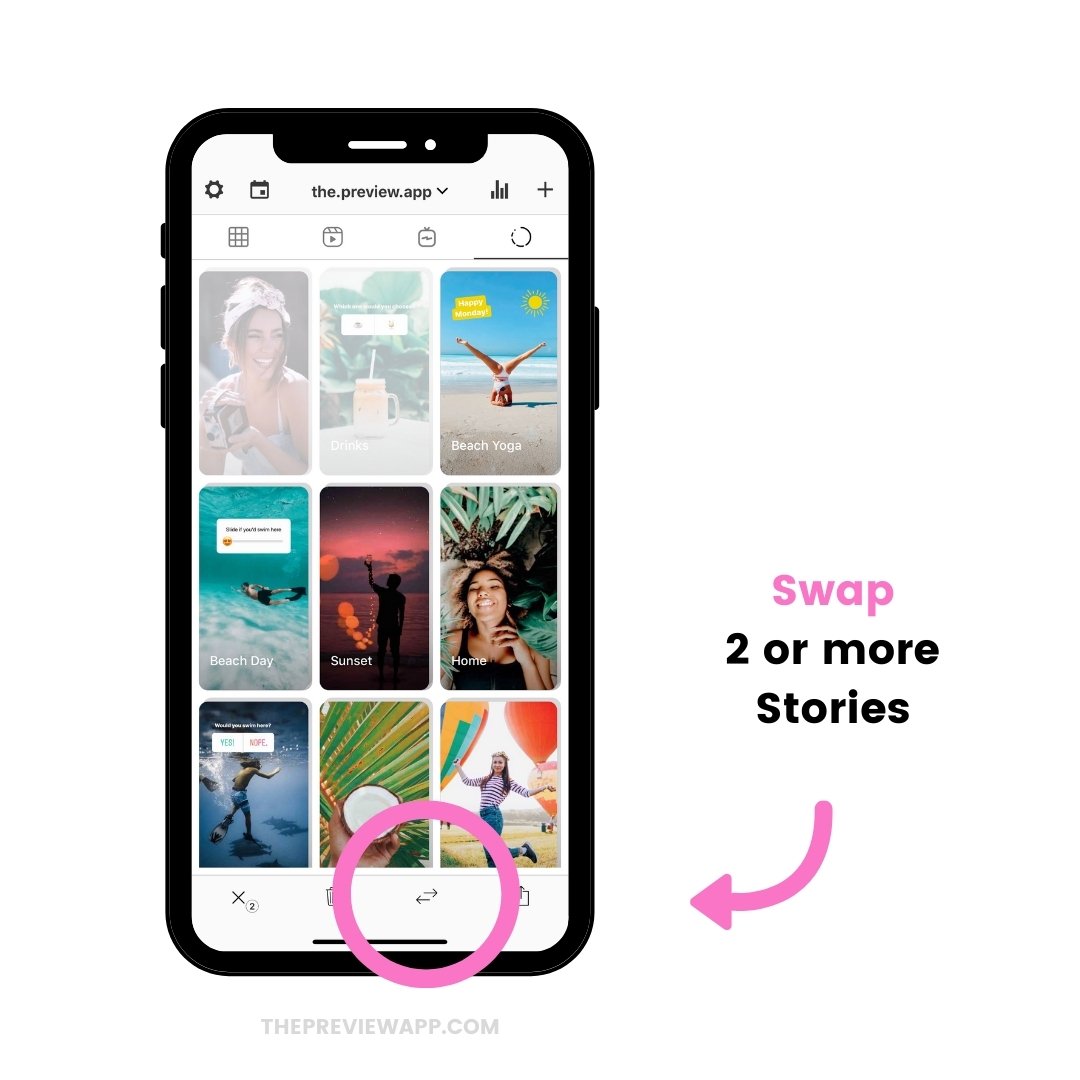
To rearrange:
- Drag and Drop: Hold your finger on one of the Stories and drag it somewhere else, or
- Swap: Select 2 or more Story Groups and press on the “arrows” button to swap them (this way you don’t have to move all your other Stories)
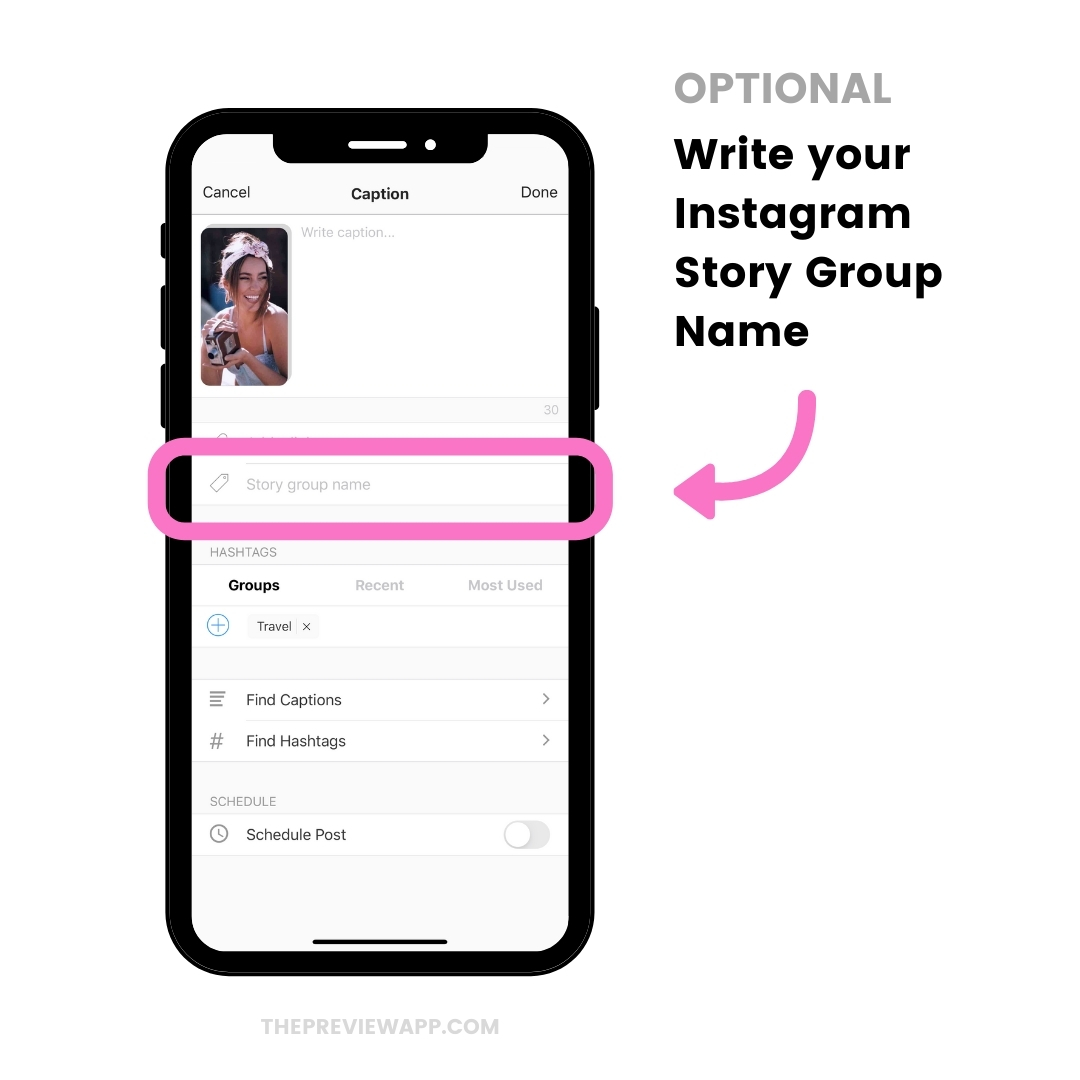
3. Give your Instagram Story Group a name
This is optional. But it’s one of my favorite features!
You can add a “title” or “name” for your Instagram Story Group.
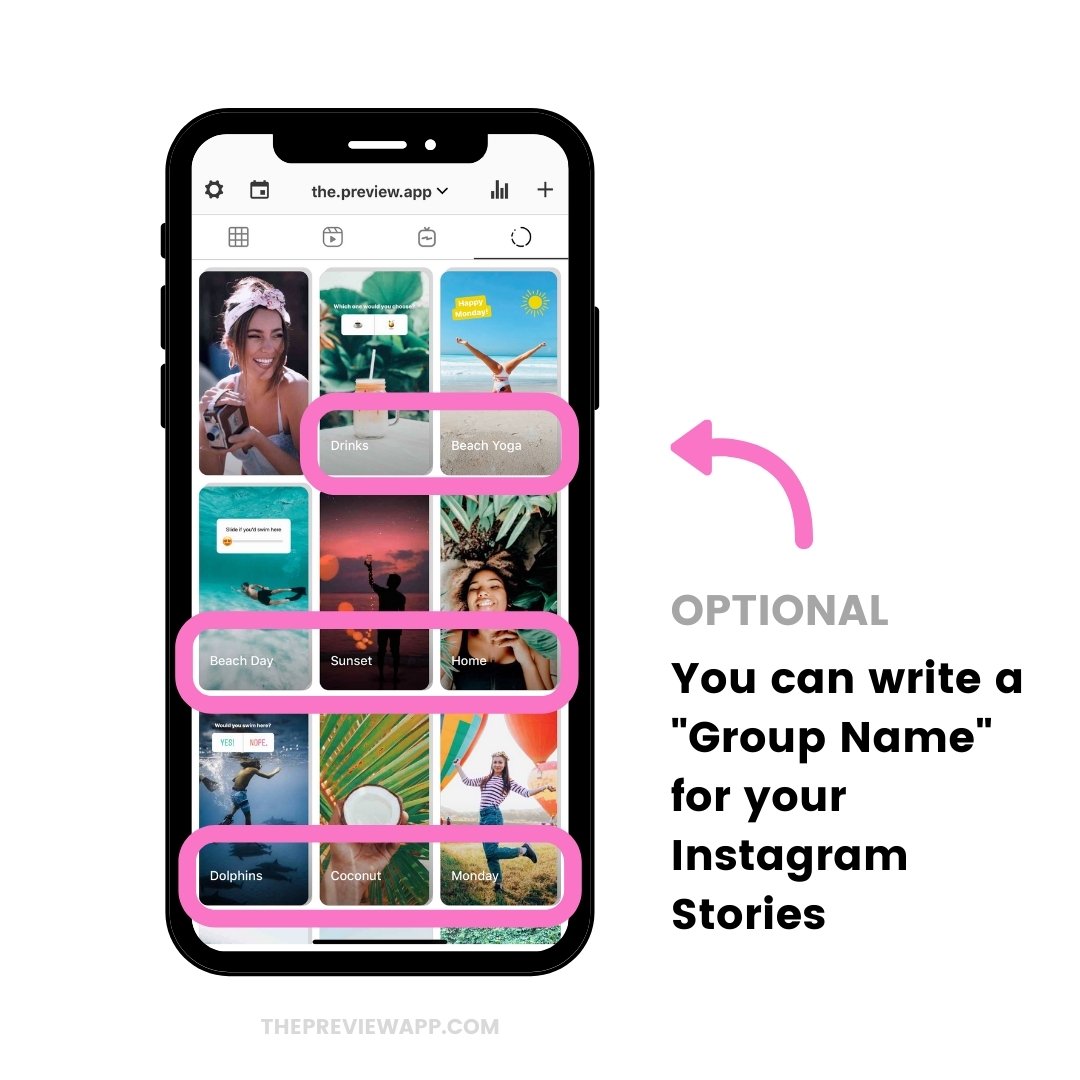
This is perfect if you want to make a note for yourself and know what this Instagram Story Group is for.
To add a Name:
- Press on the Story Group
- Press on the “Speech Bubble” button
- Write your “Story group name”
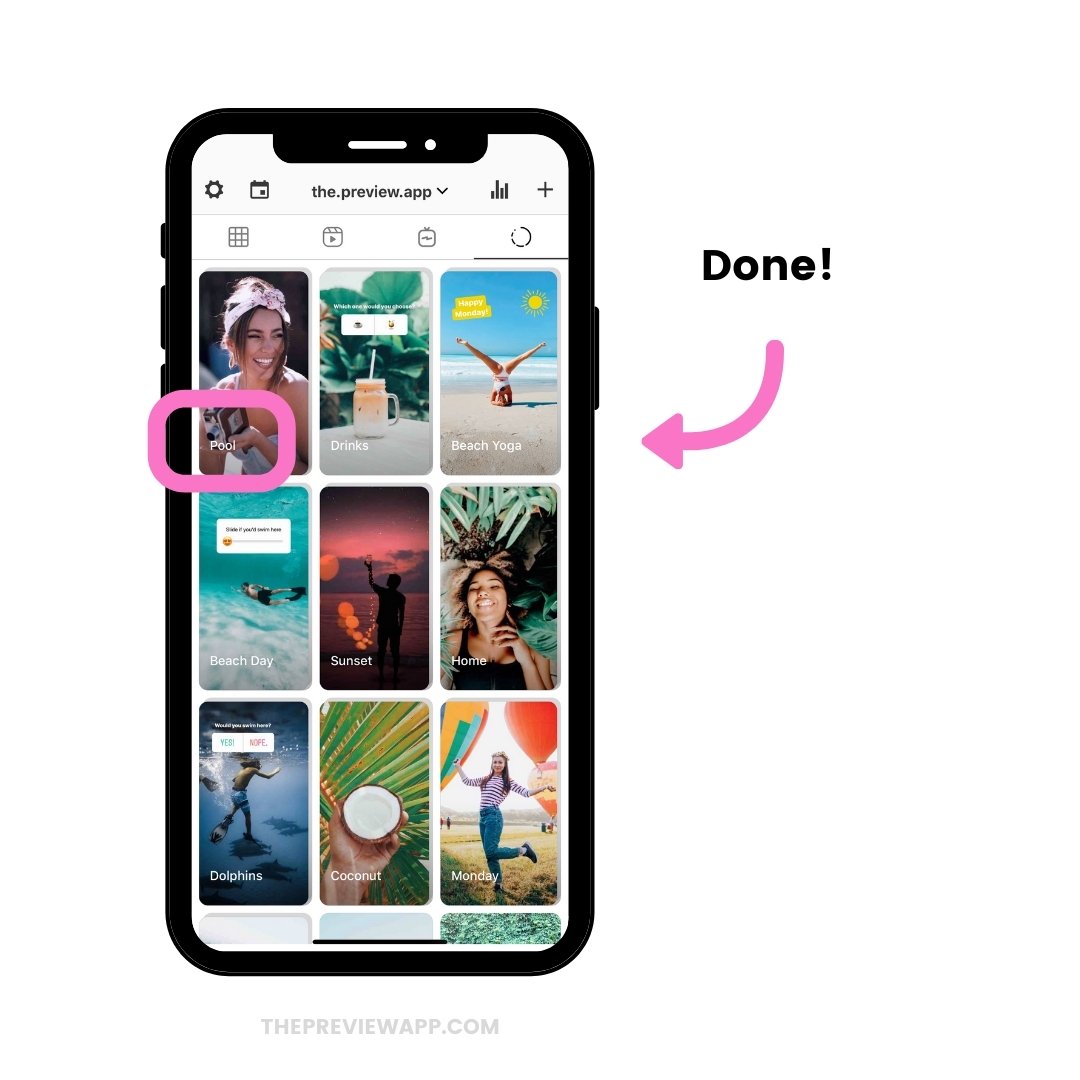
Done. The name will show in your main Insta Story feed.
4. Add a “Swipe Up” link
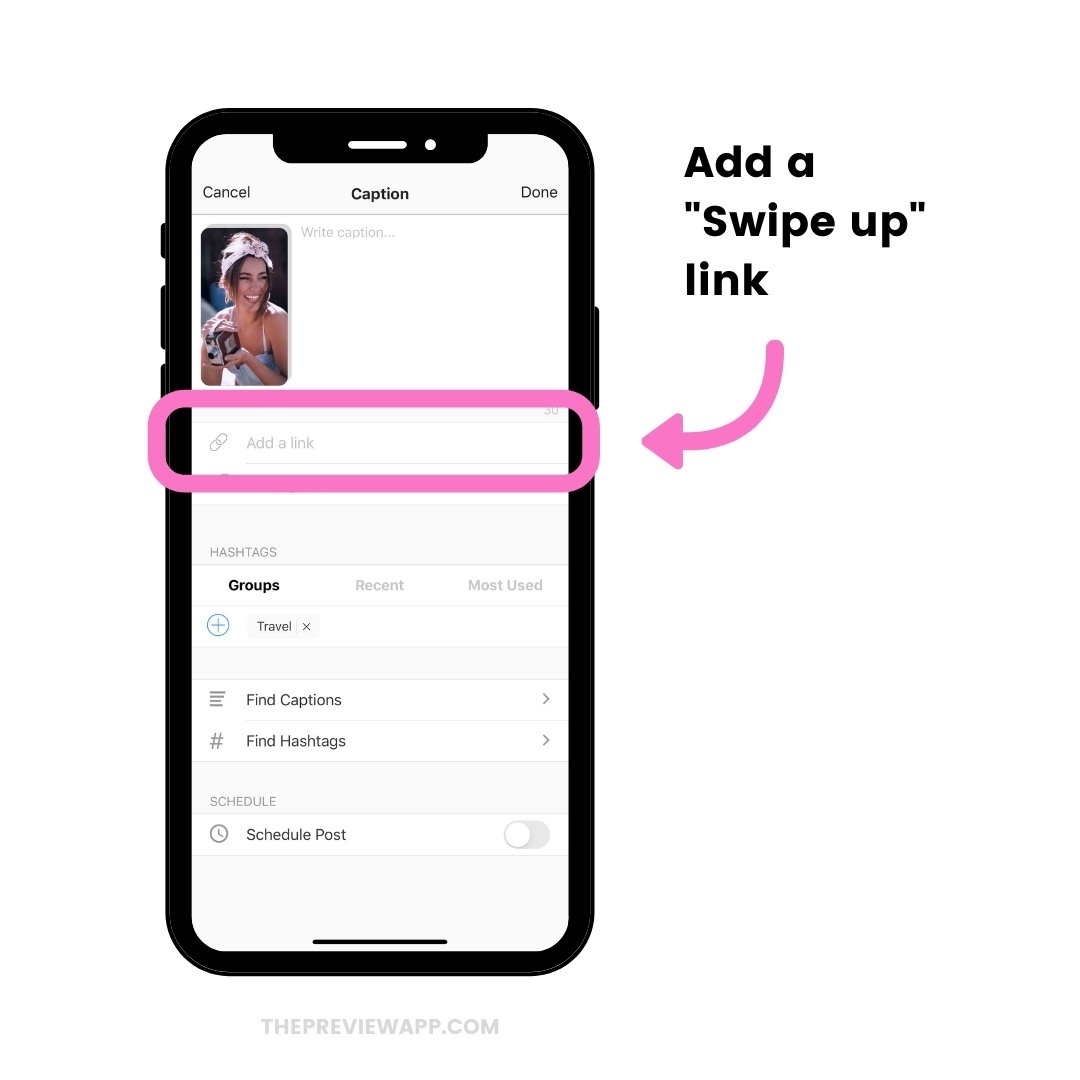
As you can see, you can also add a link.
This is for your “Swipe Up” link. So if you want to share a blog post, YouTube video or link to your website or shop, you can prepare your swipe up link here.
If you prefer to add different links for different Stories within your Group, you can do this too. I’ll show you how below.
Tip: If you don’t have the swipe up feature yet, check this blog post to see how you can get it.
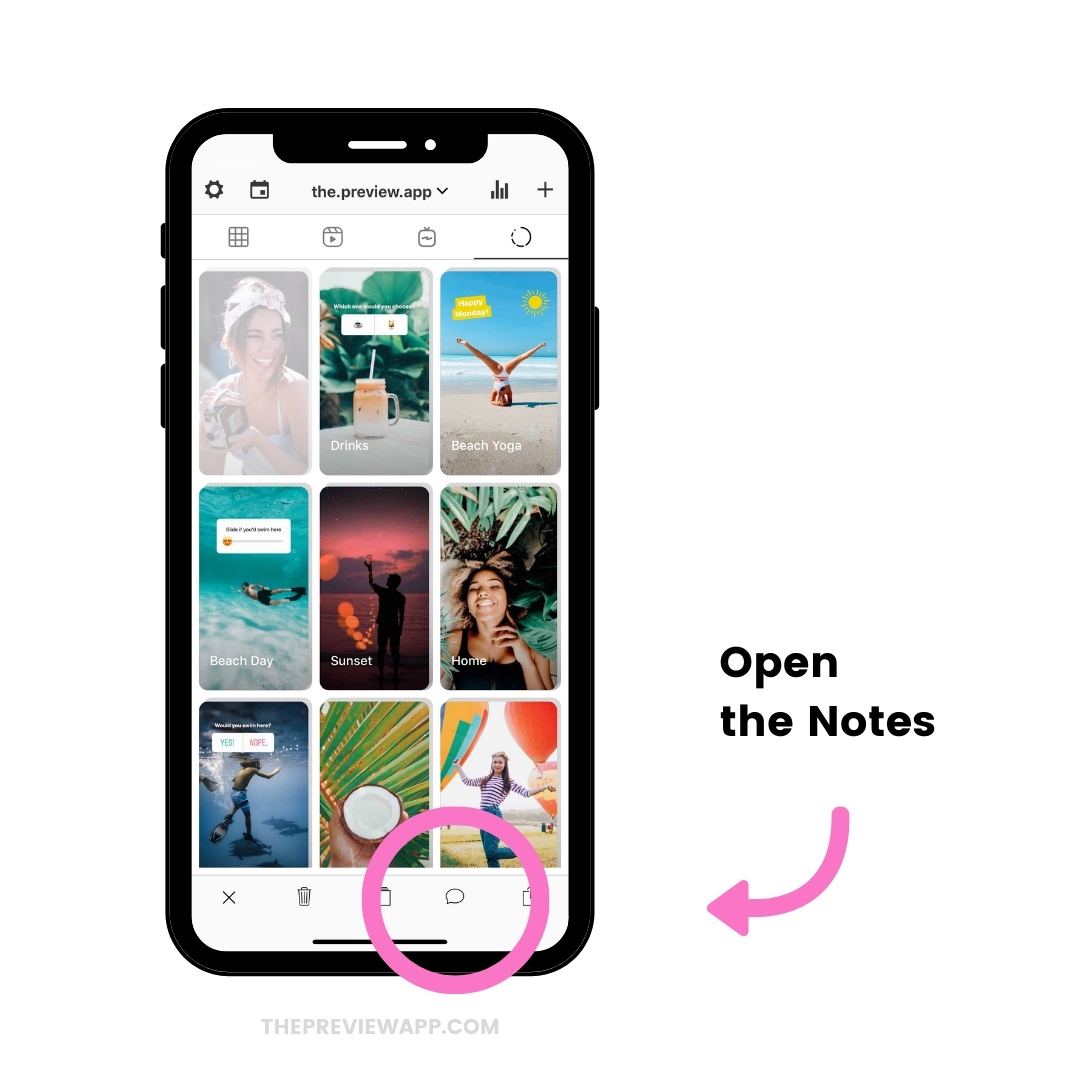
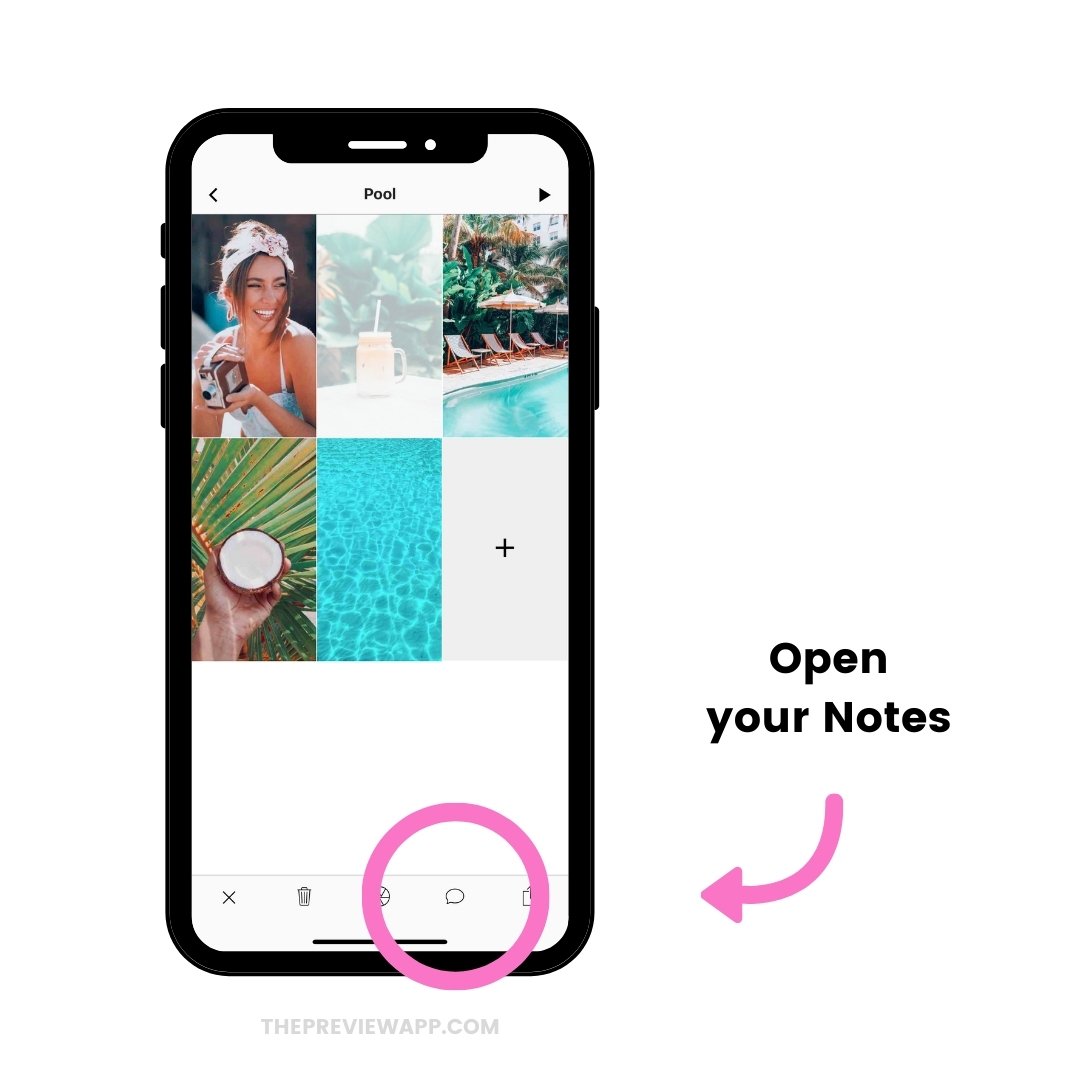
5. Add Notes
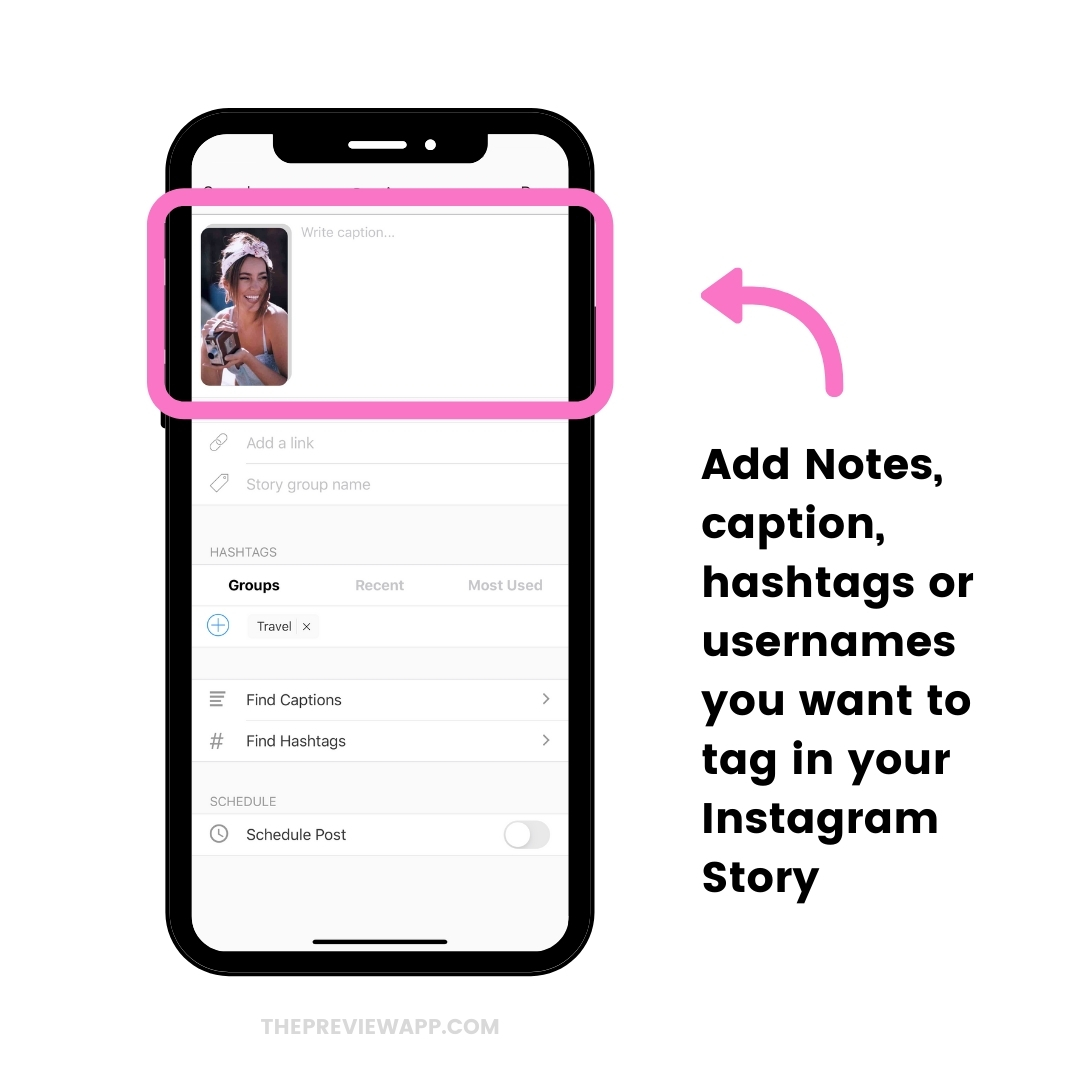
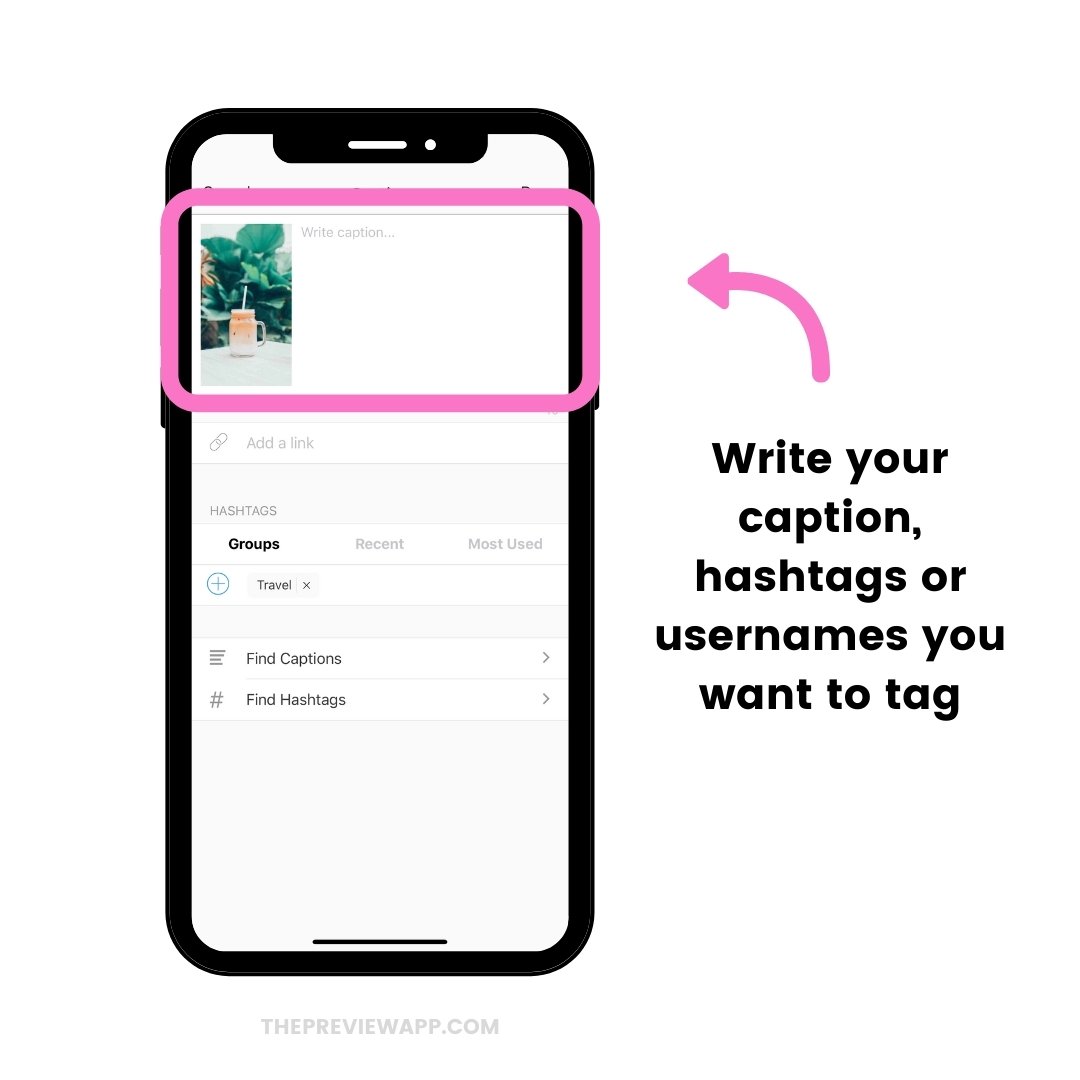
You can also write down any other notes you might have in the “caption” section.
For example, you might want to add hashtags or prepare the usernames of the people you want to tag once you are on Instagram.
It could also be Notes you’d like to write for your team members (if you’re using Preview with your team).
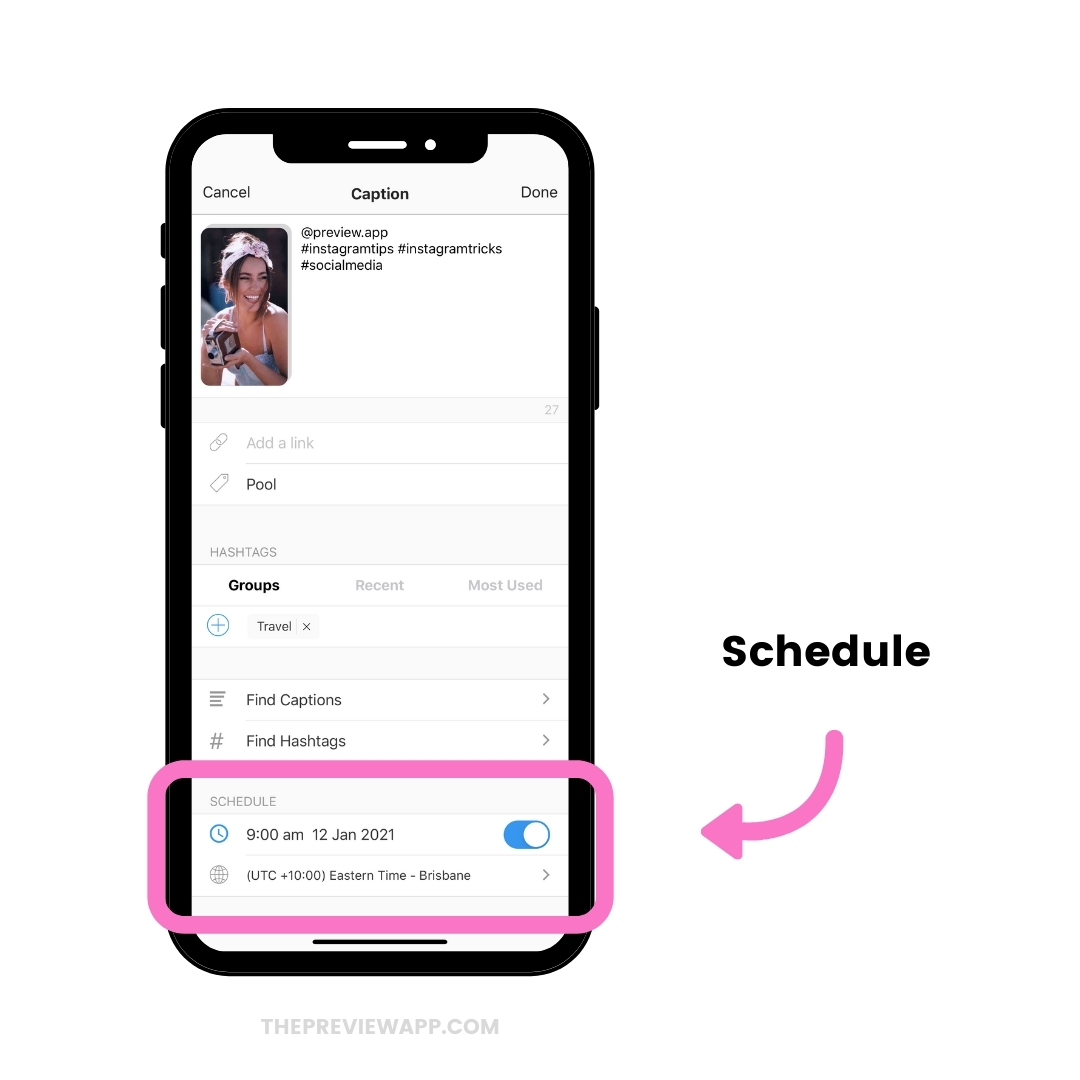
6. Schedule your Instagram Stories
How to schedule Instagram Stories?
To schedule your Instagram Stories:
- Turn on the “Schedule post” option
- Choose a day and time when you want to post your Story
Done.
7. Add more Instagram Stories in your Group
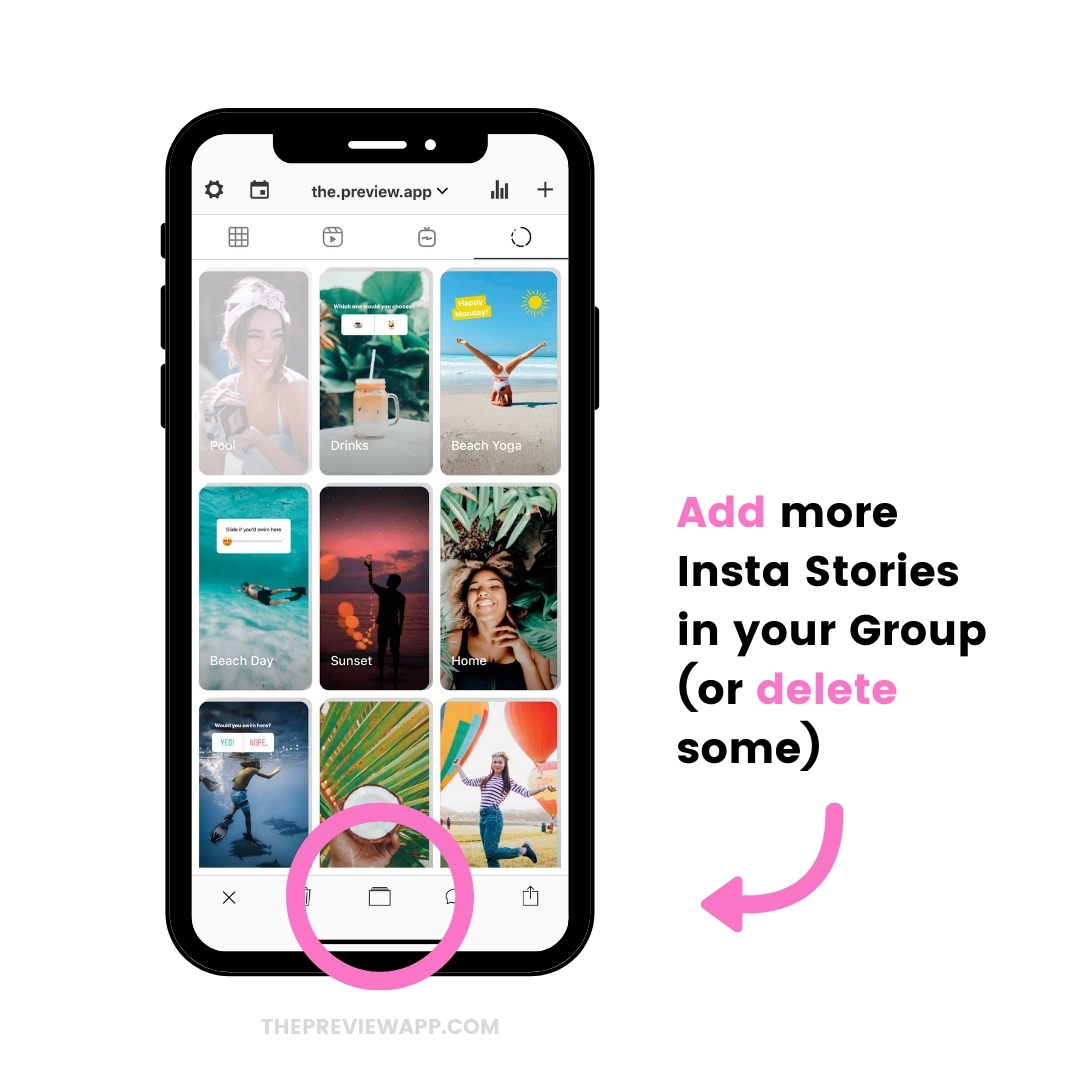
Want to add more Stories inside your group? Or delete some Stories from that group?
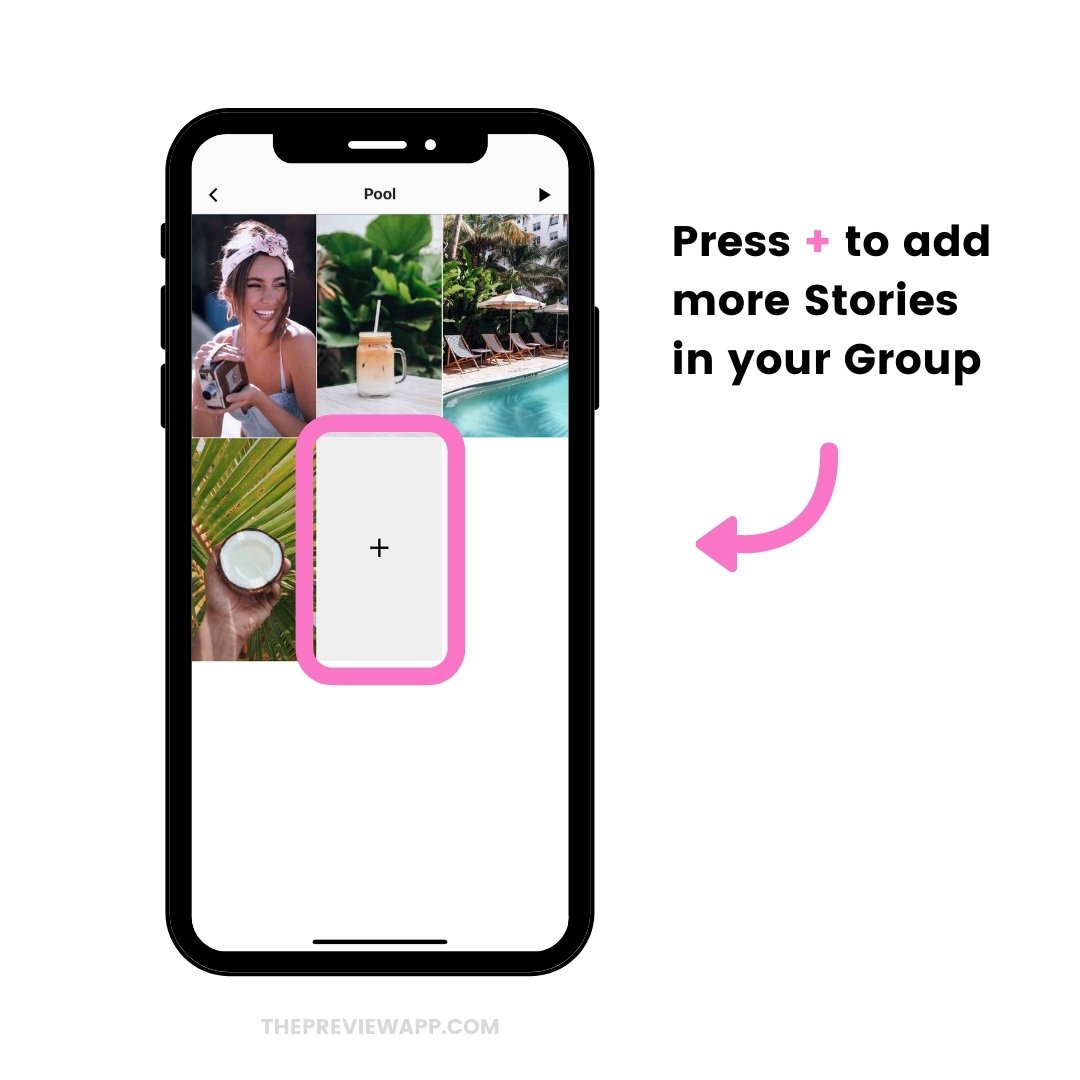
To add more Stories in your Group:
- Press on your Insta Story Group
- Press on the “group” button
- Press on the “+” button to add more photos or videos
Done!
8. Rearrange the order of the Instagram Stories in the Group
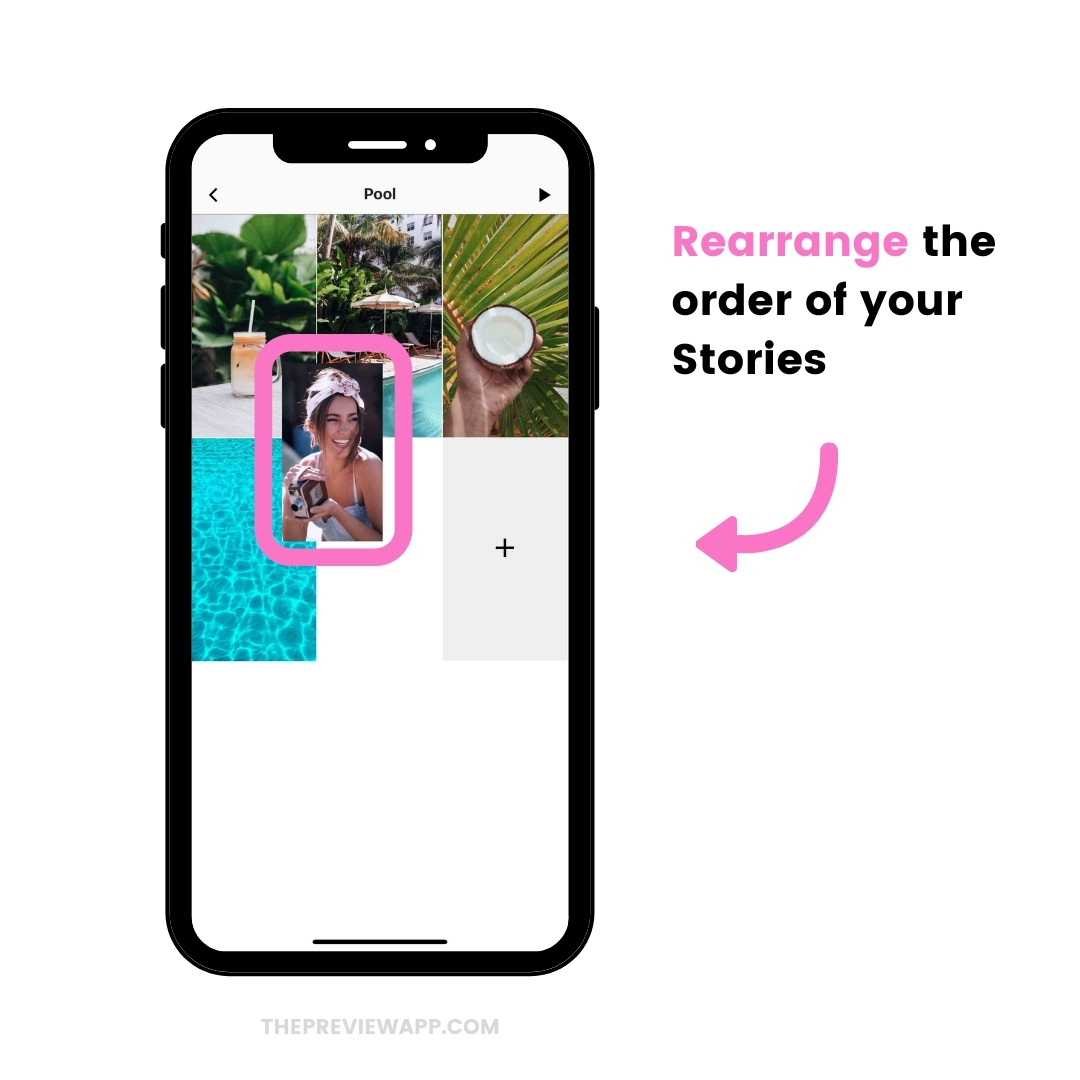
You can rearrange the order of your Stories.
Just like before, you can Drag and Drop, or swap them.
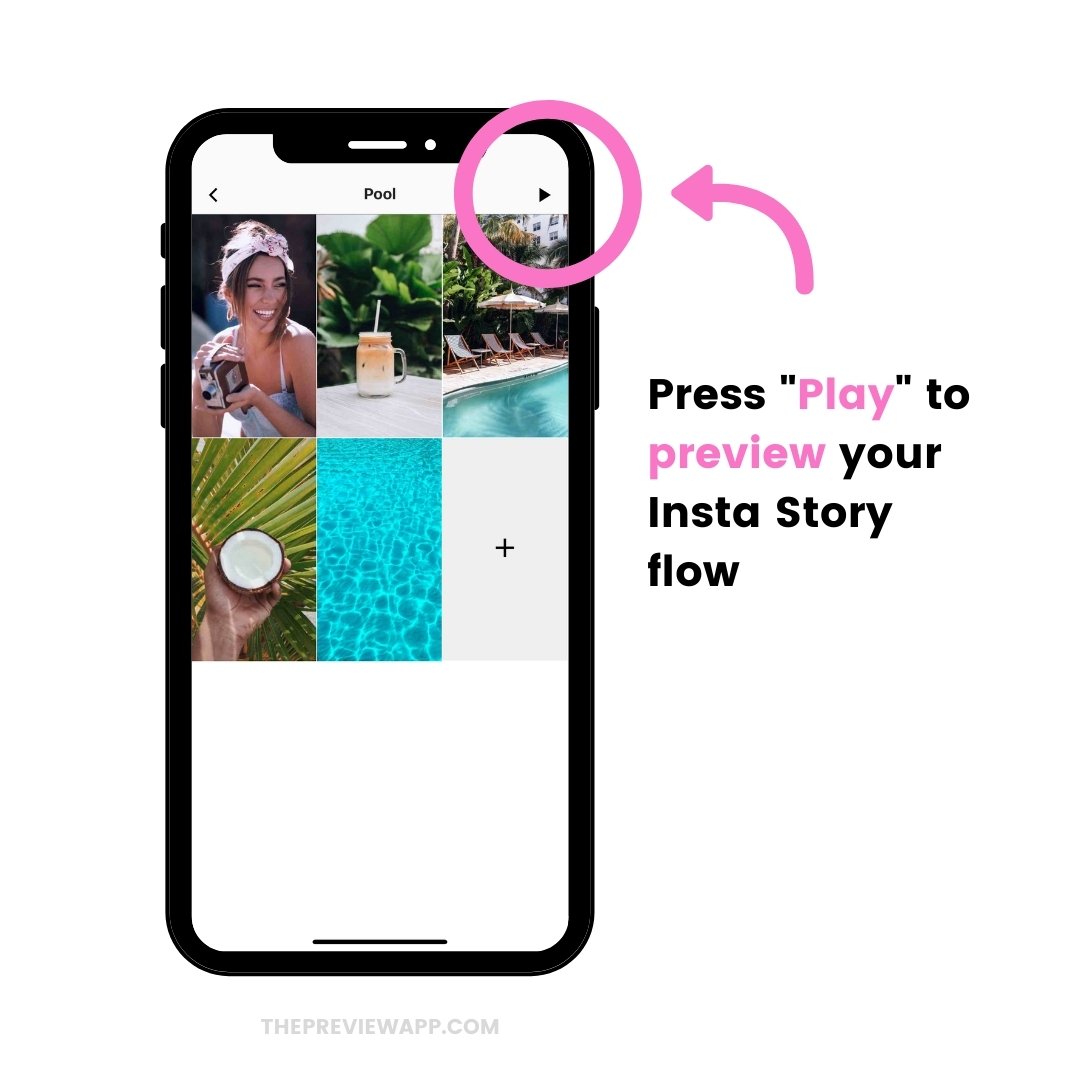
9. Preview your Instagram Stories flow
Want to see how your Insta Stories look like together, as if you already posted them on Instagram?
Press on the “Play” button on the top right corner of your screen.
10. Edit your Insta Story photos
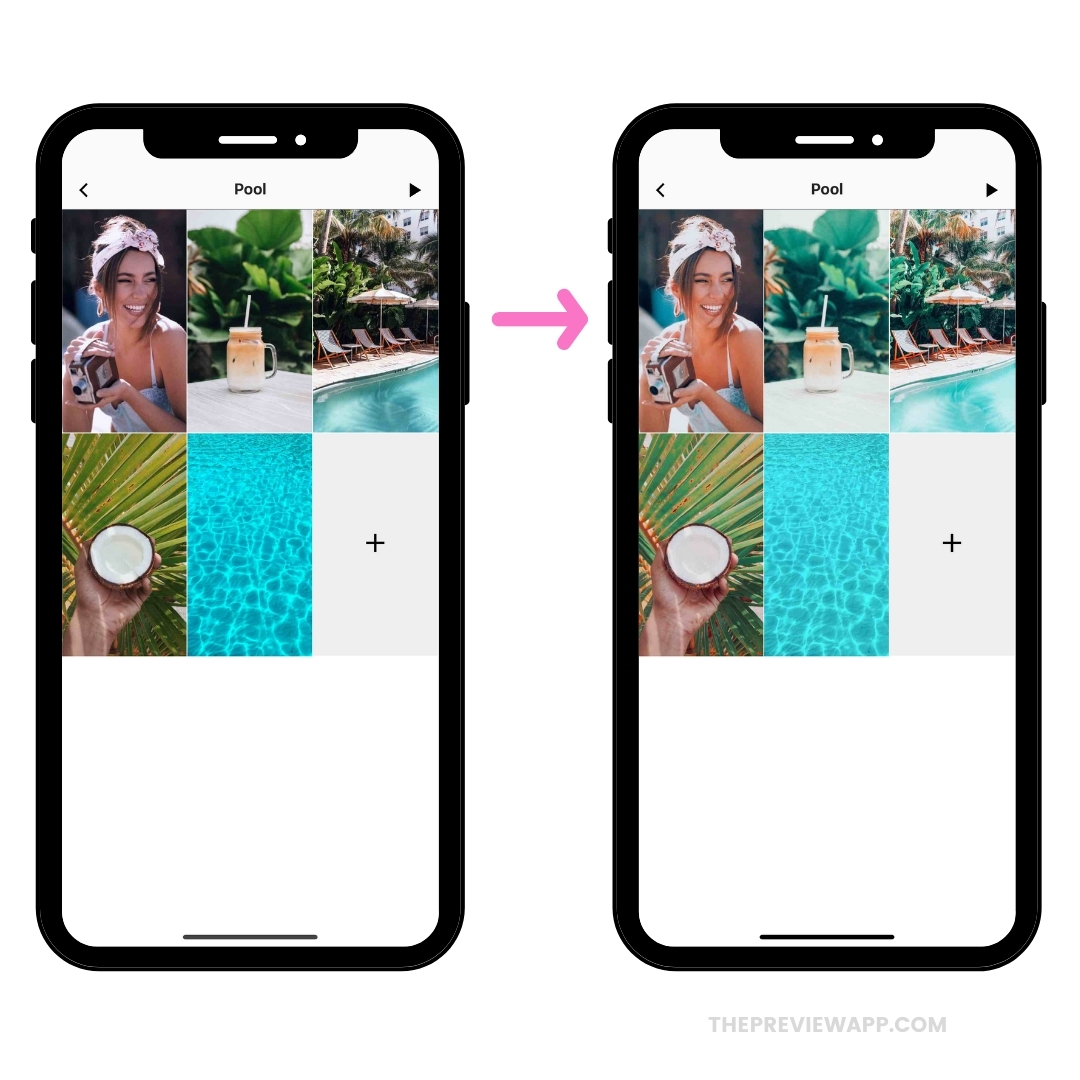
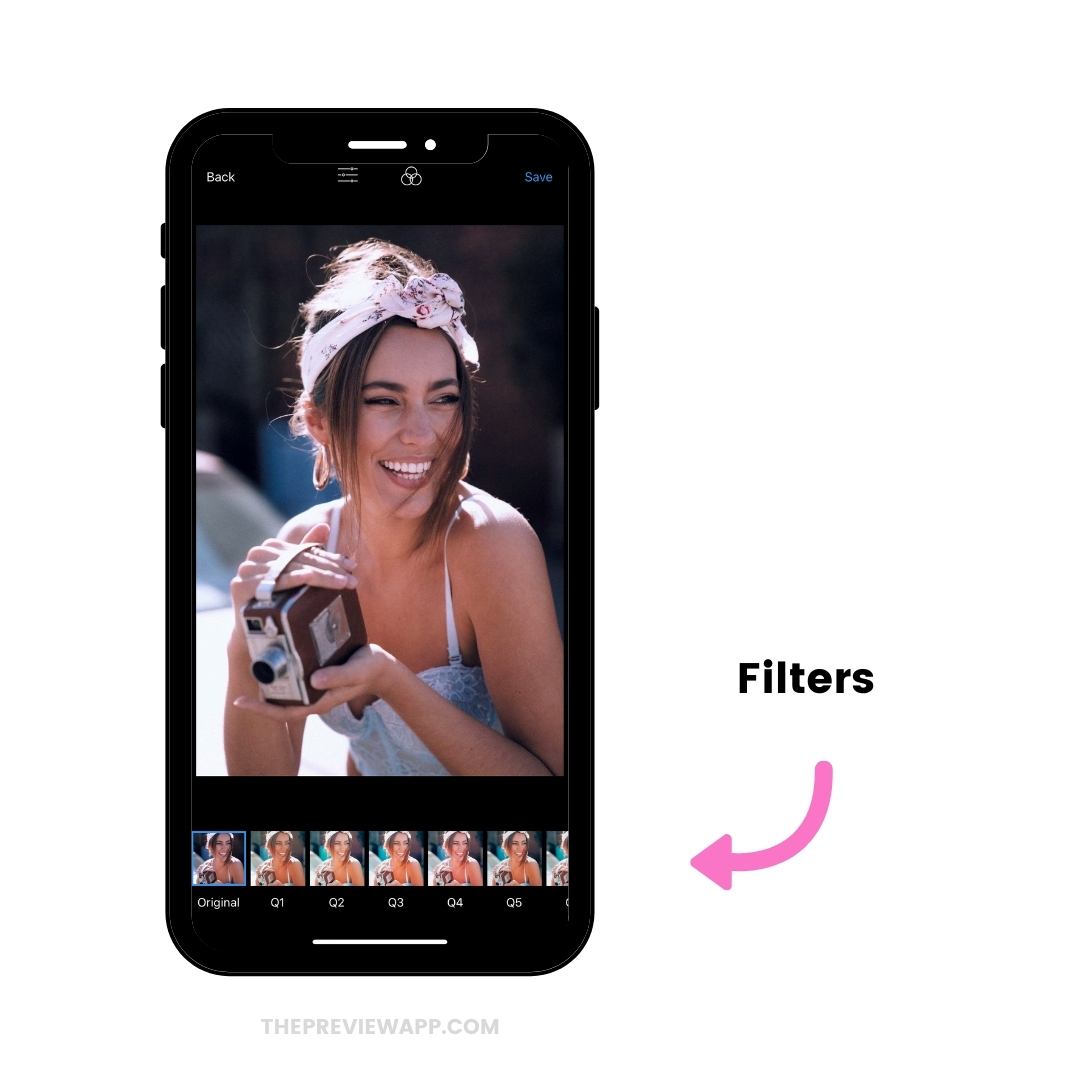
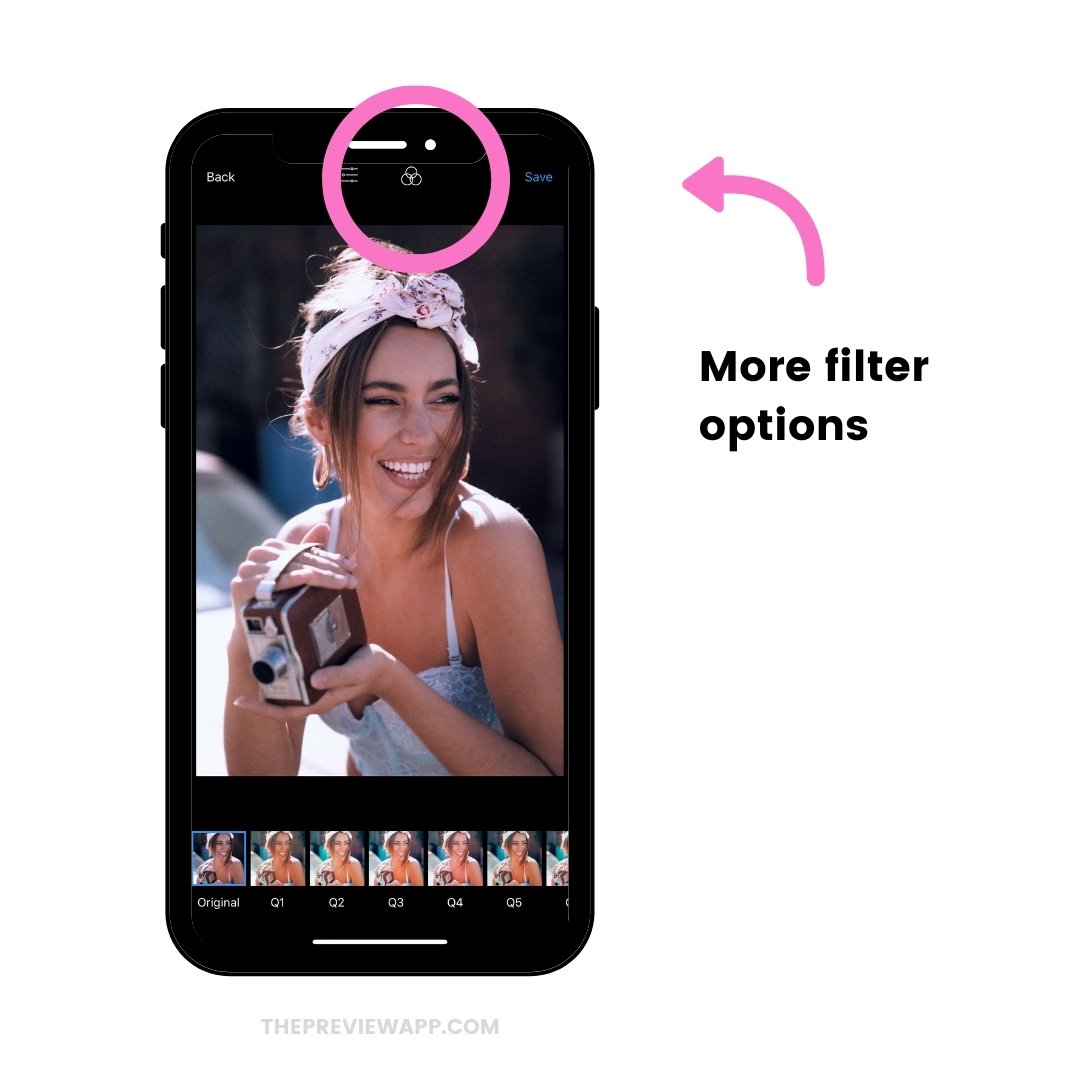
You can also edit your photos. This is perfect if you are already using a Preview filter and want your Stories to have the same vibes as your Instagram feed. #cohesive
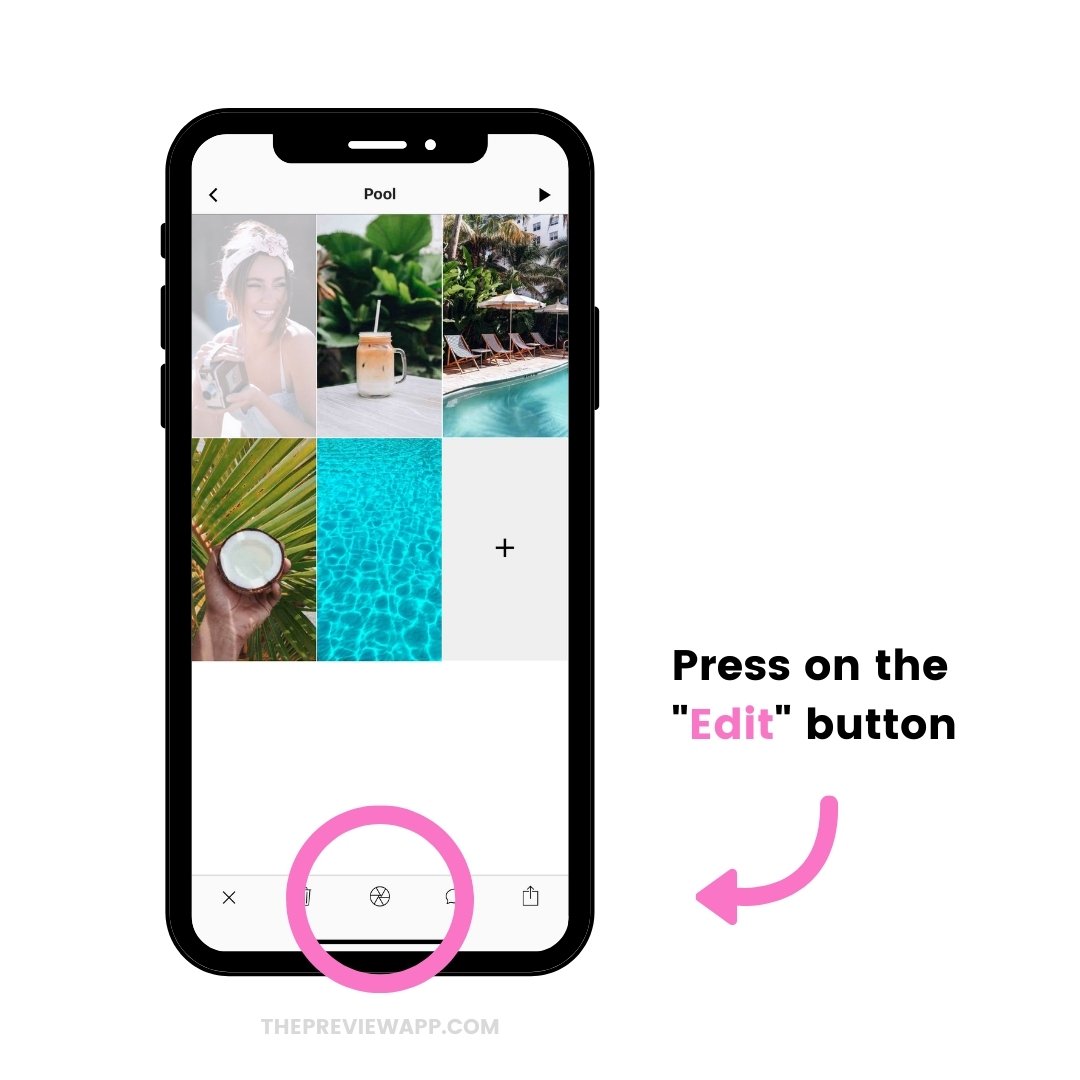
To edit your photos:
- Press on a Story
- Press on the “Edit” button
- Choose a filter at the bottom of your screen, or
- Press on “Filter Pack” button on the top right corner of your screen (here you can choose a different filter pack)
11. Add a link for your specific Story
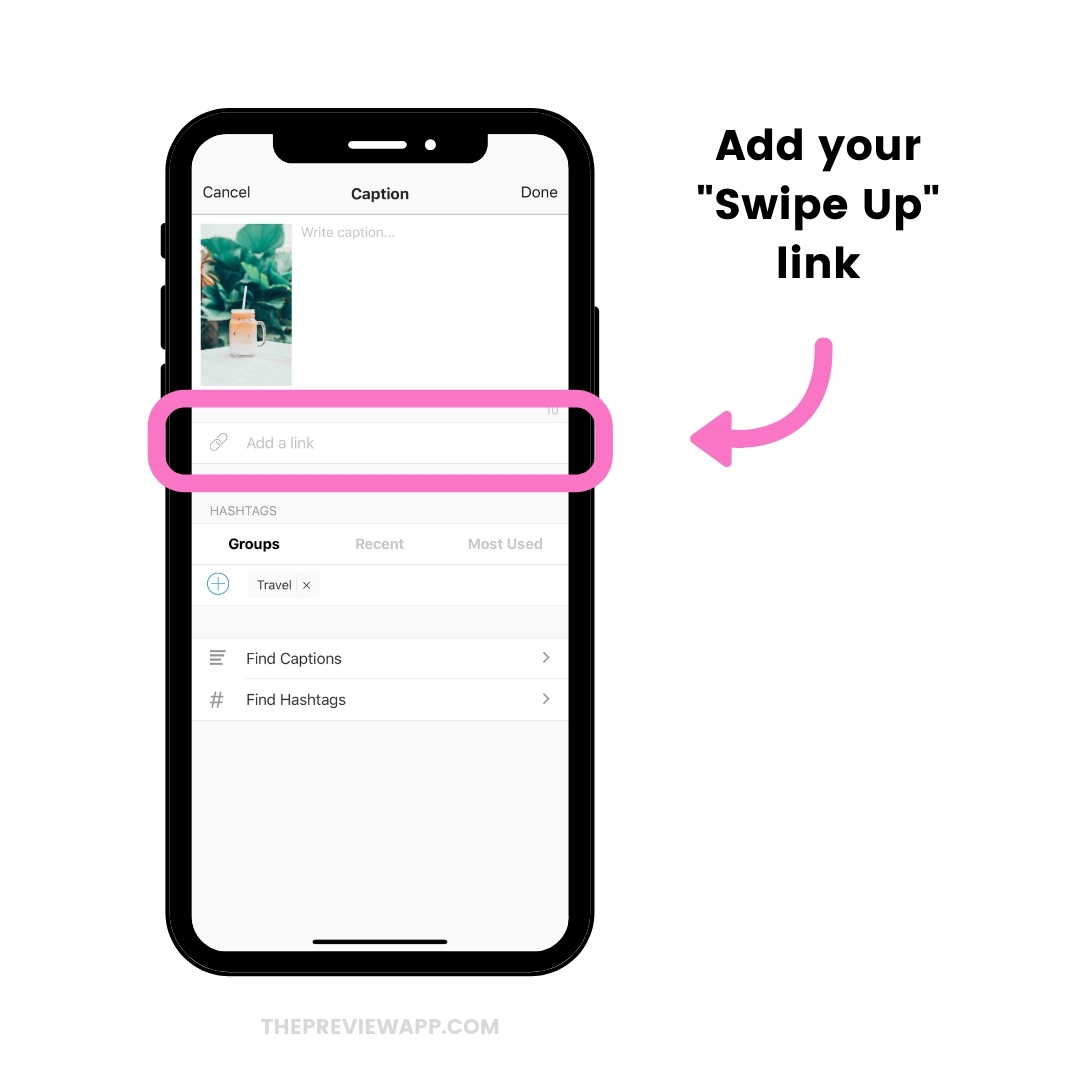
If you want to share different links for different Insta Stories, you can.
Here is how:
- Press on an individual Instagram Story
- Press on the “Caption” button
- Add your link
Done!
12. Write your caption
If you want to prepare what you want to write on Instagram once you post in your Stories, you can too.
Preview will automatically copy the caption and hashtags for you.
11. Post your Instagram Stories on your account
“Can you auto post Instagram Stories?”
Not at the moment.
Instagram doesn’t allow any other apps or websites to automatically publish Stories to your account. It is against their Rules and Policies. Preview has been approved by Instagram and follows their Rules to keep your account safe. So I’m going to show you how to post your Instagram Stories, the Instagram-approved way.
Preview will send you a notification when it’s time to post.
There are 2 ways you can post your Instagram Stories from Preview to Instagram:
- Post one Story at the time, or
- Post the entire Story Group
Let’s have a look at option 1 first.
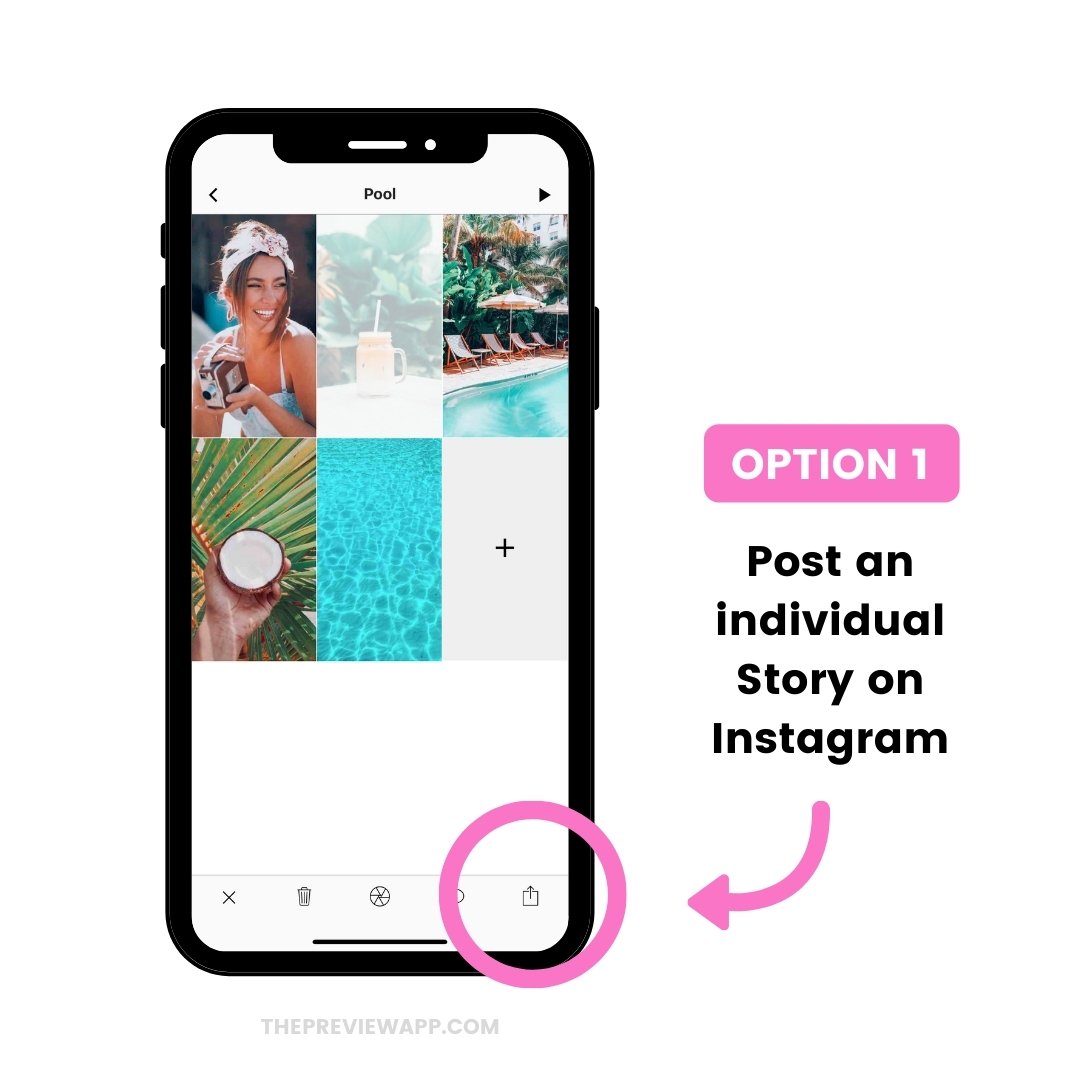
To post one Story at a time:
- Open your Story Group
- Press on one Story
- Press on the “Share” button
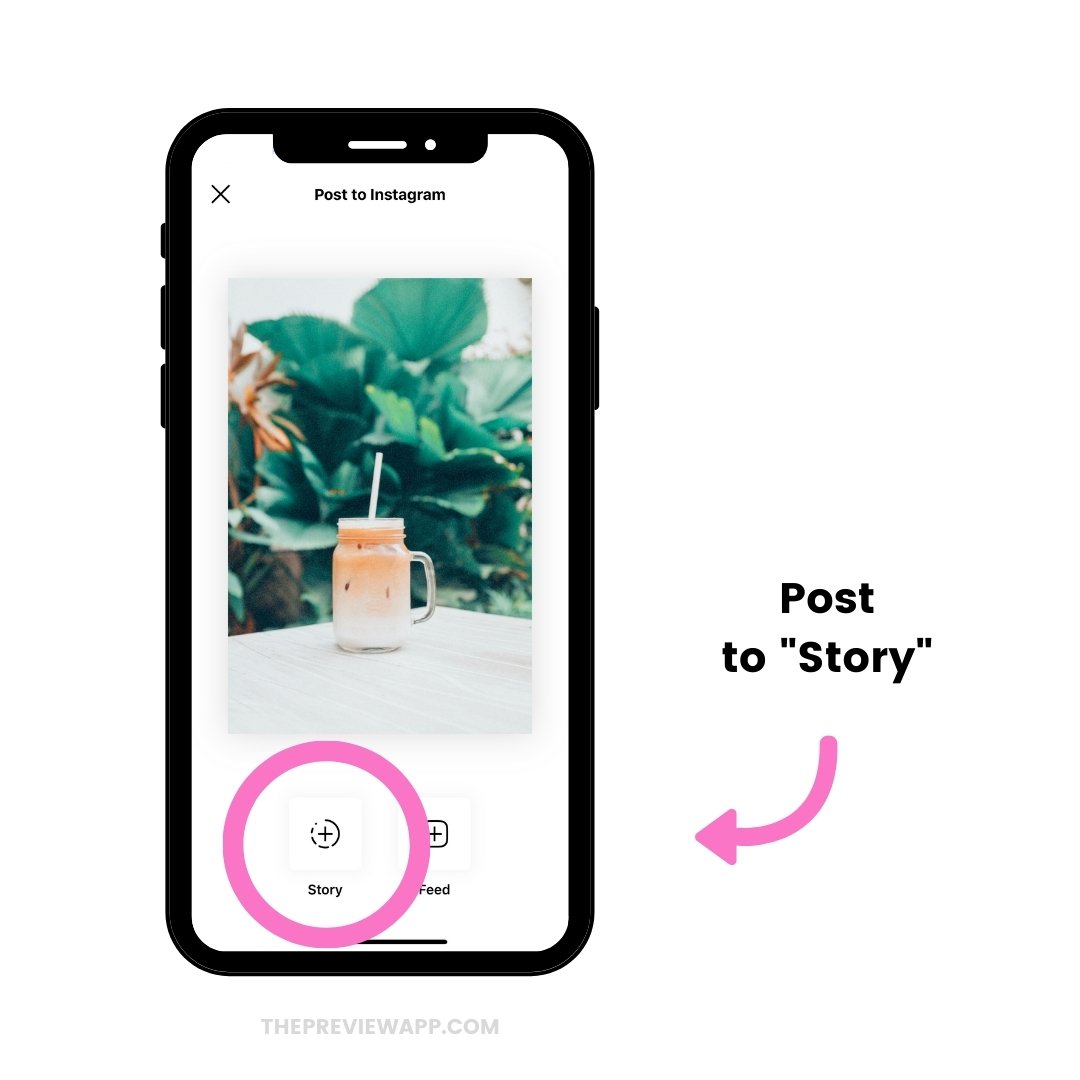
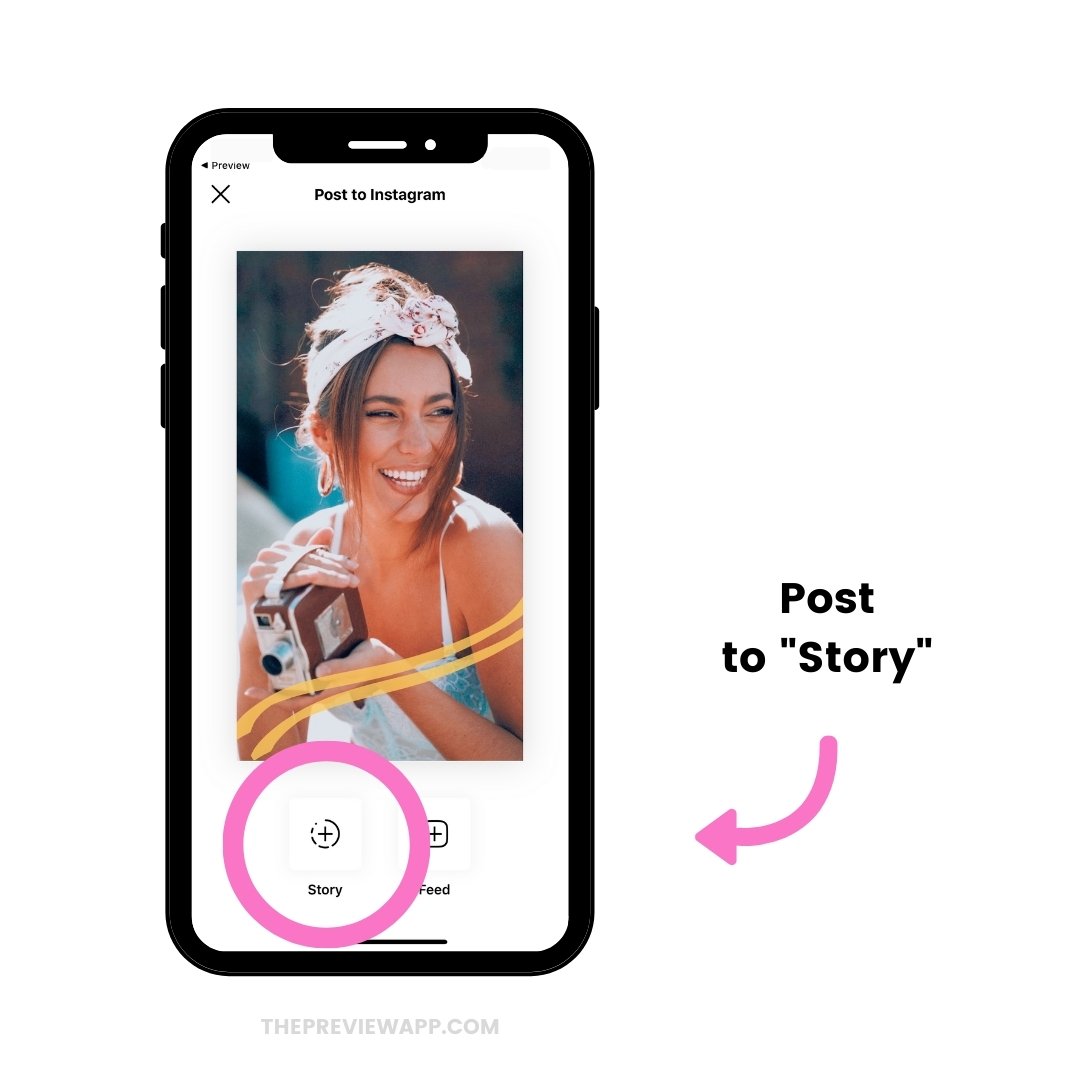
- Instagram will open up
- Press “Story”
- Paste your caption or swipe up link (if you had prepared some – Preview automatically copied it for you)
Here is how it looks like in images:
And now let’s look at option 2:
Posting your entire Story Group.
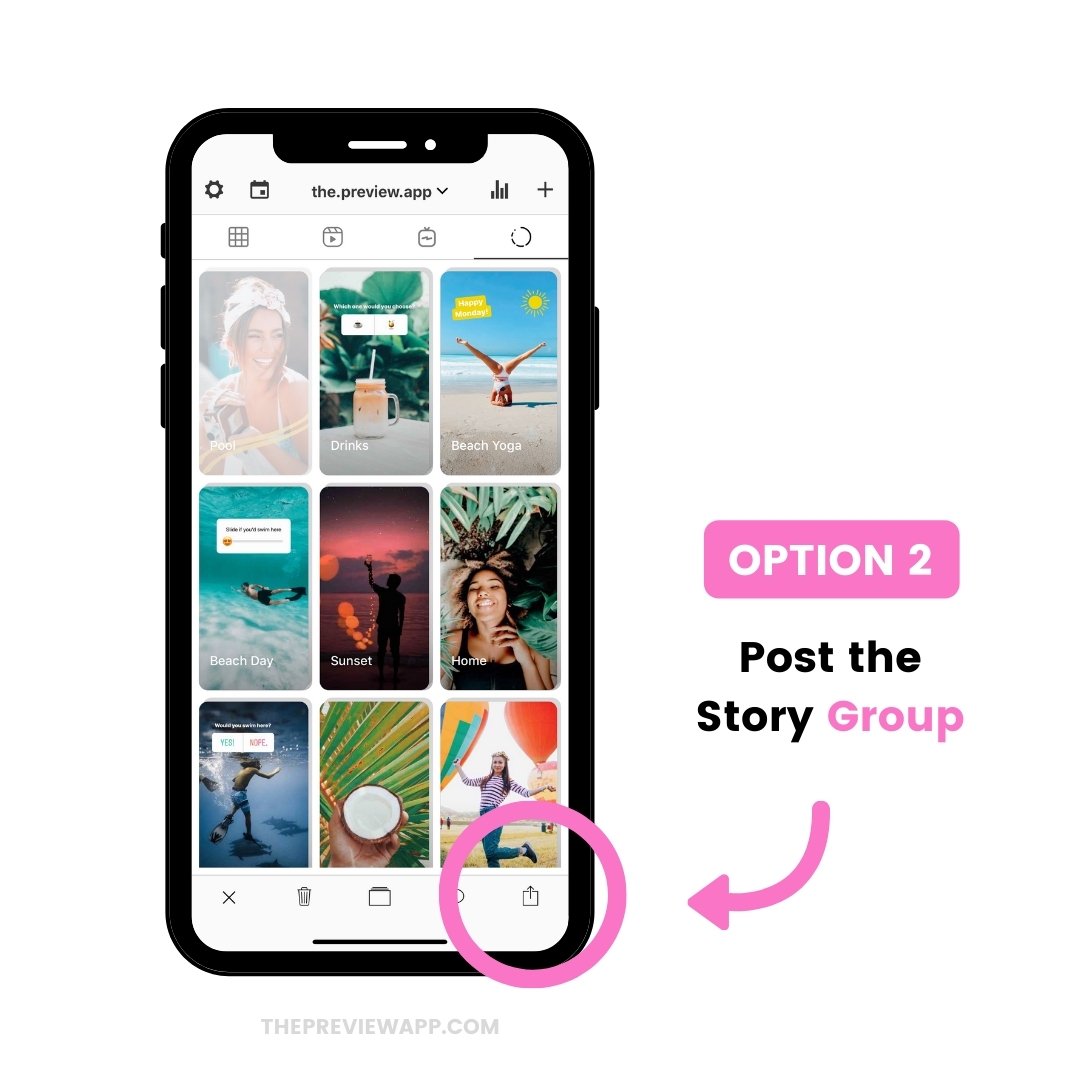
To post your entire Story Group:
- Press on the Story Group
- Press on the “Share” button
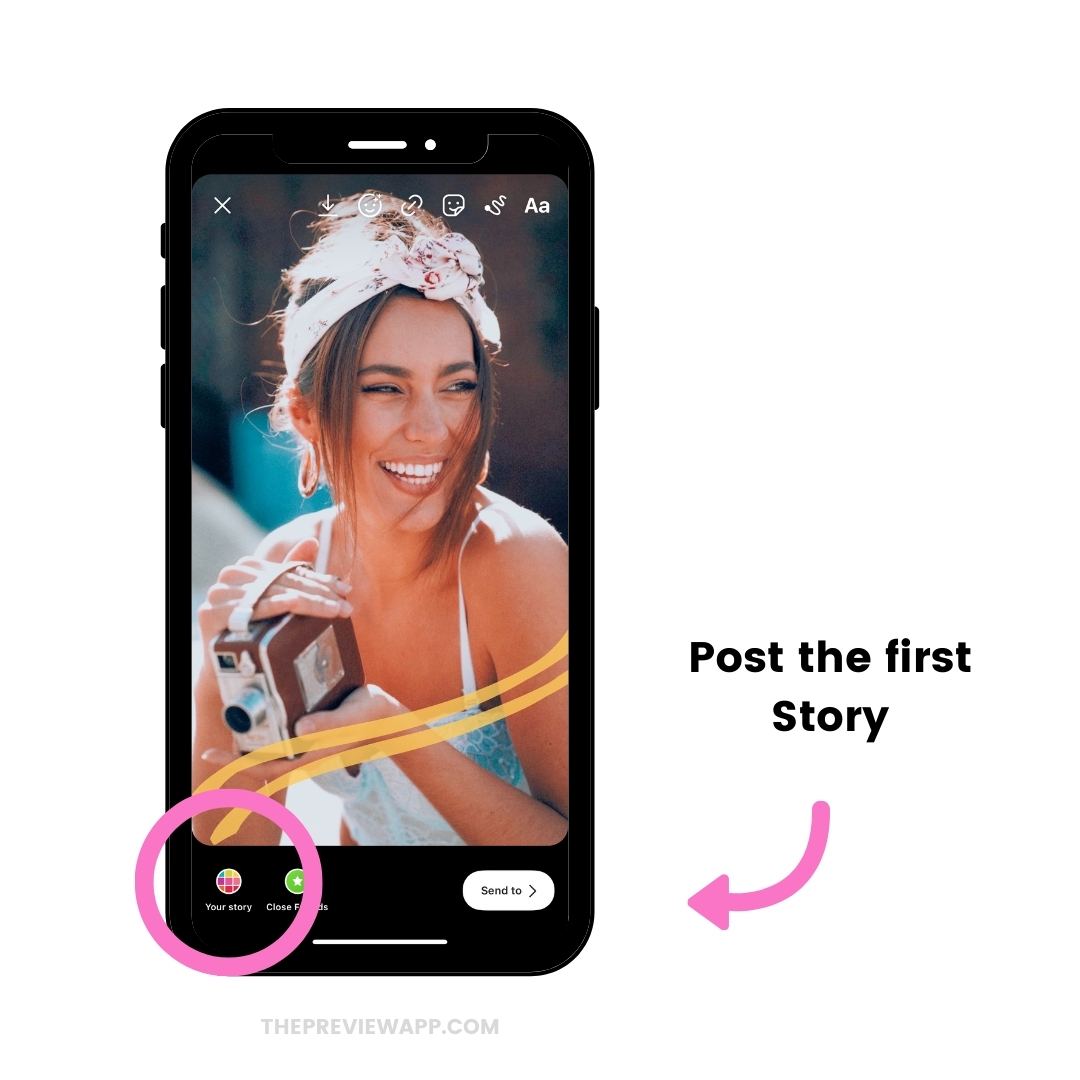
- Your photos and videos will be automatically saved to your camera roll for quick access (Note: this is the only Instagram-approved way to post your Stories)
- Share the first Story
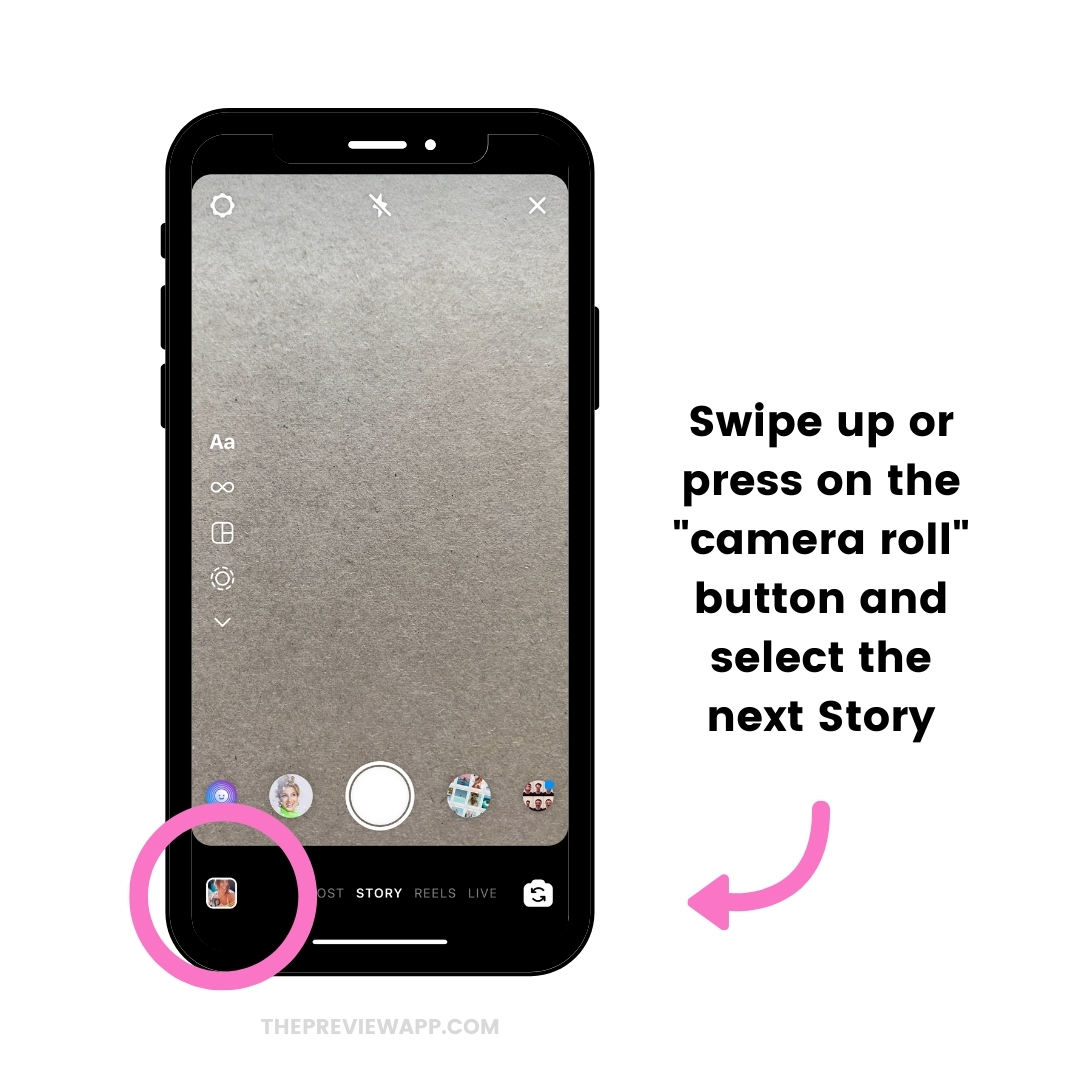
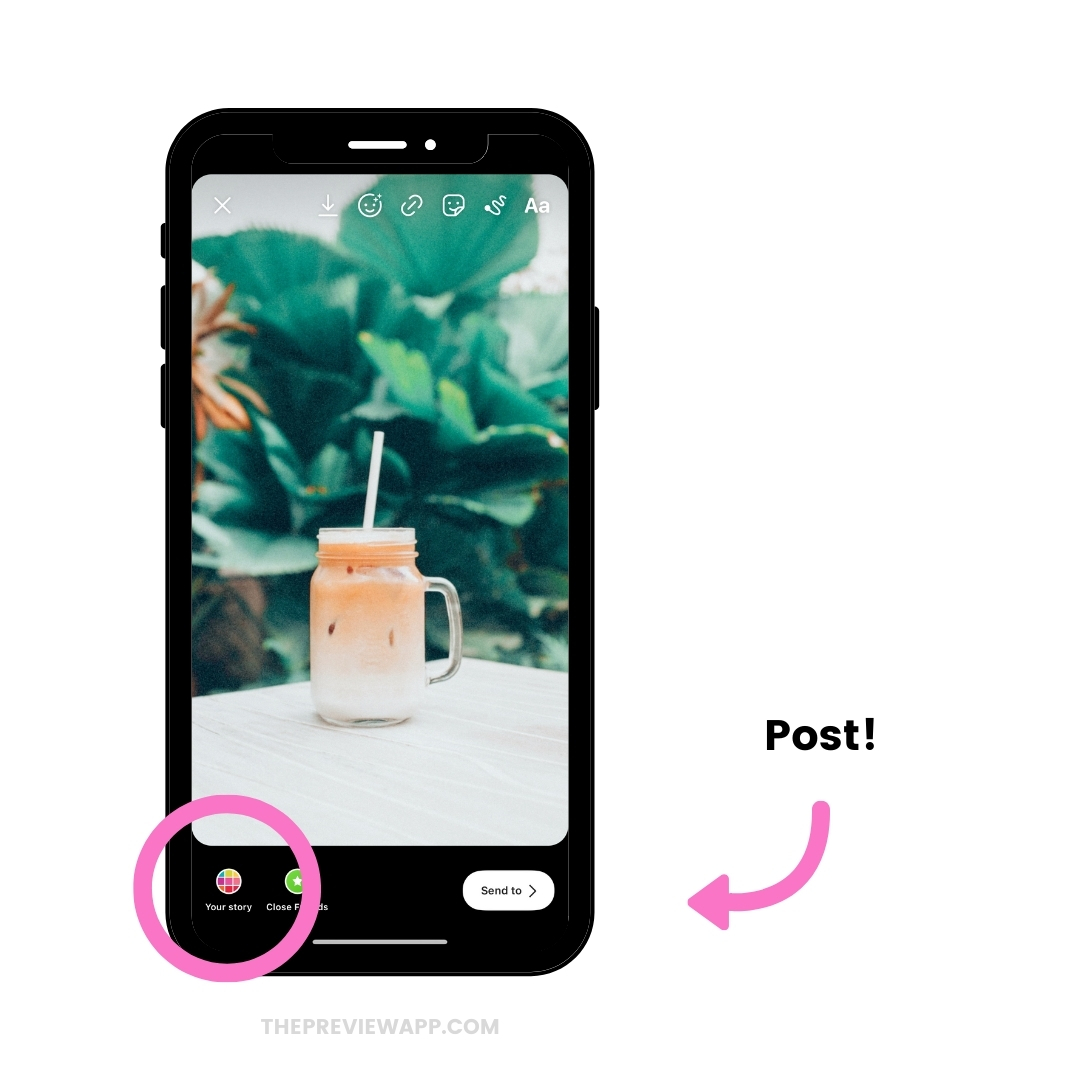
- Still in your Story, swipe up and select the next photo or video from your camera roll
- Keep going until you’ve posted all your Stories
And you’re done!
Have fun planning your Instagram Stories!
Don’t hesitate to email us if you have any questions.
Otherwise, have fun planning your Stories!
You might also like:

