I’m going to tell you exactly my routine when I schedule my Instagram feed one month in advance. It’s super easy. I don’t ever stress about what I have to post next anymore.
These tips are especially good for you if you have a business or you are a blogger, and you are looking for an efficient system.
Of course, I use Preview App to schedule my feed. I love it because I can schedule unlimited photos, videos and carousels – for free. I do all my editing in the app too.
Without further ado, let’s jump right into it:
- Decide what to post (+ my idea bank)
- Choose an Instagram grid layout
- Choose how many times a day to post
- Upload your photos in Preview App and rearrange them
- Save your hashtag groups in Preview (+ test them)
- Prepare your caption
- 3 ways to find your best time to post
- Schedule
Warning: For those of you who are very serious about growing your Instagram, I’m going to give you lots of quick tips along the way to streamline your scheduling process as much as possible.
1. Decide what to post
Focus.
Decide what to post. Pick 3 or 5 things you are passionate about. What should you account be known for?
If you want to post photos of everything and anything, that’s fine. This step doesn’t apply to you. Just add all the photos you have in your Preview App.
For my feed, I focus on showing 3 things:
- Instagram theme ideas (including featuring people)
- Instagram tips
- Quotes
I know exactly what I have to post so I don’t have to scout the Internet in search for ideas. No more stress. I’m focused. I know what my content is going to be.
Of course, I can posts about other things here and there. But I know what my core content is, and my dear followers will also know what to expect from me (and what they are pressing that “Follow” button for).
How do I find so many things to post for a month?
I have an idea bank. My idea bank is where I write all my ideas, quotes and tips. I write them in Trello and a Word Document. Every beginning of the month I open my idea bank and I decide which ones to share.
2. Choose an Instagram grid layout
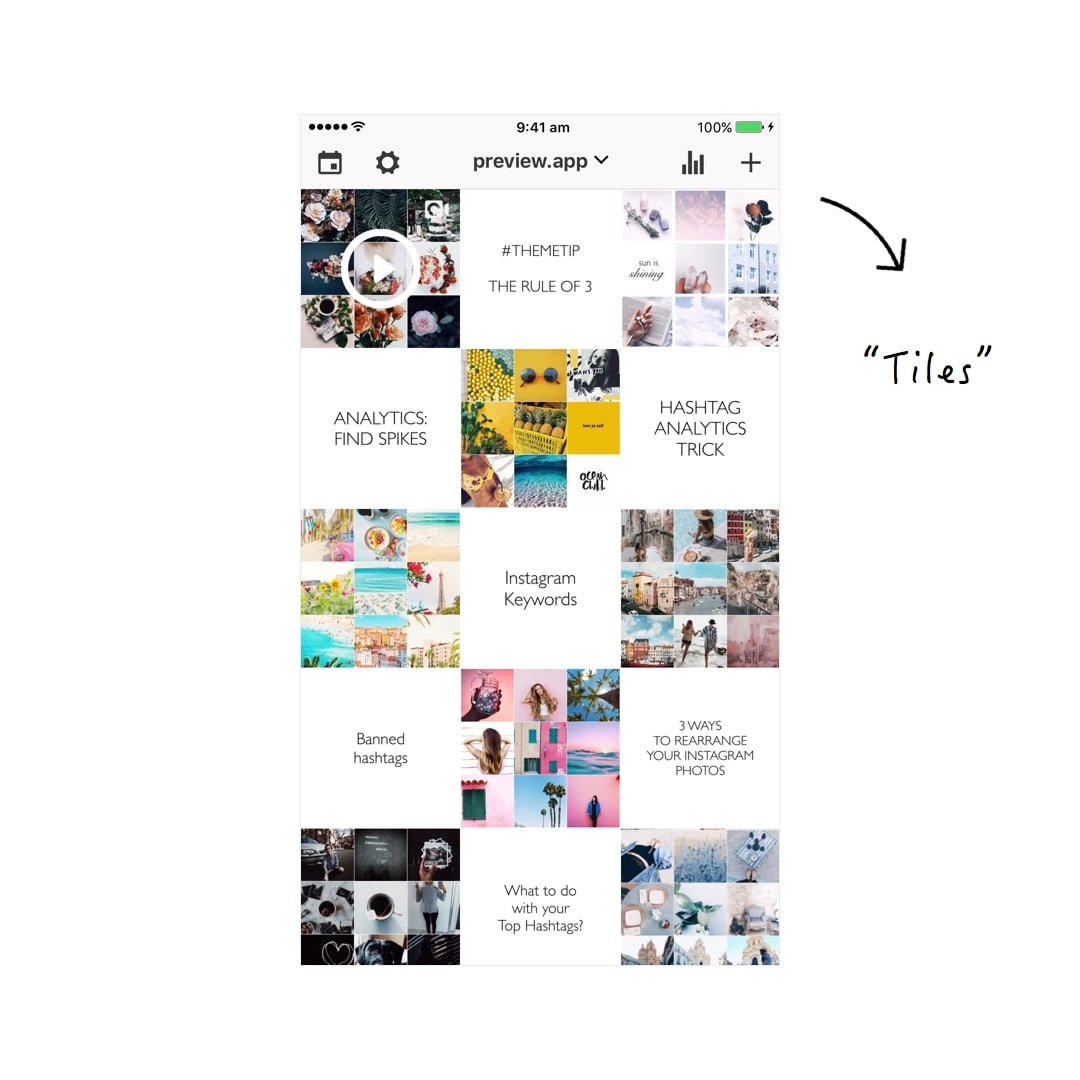
Ah! This is my favorite part: choosing an Instagram grid layout.
A layout will help you stick with a specific look for your feed. It will make your feed look organized, effortlessly.
There are 9 types of layouts you can choose from – I’ve written all about them here.
I stick with the tiles layout. It means I post one tip, then one theme, then another tip, and again another theme.
If you need help creating a cohesive Instagram feed, you’ll love my step-by-step guide:
3. Choose how many times a day to post
The next thing I do is choosing how many times a day I want to post. If I know how many times a day I post, I know how many posts I need to schedule for the month. 1 post a day = 30 posts.
Choose a realistic number. If you can commit to once every two days, that’s fantastic. If you can post once every day, great! If you can commit to twice a day, perfect!
Just be consistent.
I choose to post once a day (or once every two days depending on the type of tips I share – sometimes I want people to take their time to read my tips).
This way I know that 1 post a day = 30 posts I have to add in my Preview App.
It’s achievable.
Quick tip: I schedule one week before moving on to the next.
4. Upload your photos in Preview app and rearrange them
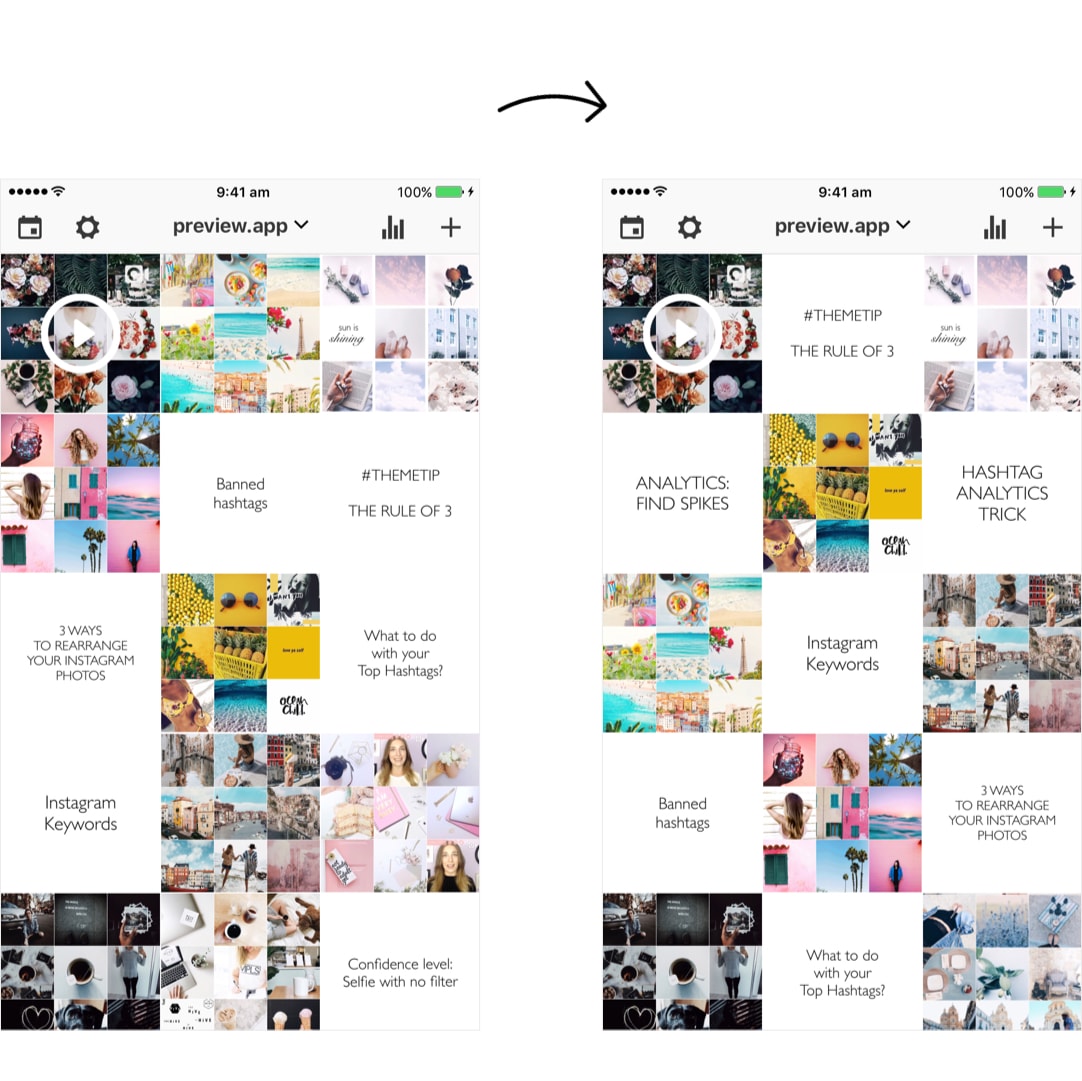
Now I know what to post and my grid layout. Time to upload all my photos and videos in Preview.
I drag and drop to rearrange the order of the posts in order to achieve the tiles grid layout I chose previously.
I have 2 tips for you:
Quick tip 1: Are you going to post quotes? Make your life easier. Use templates.
I don’t create my quotes / tips on my computer. I create them in Preview. I upload white images in my Preview App and then use the text tool in the Editing Tools section to write my tips. You can use any other template (it doesn’t have to be a white image). I explained everything in this article: 3 ways to create templates for your Instagram posts.
Quick tip 2: Use the “Repost” feature in your Preview App if you curate photos from all over Instagram.
5. Save your hashtag groups in Preview App
All my posts are in my Preview App. Perfect! Time to prepare what I’m going to write. Let’s talk hashtags first.
In my opinion, hashtags are one of the most powerful tools on Instagram – because that’s how people find your account.
I’ve saved all my hashtag groups in my Preview App. No more text replacement or copy and paste from my Notes app.
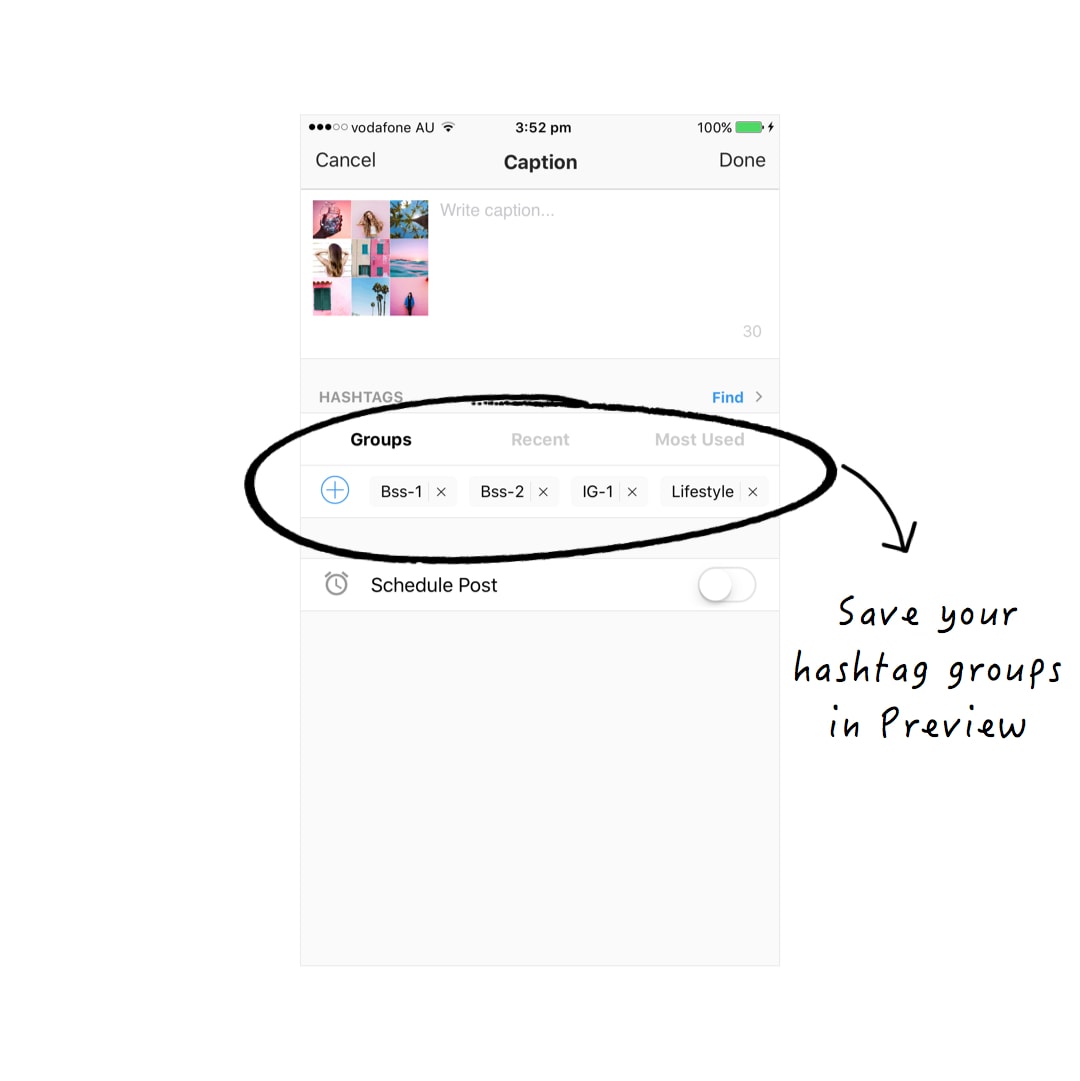
I just tap on the hashtag group I want to add it to the caption.
Preview also comes with a Hashtag Finder. So I don’t even have to do my hashtag research anymore.
Quick tip: Preview App also tests your hashtag groups automatically. It tells you which hashtag group gets you the most likes, comments and engagement. So if one hashtag group doesn’t lead me anywhere (it doesn’t give me much likes, comments or engagement), I delete it and create another one.
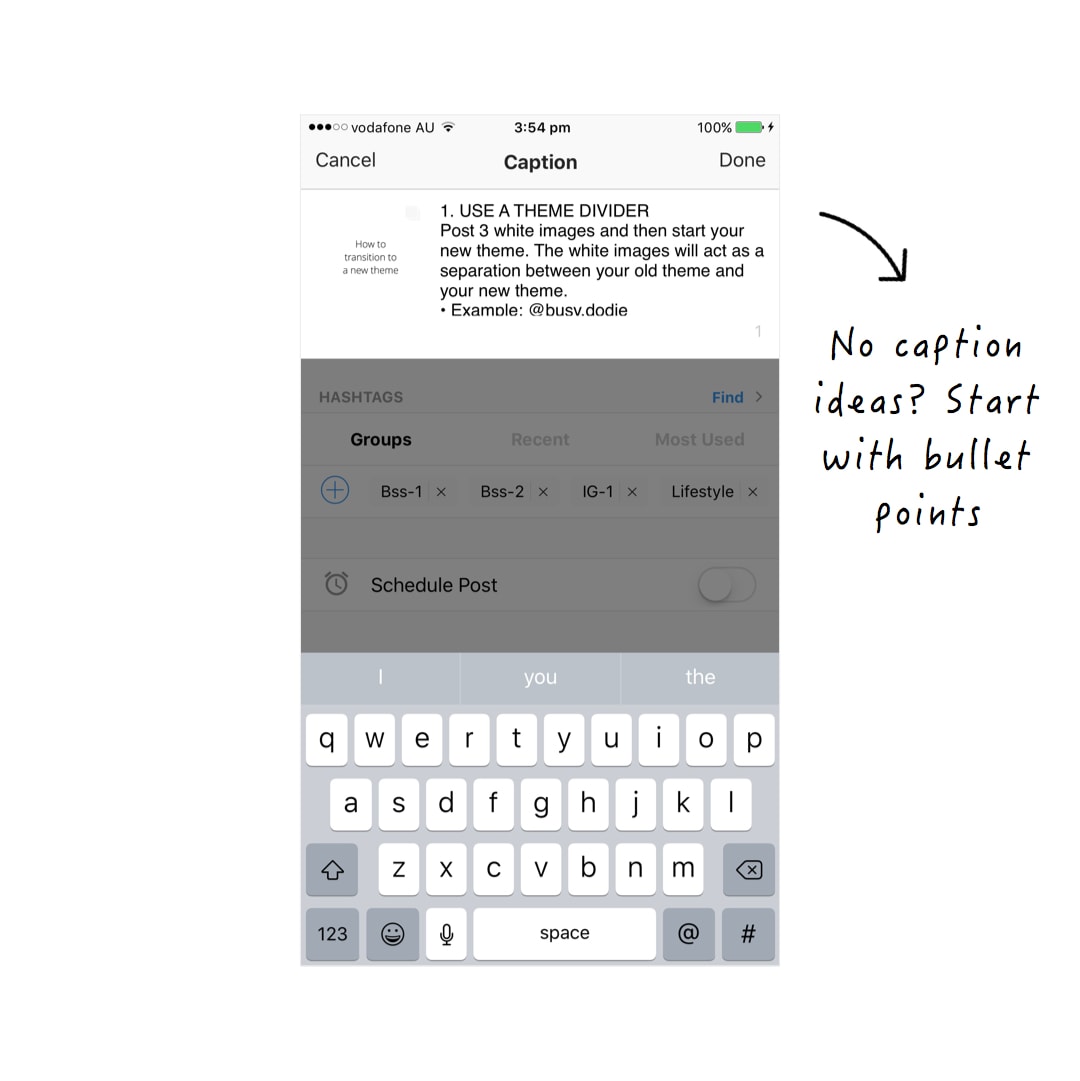
6. Prepare a rough draft of your caption
Let’s be real: it’s hard to write a caption on the fly.
I usually use dot points to write my ideas and tips. This way I already have the backbone of my caption ready to go! I just have to add little bits and pieces.
I also add my hashtag group by just pressing on the one I want to use.
Don’t stress out if the caption doesn’t come to your mind straight away. Write down the ideas you have on top of your head. Sometimes, the hardest part is to start writing – then it magically flows 🙂
7. Find your best time to post
Almost done! My posts are all in my Preview App. I have rearranged them into a layout. My captions and hashtags are ready.
I just need to schedule them. But before I do so, I want to see when my best time to post is (so the majority of people can actually see my posts).
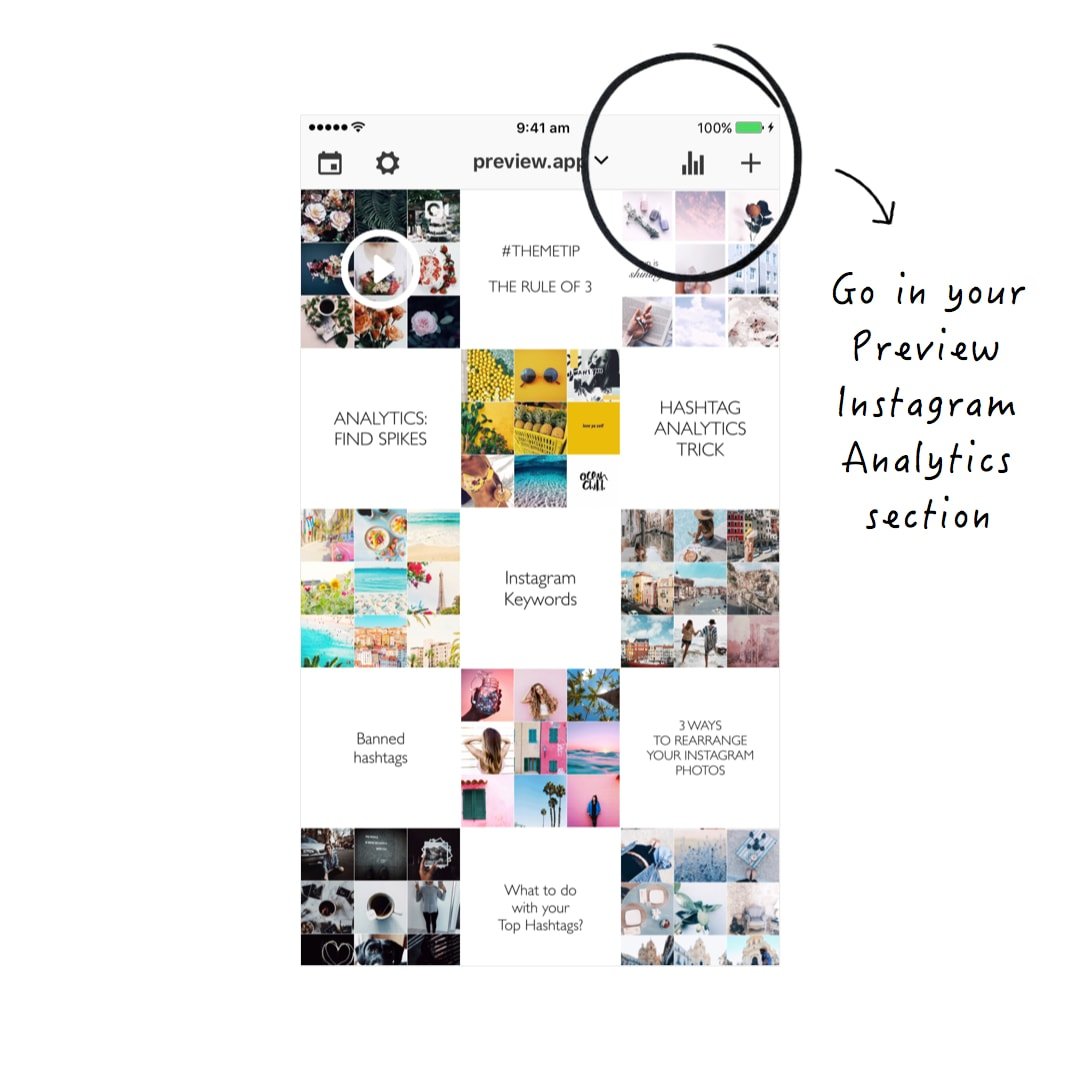
Preview comes with an Instagram Analytics section. So I go in my Preview Analytics and I check 3 things:
- My best time to post
- My best time to interact (that’s when my followers interact the most with my post – you know, like, comment and all that jazz)
- 2 or 3 other peak times
Quick tip: I strongly recommend you test your best time to post. The time at which you’ve posted before might not be the best one for you (or it might!). Have a look: Why posting at different times on Instagram is important.
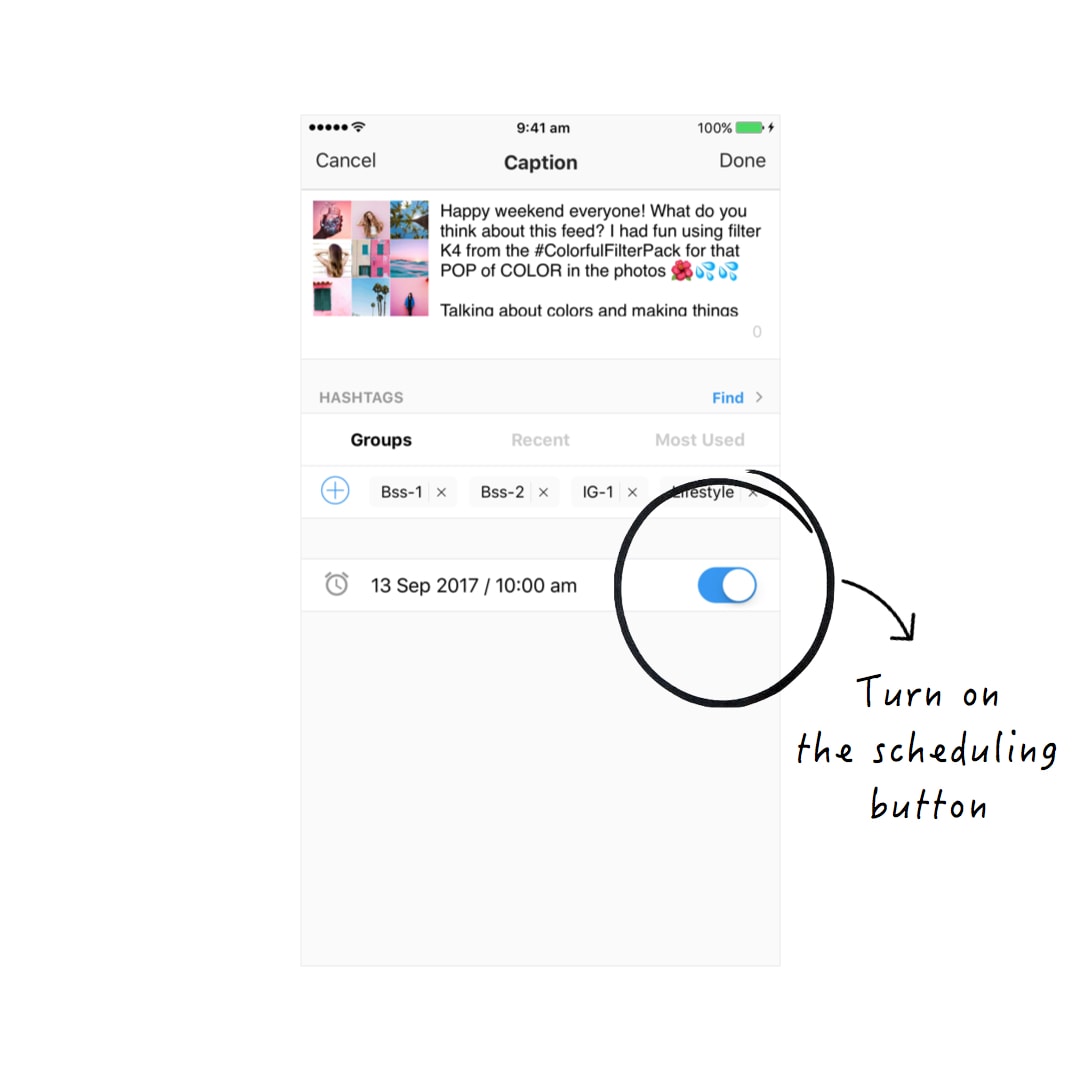
8. Schedule
Now that I know my best times, I schedule my posts at 2 or 3 different times (so I can reach different people from different time zones).
Done!
Your turn to schedule your feed!
You read until the end!
Tell me in the comments: Was this article useful?
Feel free to let me know if you have any other questions.
If you’re wondering where to start: start with your idea bank (a folder with all your ideas, photos, quotes).
Until next time, see you all on Instagram (@preview.app) for more tips, tricks and theme ideas!
+400,000 Instagrammers are already using Preview App to edit, plan & schedule their feed. If you haven't tried it, you're missing out.
It was super useful, thanks !
How did I not see your comment before? Thank you Samuel, I’m really happy this post was helpful too 🙂
This was an amazing guide on how to crack down on your Instagram profile, from the first steps on creating an idea, to putting it in action
With clear and concise tips that help with any areas you might be stuck on, everyone can take something from this article
Preview is an app that I’ve been using recently to see how my profile will look, I was never interested in paying for a subscription as I thought it was a waste of money
But looking at how vital analytics are and the extra features Preview has, I’ll be signing up soon to really boost my revamped profile
Not to mention, if you can afford Netflix, you can afford Preview, which you should be using just as much, if not more!
Hi! Loved reading this. spent about an hour going through so many of your blogs!
I had a question, when scheduling posts do I still need to have the push notification on so I manually post, so I don’t get shadow banned for using a bot?
Hello! Super happy you’re enjoying the blog! Yes, make sure you have your notification turned on for Preview in your phone settings. Preview doesn’t post automatically on Instagram yet, but Instagram has recently launched a new, safe auto-posting system which is in Beta version at the moment. We will add it in Preview as soon as they make it available to the public. Feel free to send us an email at [email protected] if you would like us to send you an email when it is available 🙂
zubermohamed but