Want to schedule Instagram Stories on Desktop computer?
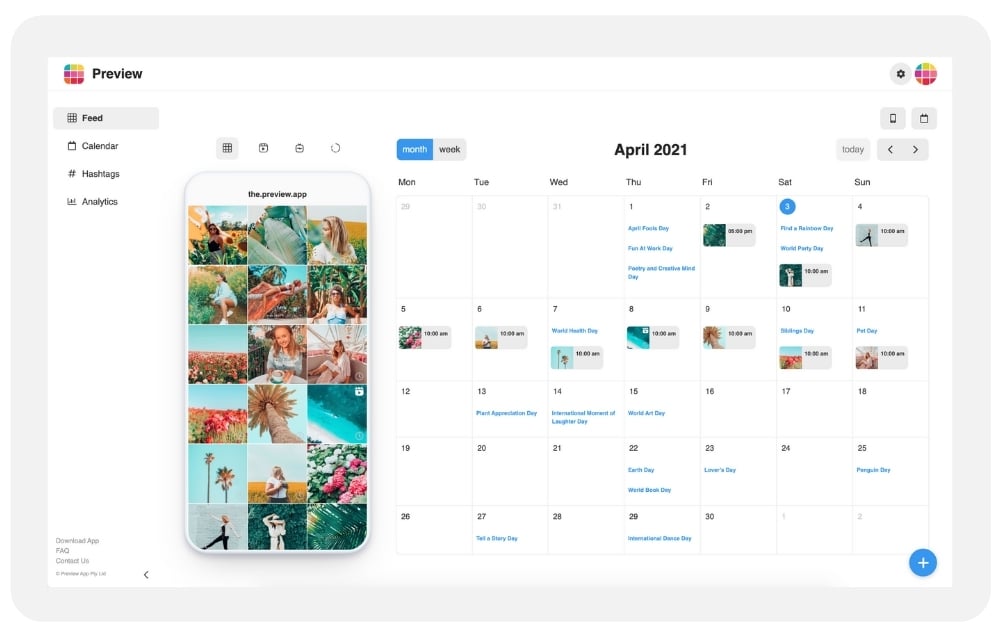
I’m going to show you how to do it with Preview:
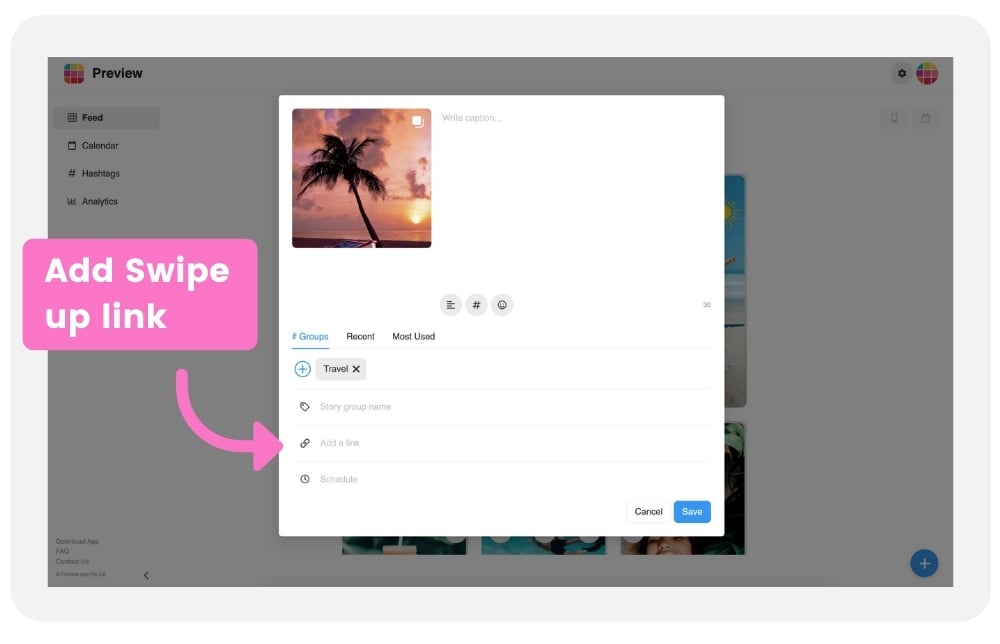
You can also prepare your swipe up links:
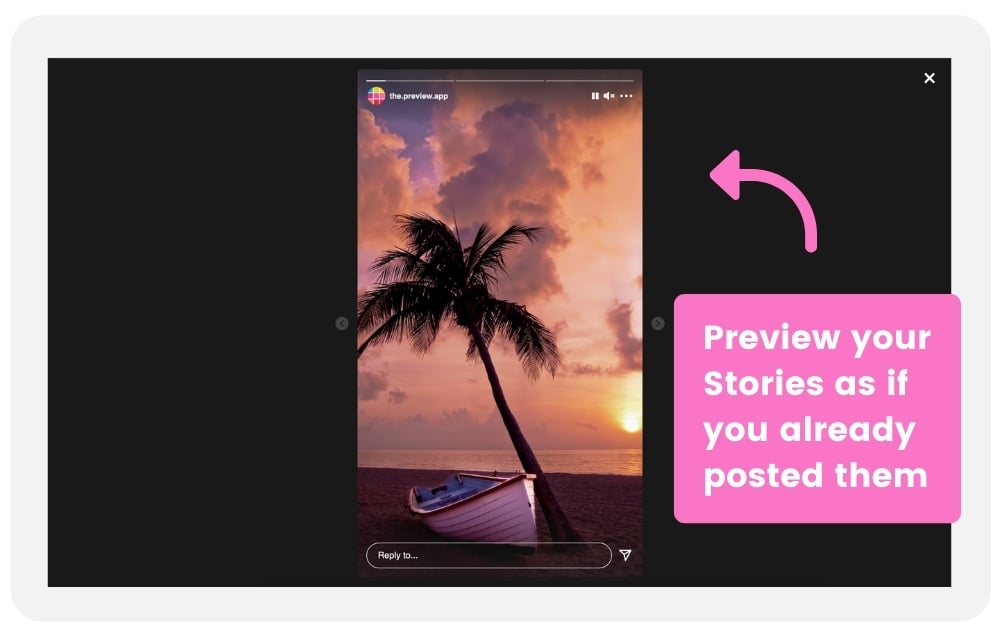
And watch your Instagram Stories as if you already posted them on Instagram, from the computer (and from the phone app too):
As you can see you can also use Preview to plan your normal posts, Reels, IGTVs and check your Instagram analytics.
Preview has been officially approved by Instagram and follows Instagram’s Rules and Policies. So all the features you will see are safe to use for your account.
Let’s get started.
1. Choose your Instagram Story Planner view
Click here to open Preview on your computer.
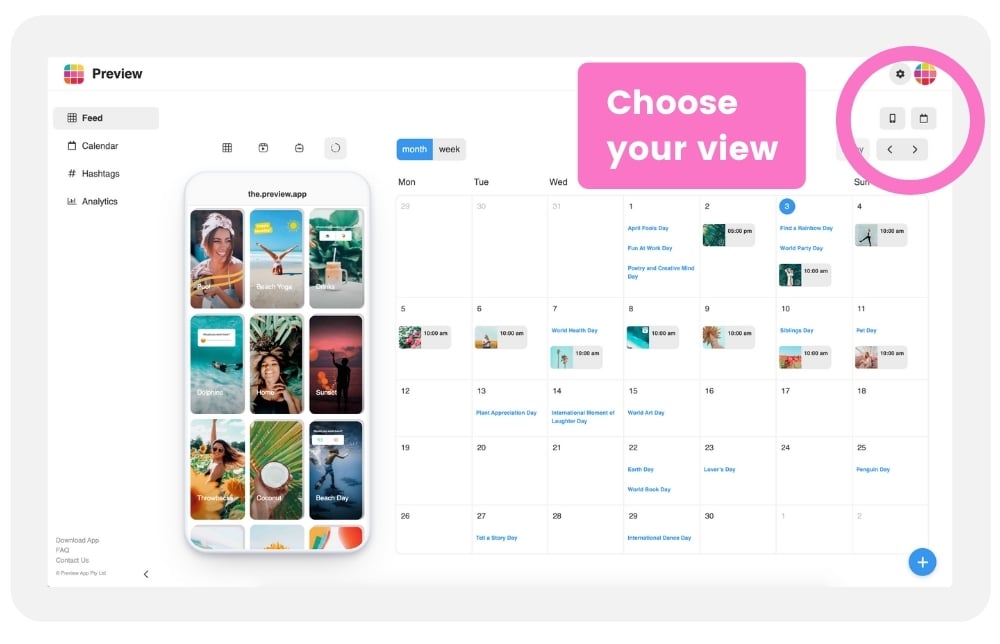
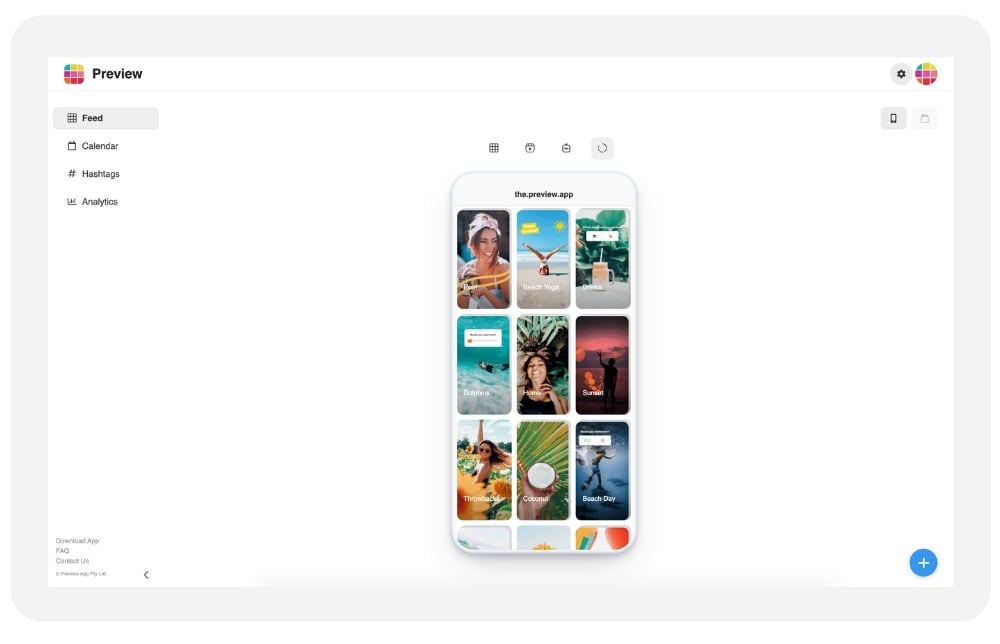
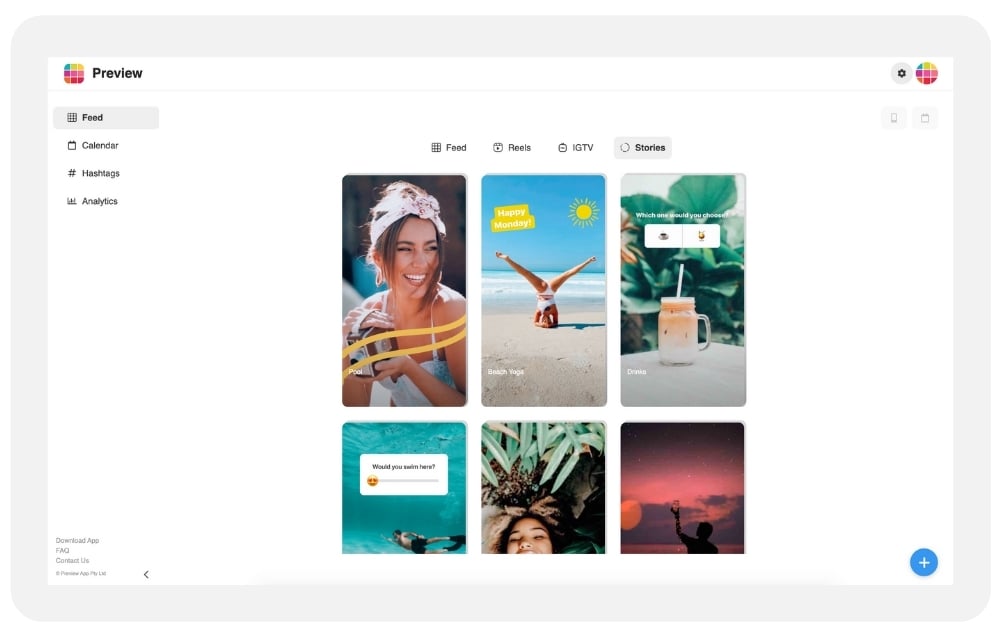
Choose how you want to see your Instagram Story Planner. Some people like seeing their content calendar, others prefer to keep it simple and just see their full Insta Story Planner view.
With or without the calendar:
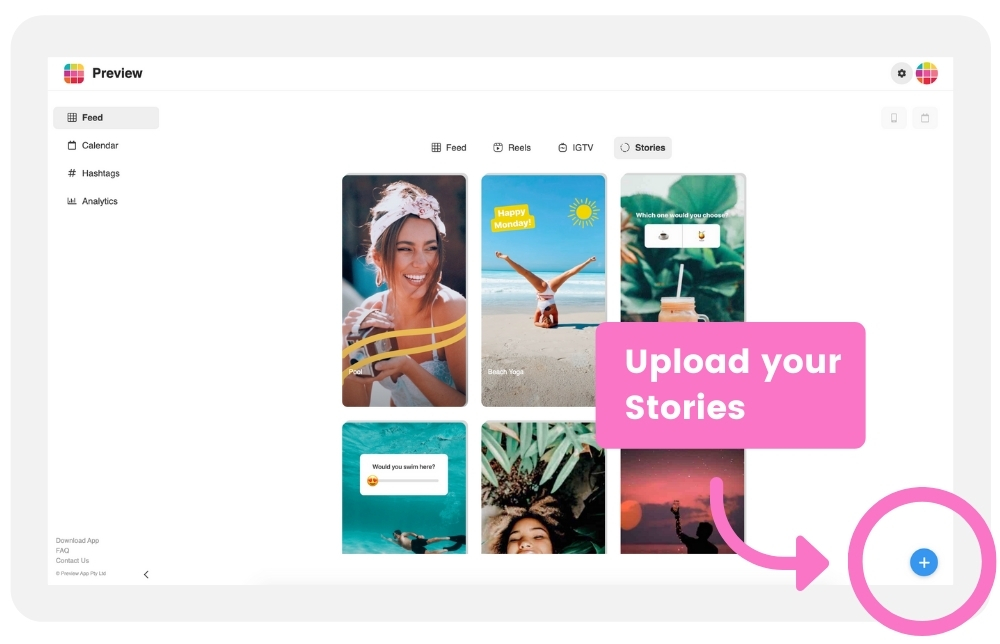
2. Upload your Stories
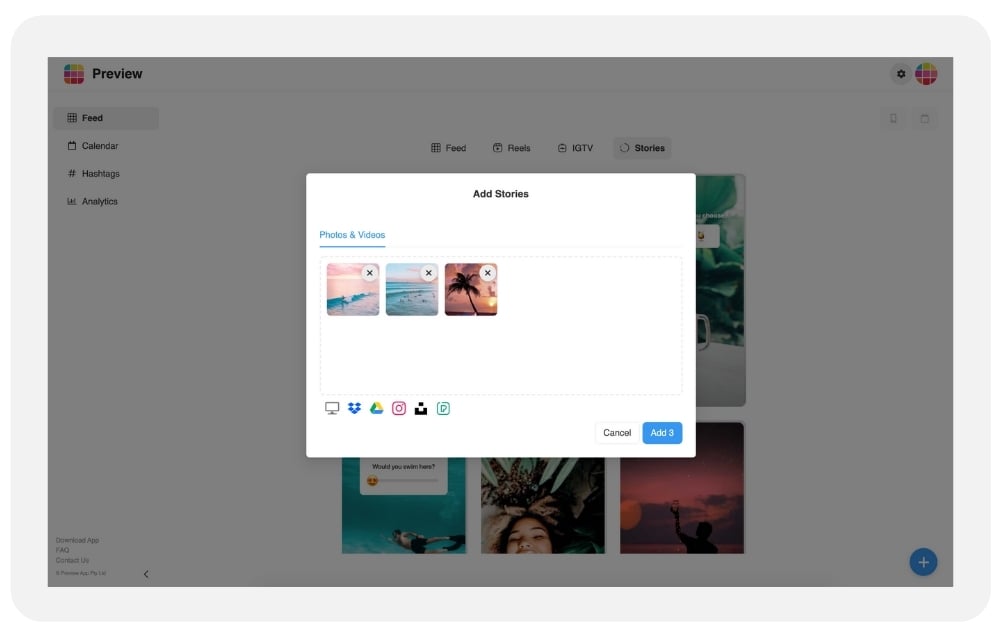
Click on the “+” button to upload your photos / videos.
Drag and drop your content in the upload box, or click on the Google Drive or Dropbox button to upload from there.
If you need free photos and videos for your Stories, check the next step.
Your Stories will appear in a folder, like this:
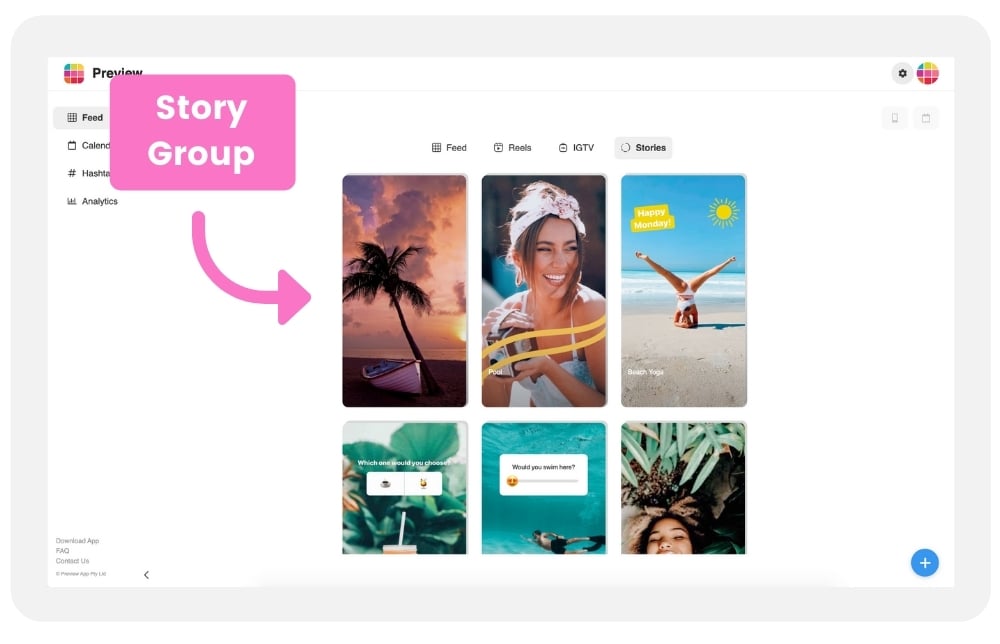
Why a folder?
People like to use the folders to organize their Instagram Stories.
For example, you can use a folder for Stories you want to post in one go.
You can use another folder for Stories for a specific campaign, or a specific event.
You can create folders dedicated to each day of the week.
You choose how you want to organize your content.
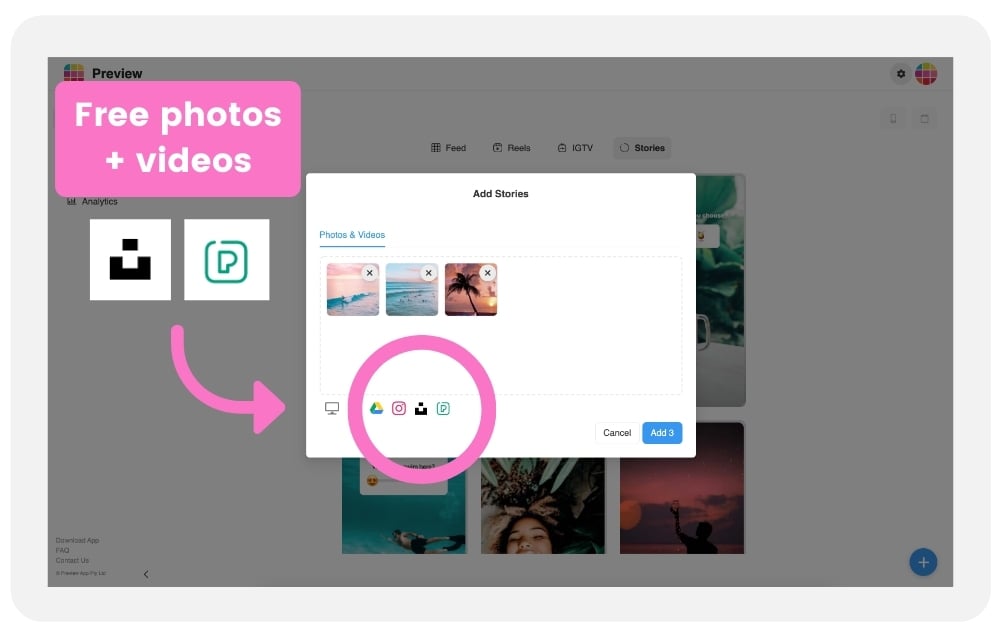
3. Free photos and videos for your Stories
If you’re looking for beautiful photos, videos and backgrounds to post in your Stories, click on the Unplash or Pexels logos.
You can use any photos or videos you want, for free. You don’t have to give credit (but it’s nice if you want to). All the content is given to you for free, copyright free.
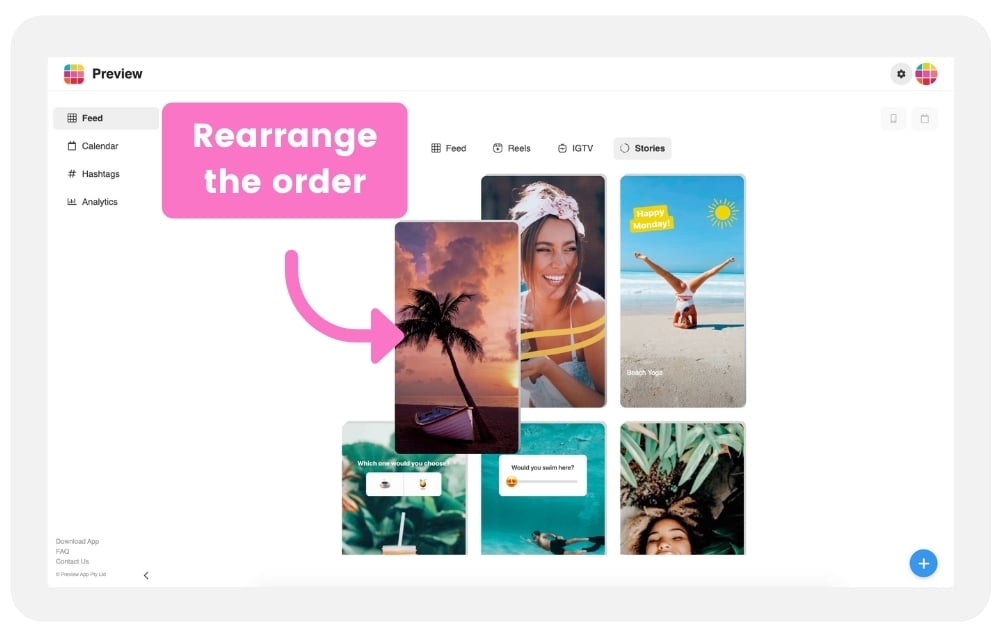
4. Rearrange the order of your Story Groups
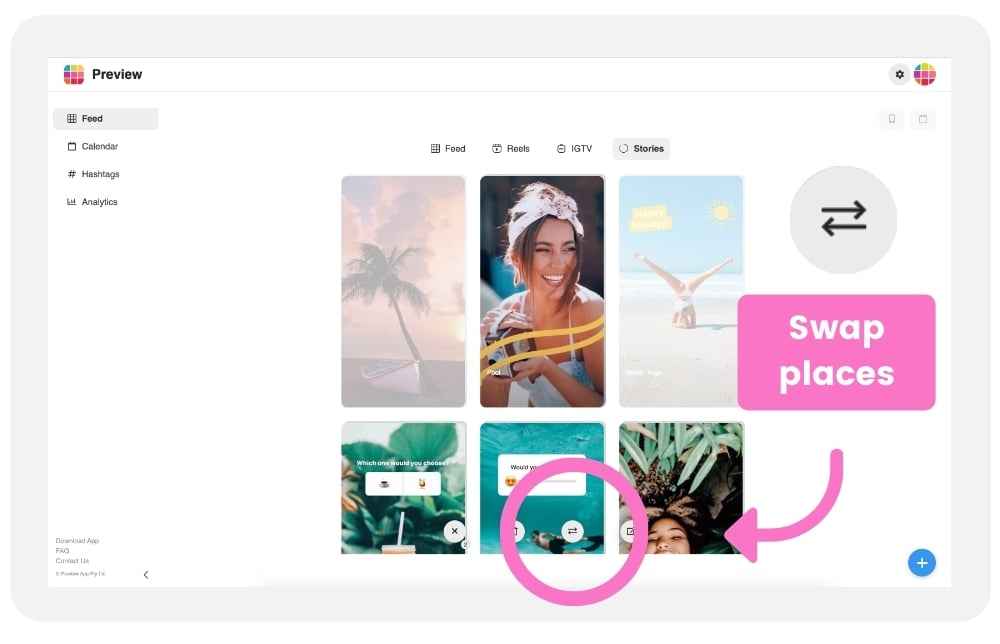
There are 2 ways to rearrange the order of your Story Groups:
- Drag and drop, or
- Select 2 Story Groups and press on the “Swap” arrows to swap them
5. Add notes and hashtags
This is optional.
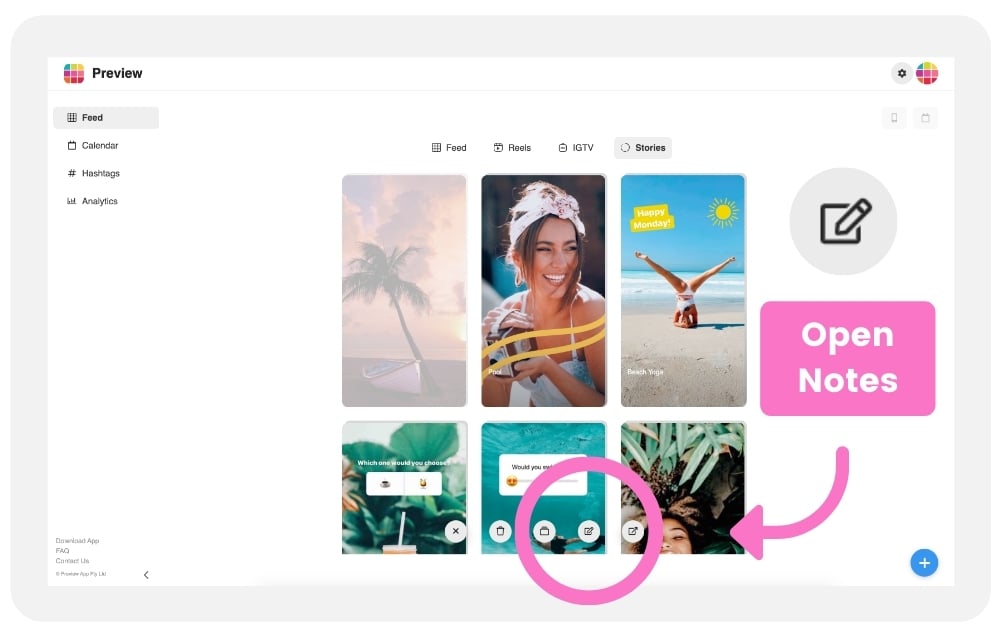
Click on your Story Group.
Click on the “Note” button.
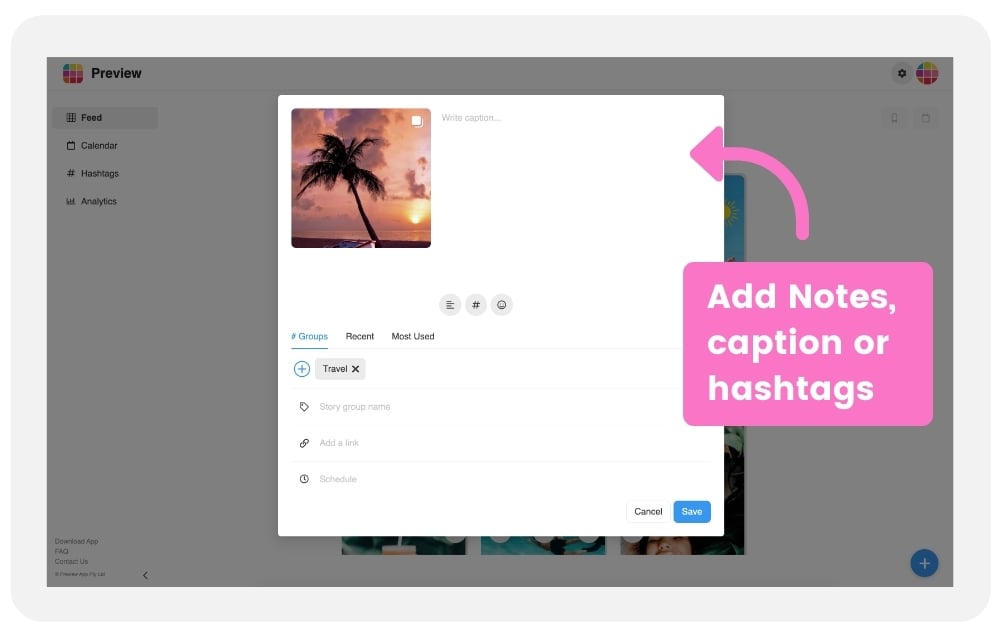
What to write in your Notes?
- Hashtags
- Caption (what you want to write on top of your image / video)
- Notes for your team member (if you use Preview with your team)
6. Find hashtags
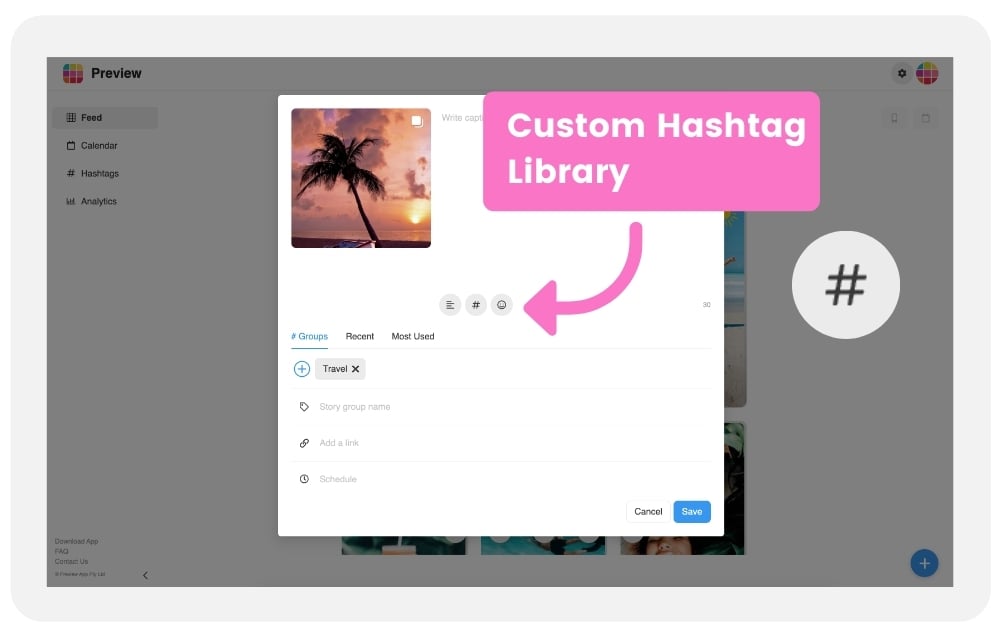
Need help finding Instagram hashtags? We’ve done the research for you and have created a custom Instagram hashtag Library.
Click on the “Hashtag” button:
7. Add a Story Group name
This is optional.
For example, people like to write a name based on::
- What the Story Group is about
- Days of the week (if you want to plan your Stories this way)
- Campaign name
- Brand name
- Product categories
- Launch name
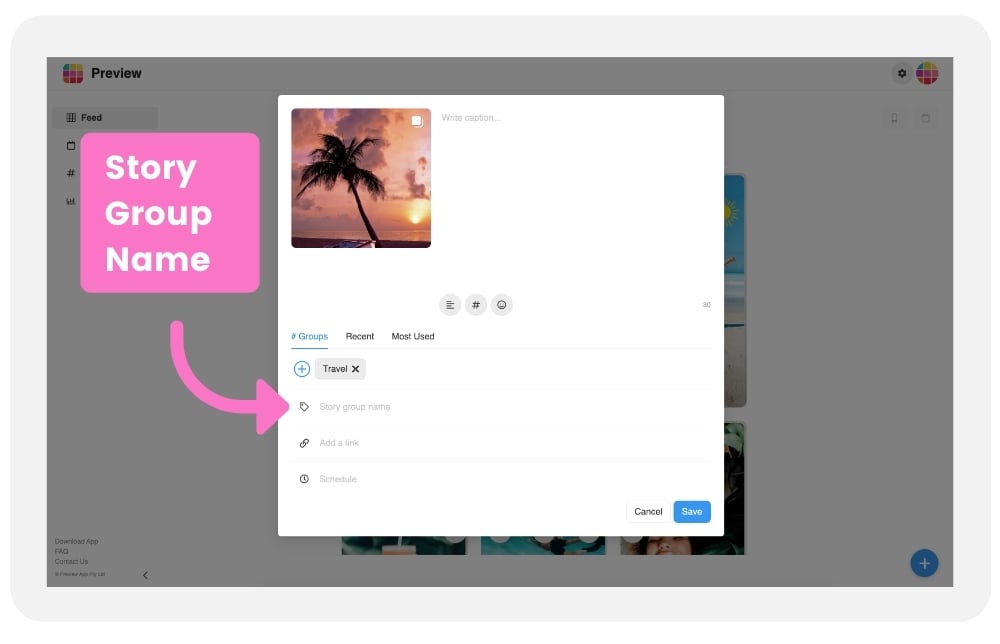
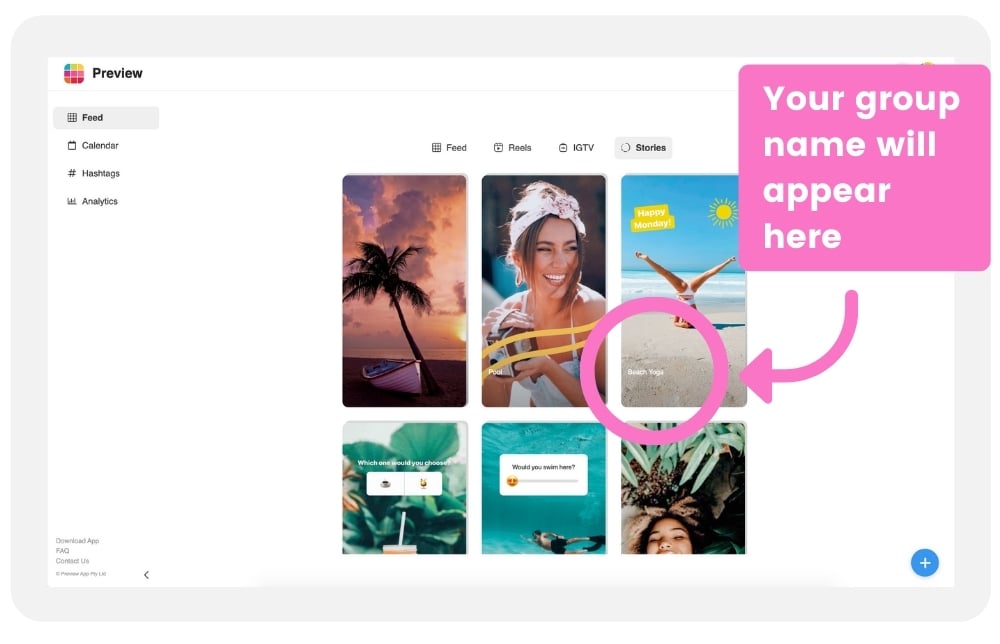
The Group Name will appear on top of Story Group, in your grid:
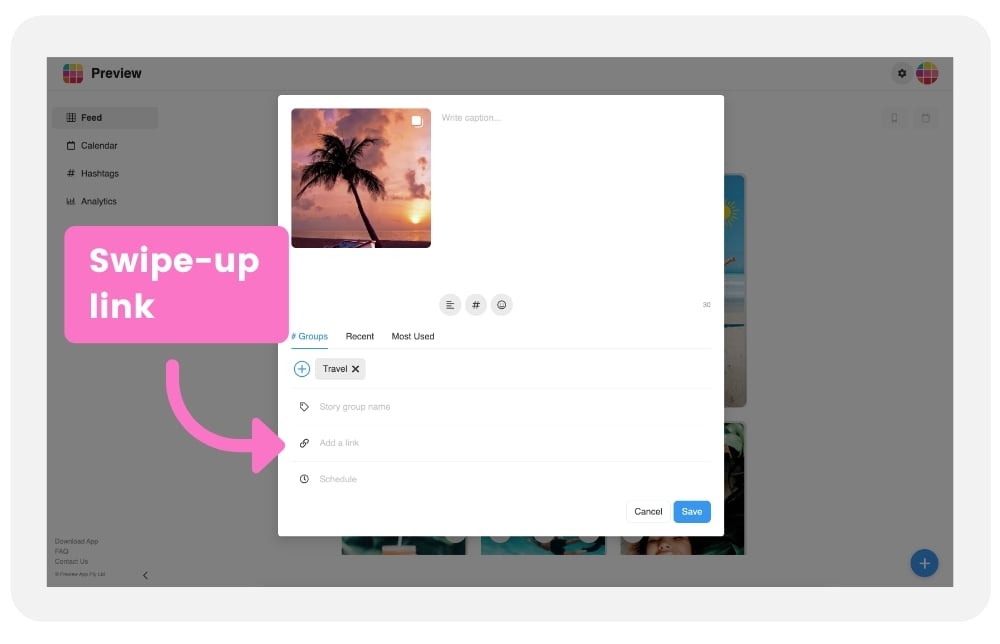
8. Prepare your swipe-up link
Add your link here:
9. Schedule your Instagram Stories
How to schedule Instagram Stories on Desktop?
- Click on “Schedule”
- Choose a day and time you want to post
Done.
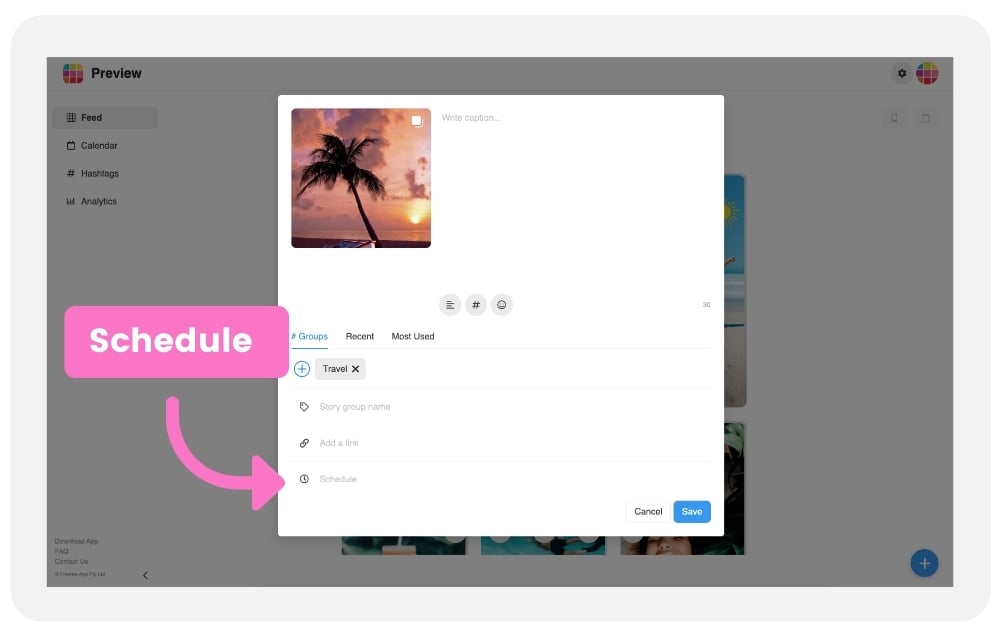
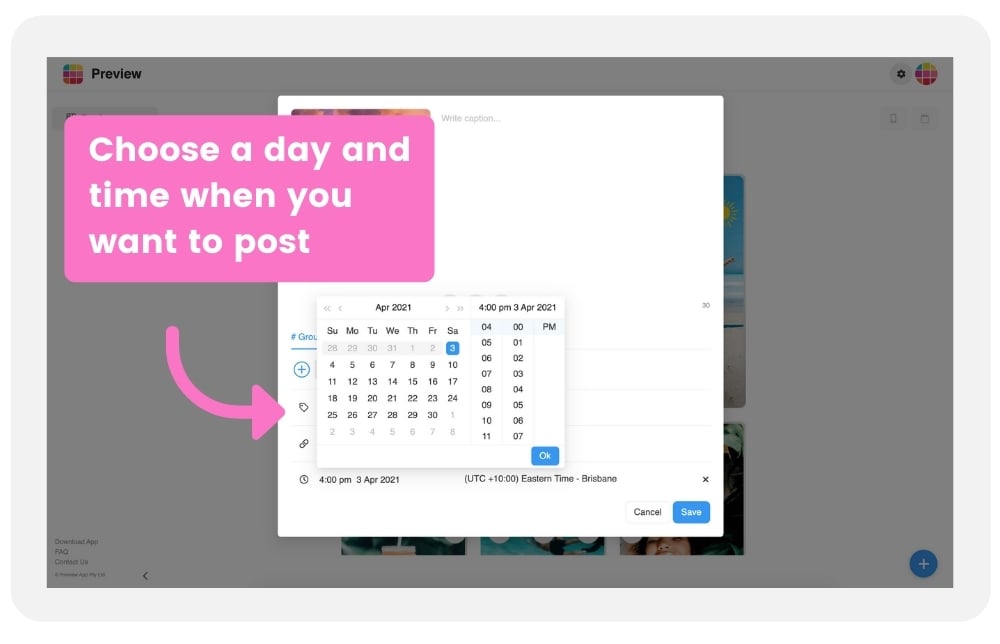
Tip: Click on the country name to change the timezone if you want to post at a specific day and time in a different city / country. This is for you if you need to post when your main audience is online, or if you are scheduling Stories for a client.
10. Upload more photos and videos in your Story group
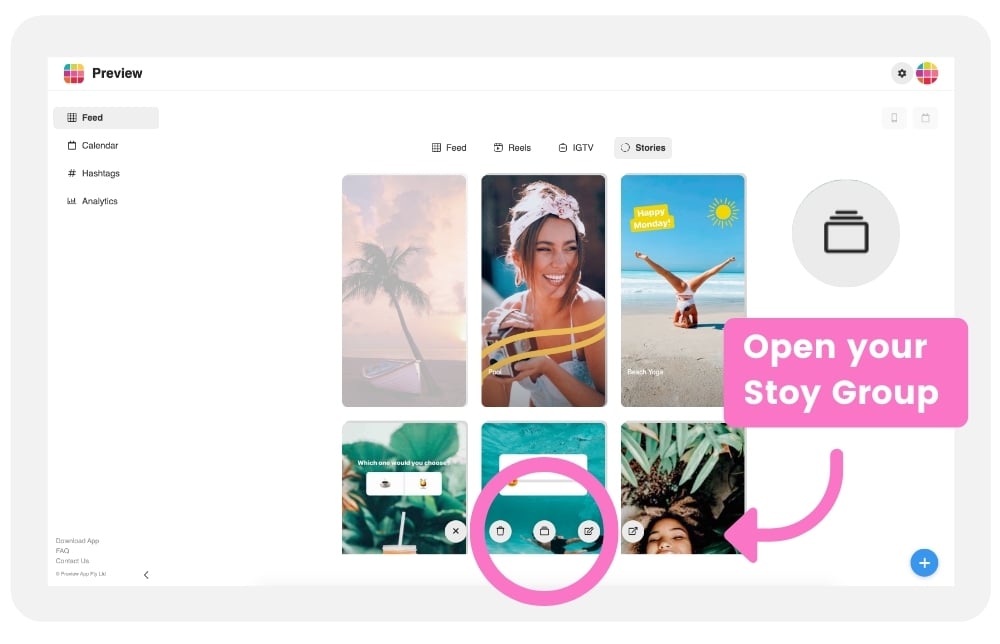
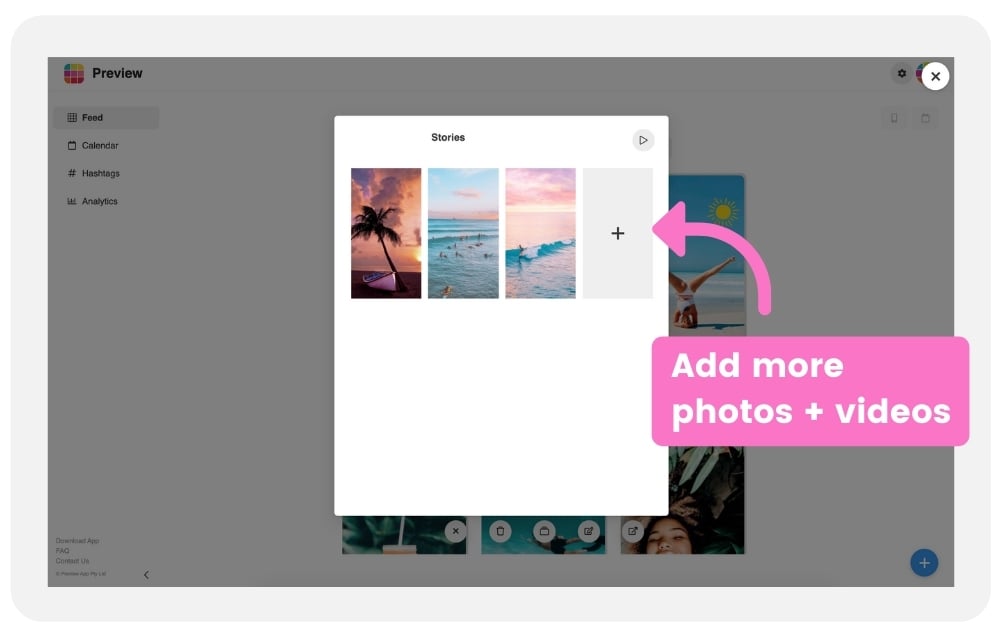
What if you want to edit your instagram Story Group? Like add more photos or videos, or replace the content that is in this group?
- Click on the Story Group
- Click on the “Group” button
- Click the “+” button to upload more photos / videos in the group
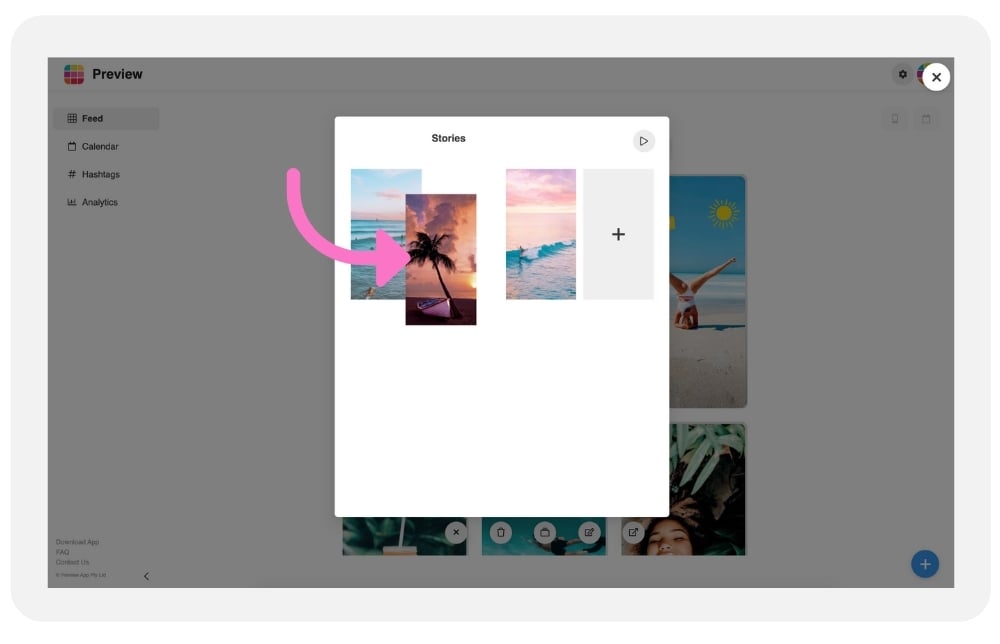
11. Rearrange the order of your Stories within your group
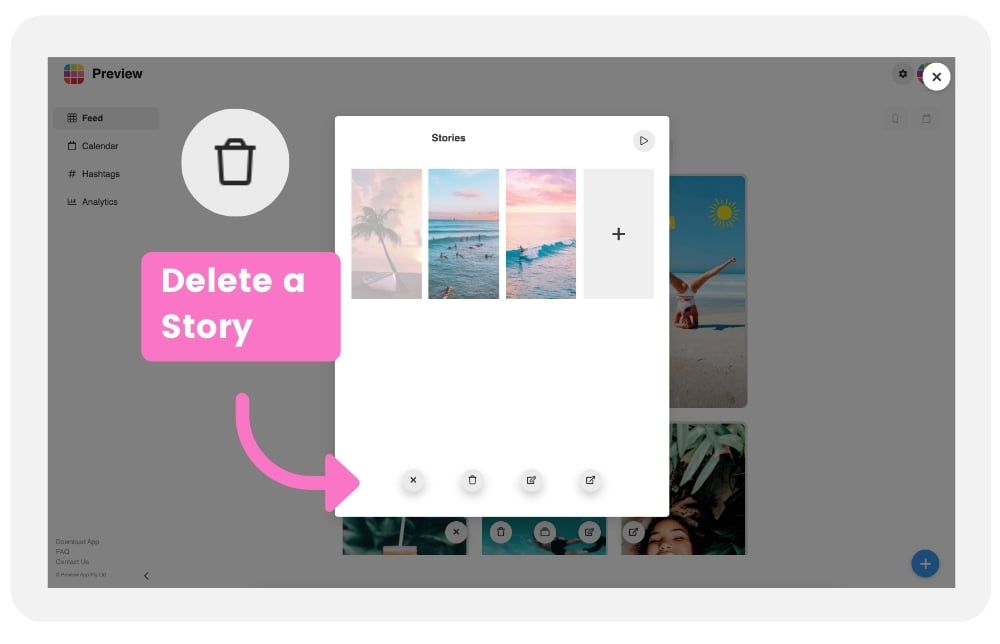
12. How to delete a Story
If you want to delete an Instagram Story from your group:
- Click on the Story
- Click on the “bin” button
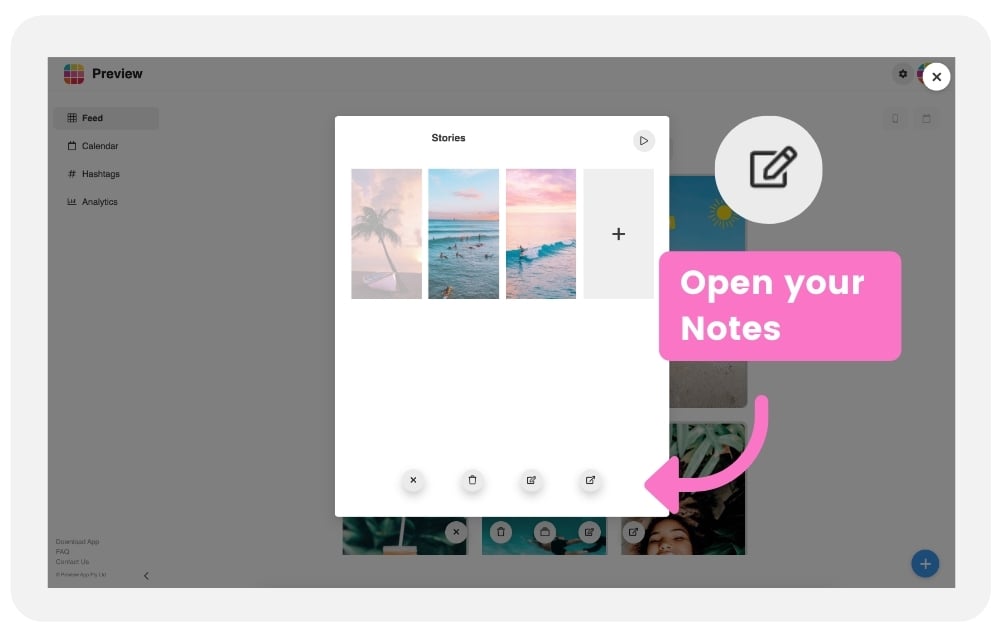
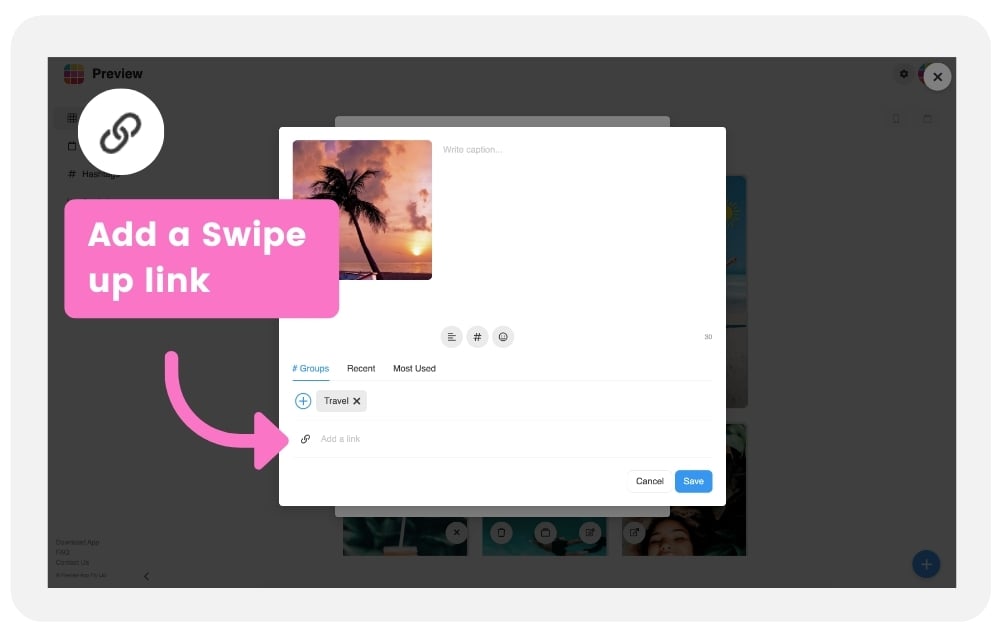
13. Add a different swipe up link for each Story
You can do this too. Just click on the Story and open the Notes to add your link:
14. Preview your Instagram Stories before you post
This is one of our favorite features: Previewing your Instagram Stories before you post.
If you are a storyteller, or if you have a brand and need to post your Stories in a certain order, this is a great feature for you. You get to experience your Stories the same way your followers will – but before you actually post them to make sure you like how they flow.
Click on the “Play” button:
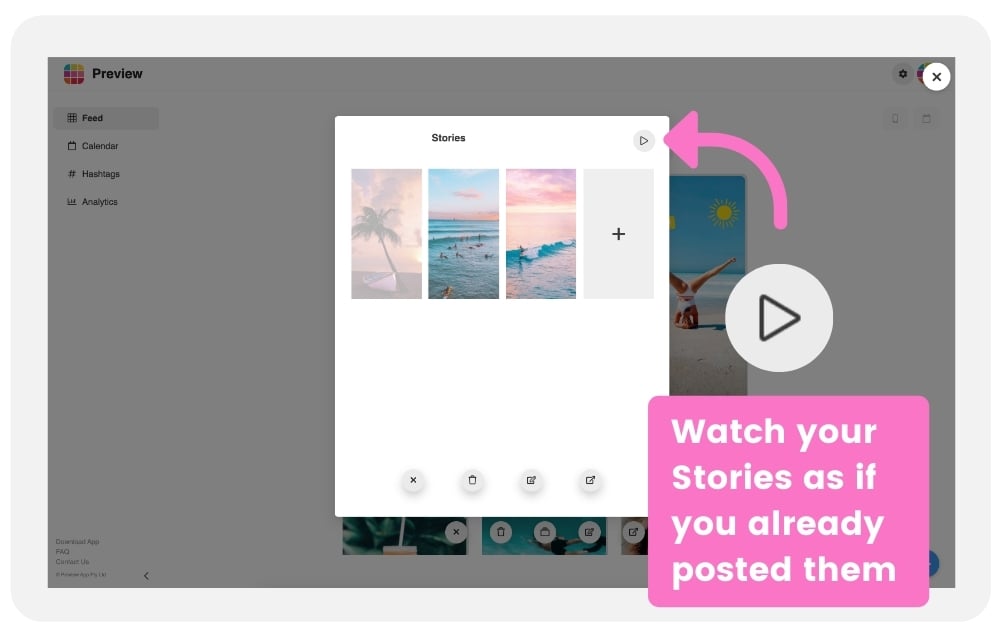

Tip: You can also preview your Insta Stories on Preview App, on your phone (Android and iPhone).
15. Post your Instagram Stories
Ready to post your Instagram Stories?
Before I show you how to do it, keep this in mind:
“Can you auto post Instagram Stories?”
Not at the moment.
Instagram doesn’t allow any other apps or websites to automatically publish Stories to your account. It is against their Rules and Policies. Preview has been officially approved by Instagram and follows their Rules to keep your account safe. So I’m going to show you how to post your Instagram Stories, the Instagram-approved way.
Preview will send you a notification on your phone when it is time to post.
There are 2 ways to post your Instagram Stories from Preview to Instagram:
- Post one Story at the time, or
- Post the entire Story Group
Let’s have a look at option 1 first.
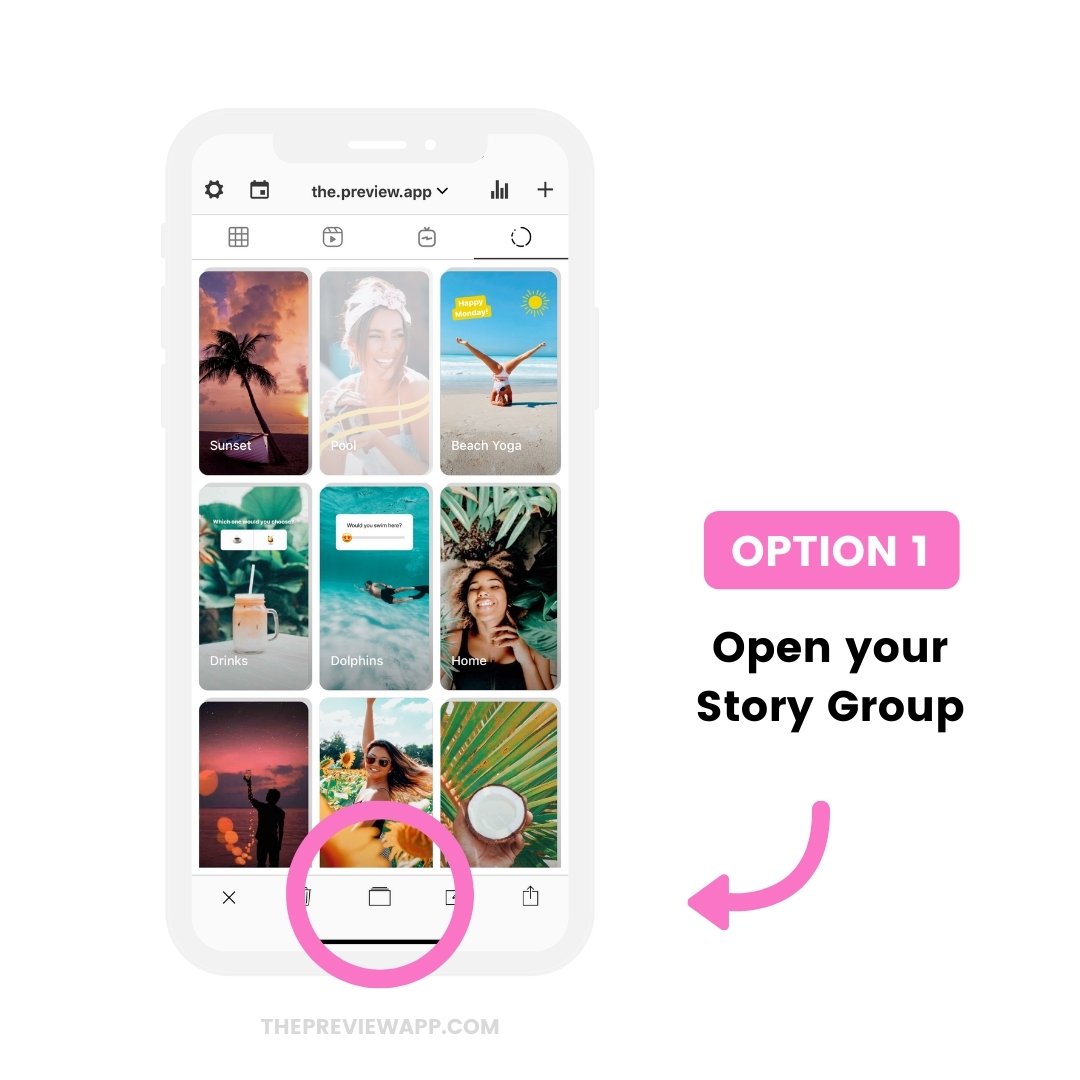
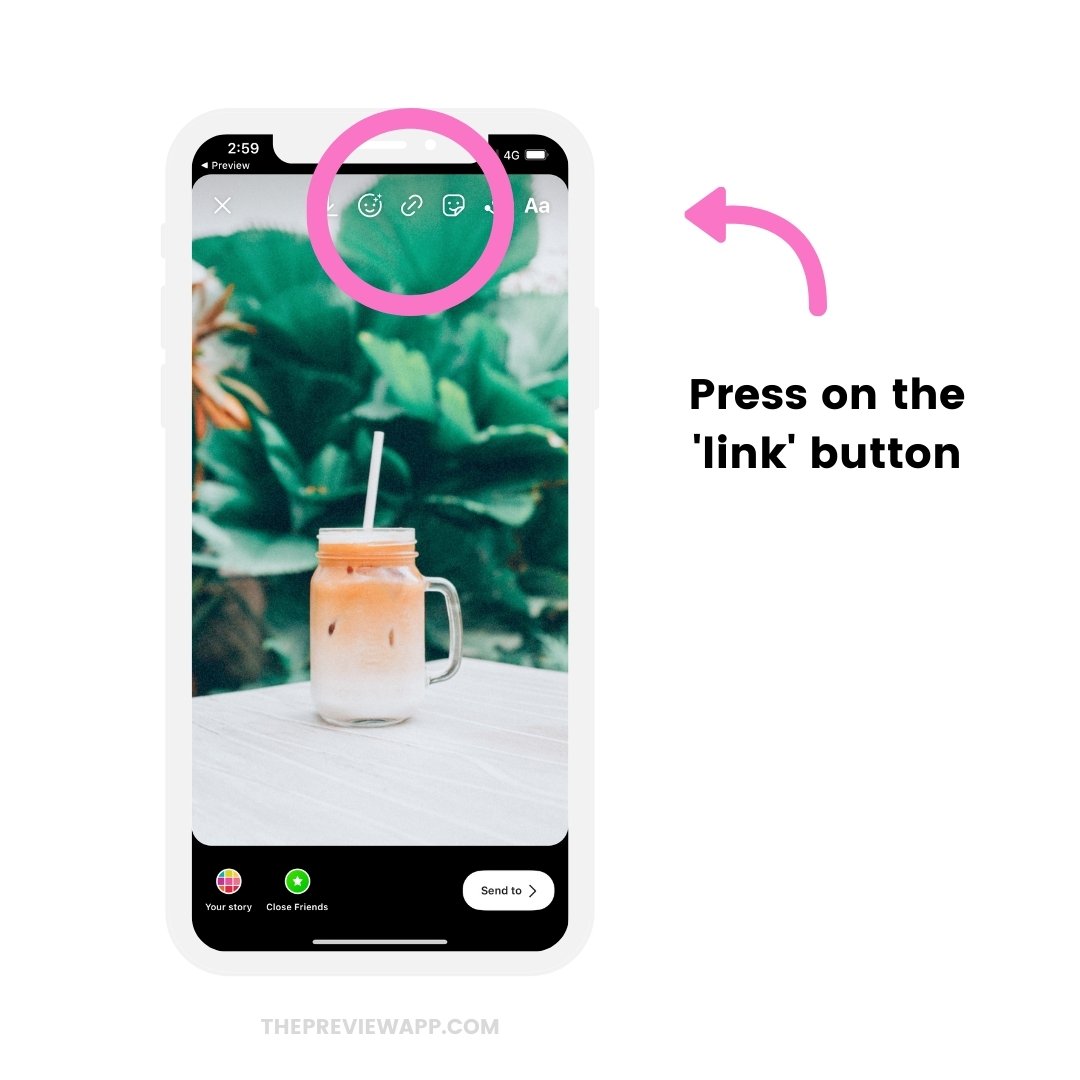
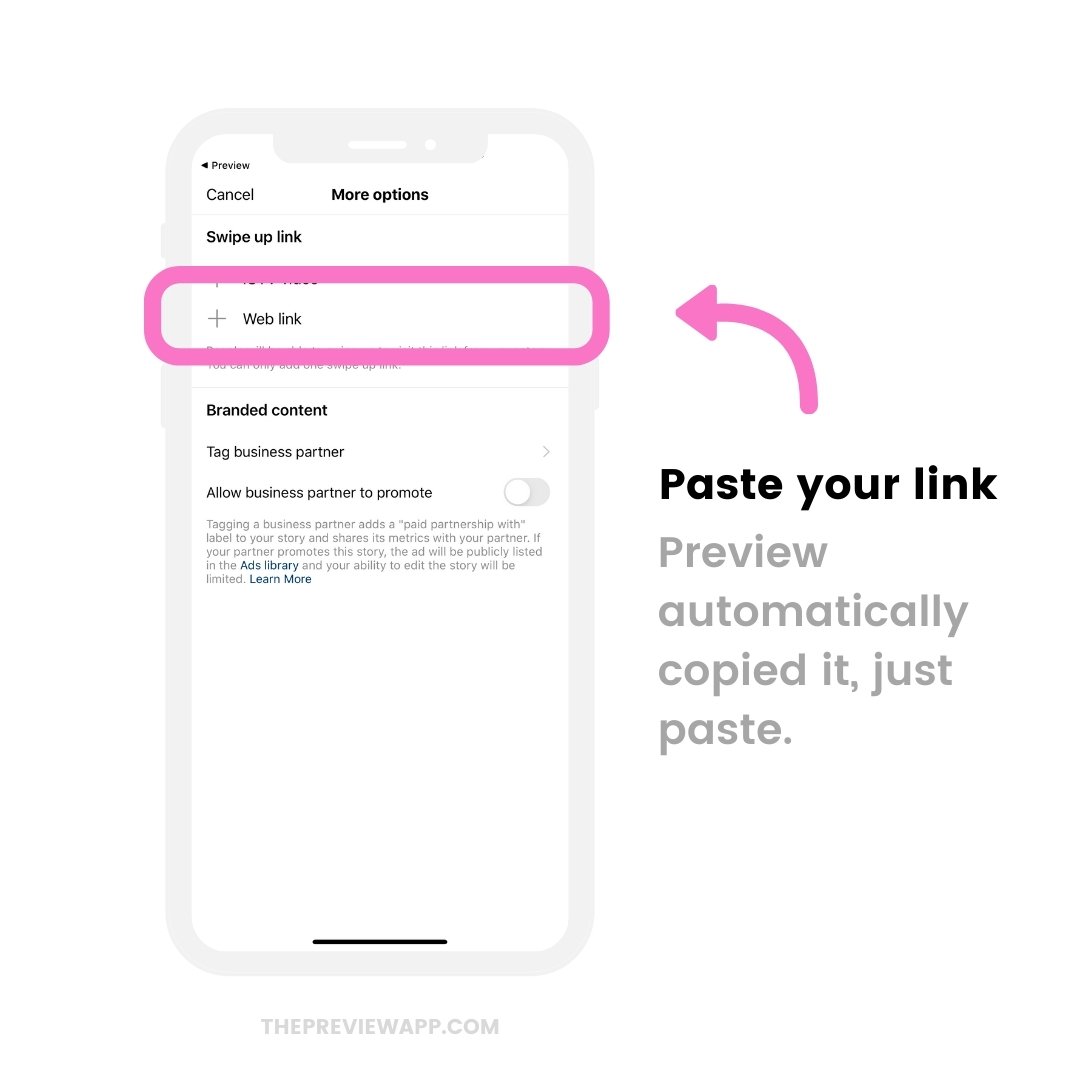
Option 1: Post one Story at a time.
- Open Preview on your phone
- Open your Story Group
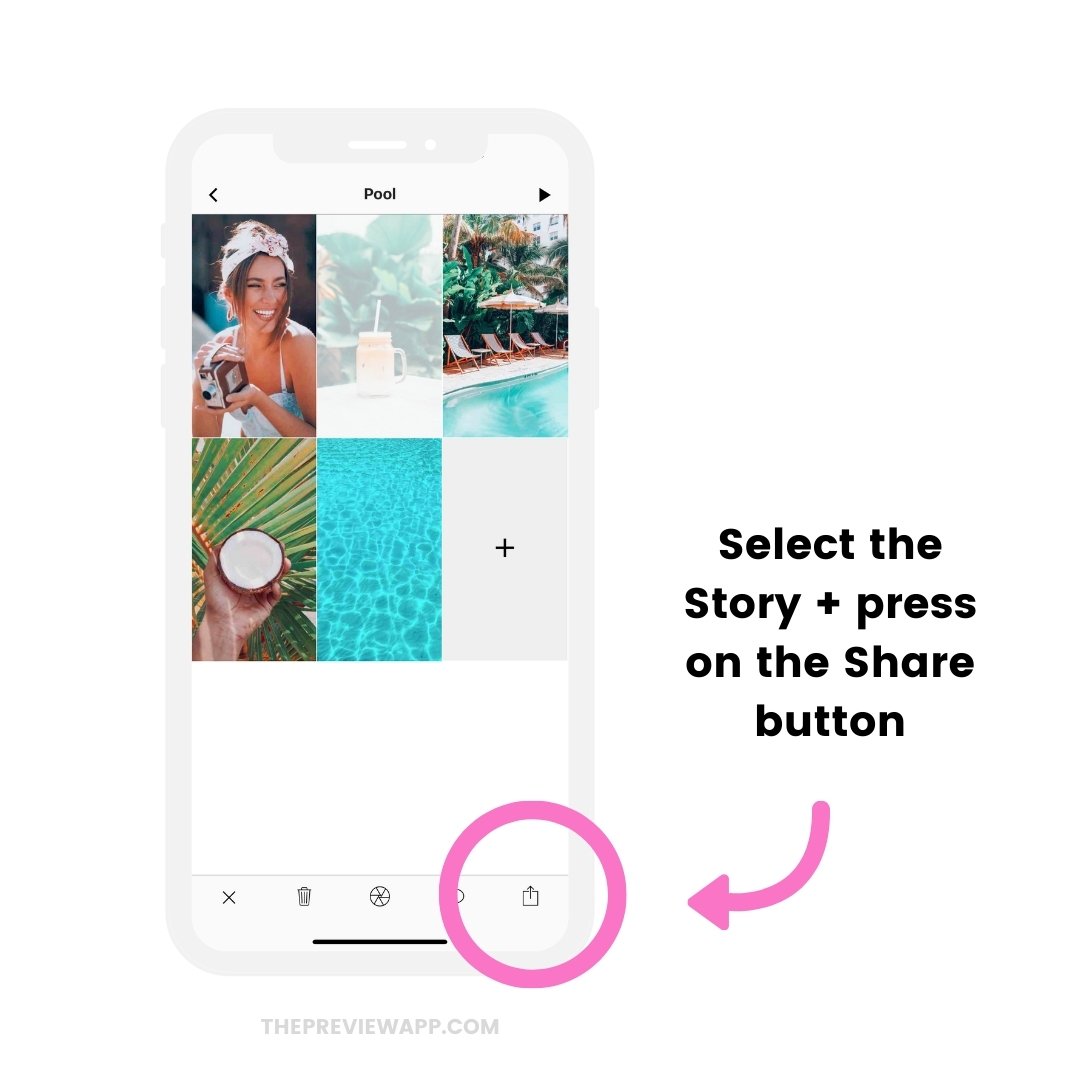
- Press on one Story
- Press on the “Share” button
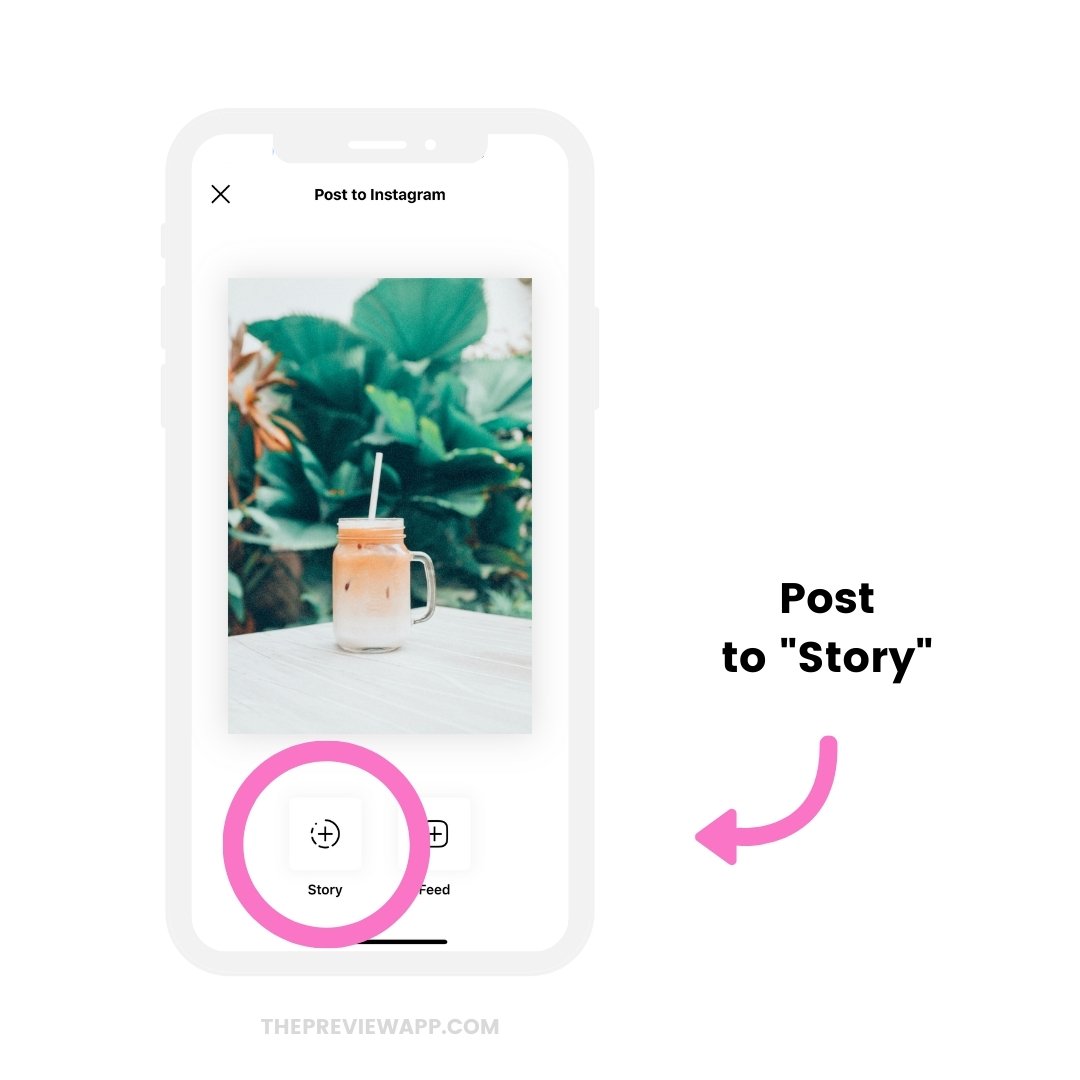
- Instagram will open up
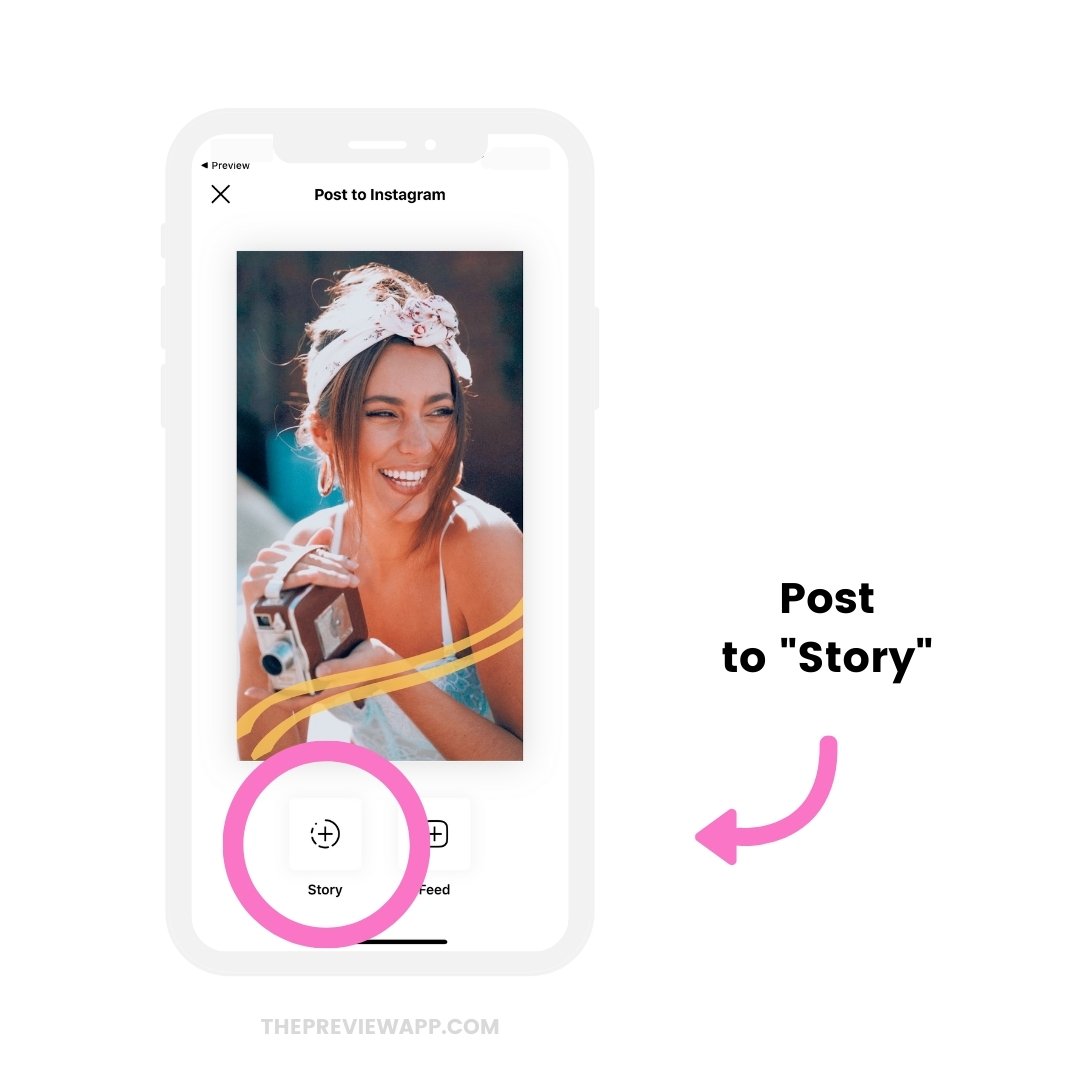
- Press “Story”
- Paste your caption or swipe up link (if you had prepared some – Preview automatically copied it for you)
Here is how it looks like in images:
And now let’s look at option 2.
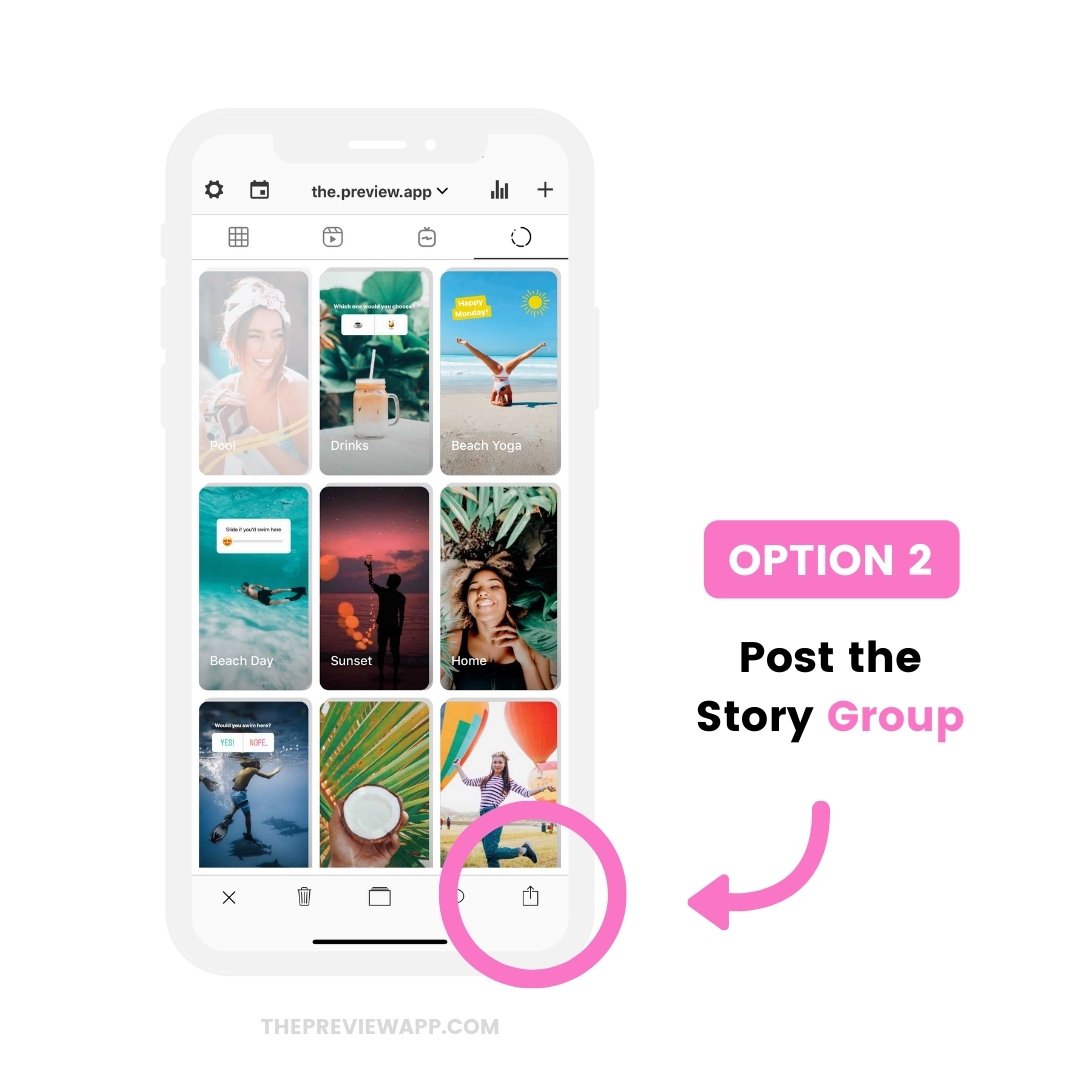
Option 2: Posting your entire Story Group at once.
To post your entire Story Group:
- Press on the Story Group
- Press on the “Share” button
- Your photos and videos will be automatically saved to your camera roll for quick access (Note: this is the only Instagram-approved way to post your Stories)
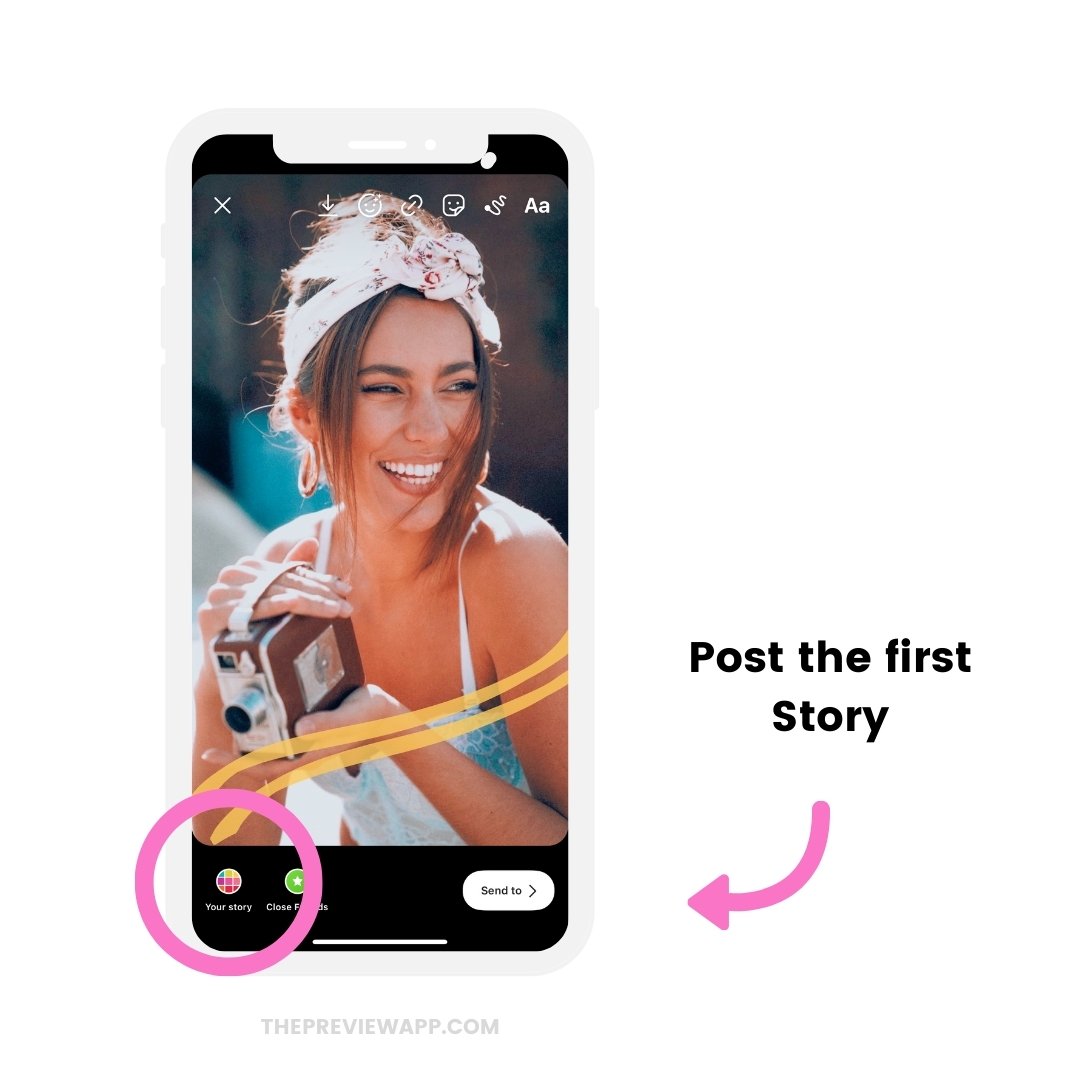
- Share the first Story
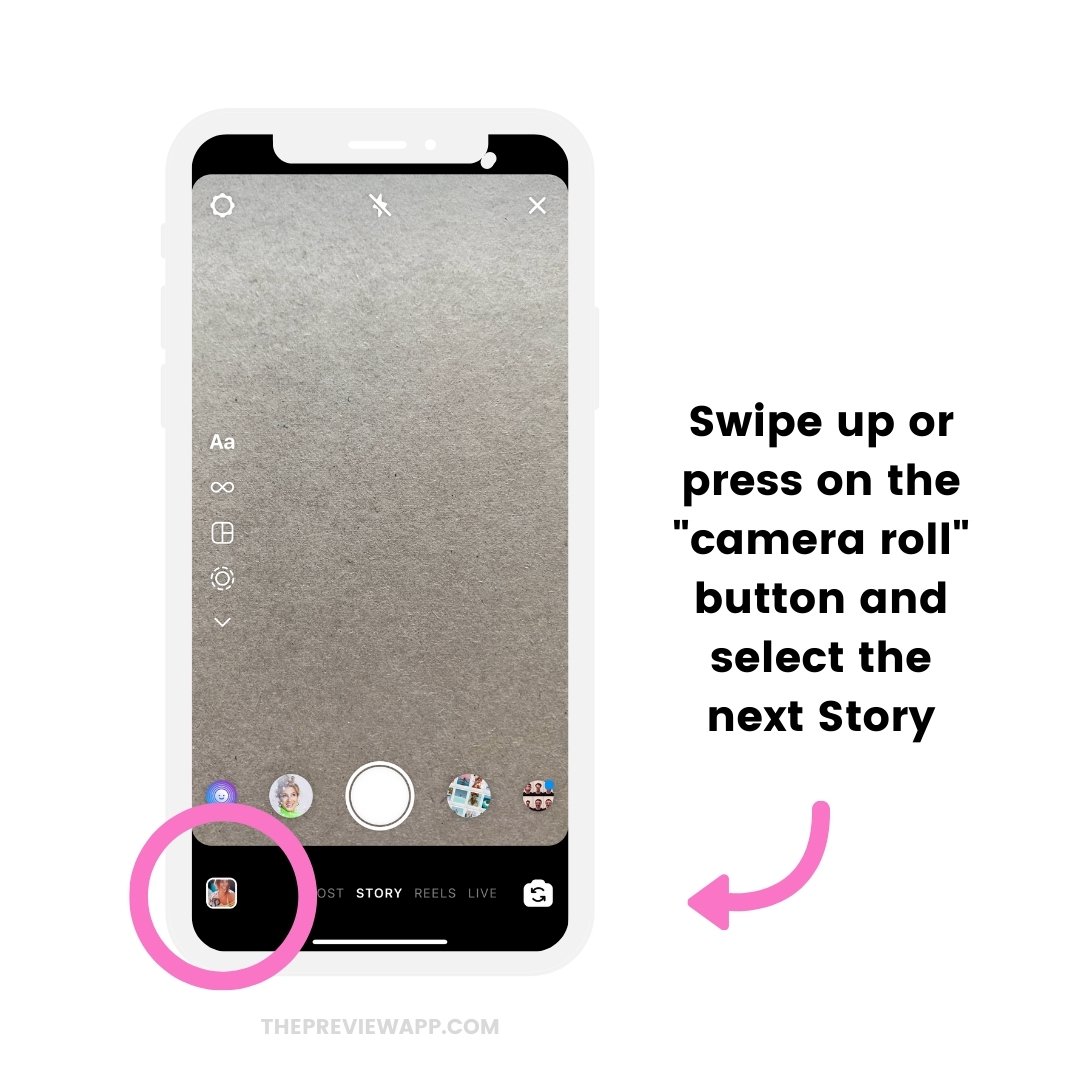
- Still in your Story, swipe up and select the next photo or video from your camera roll
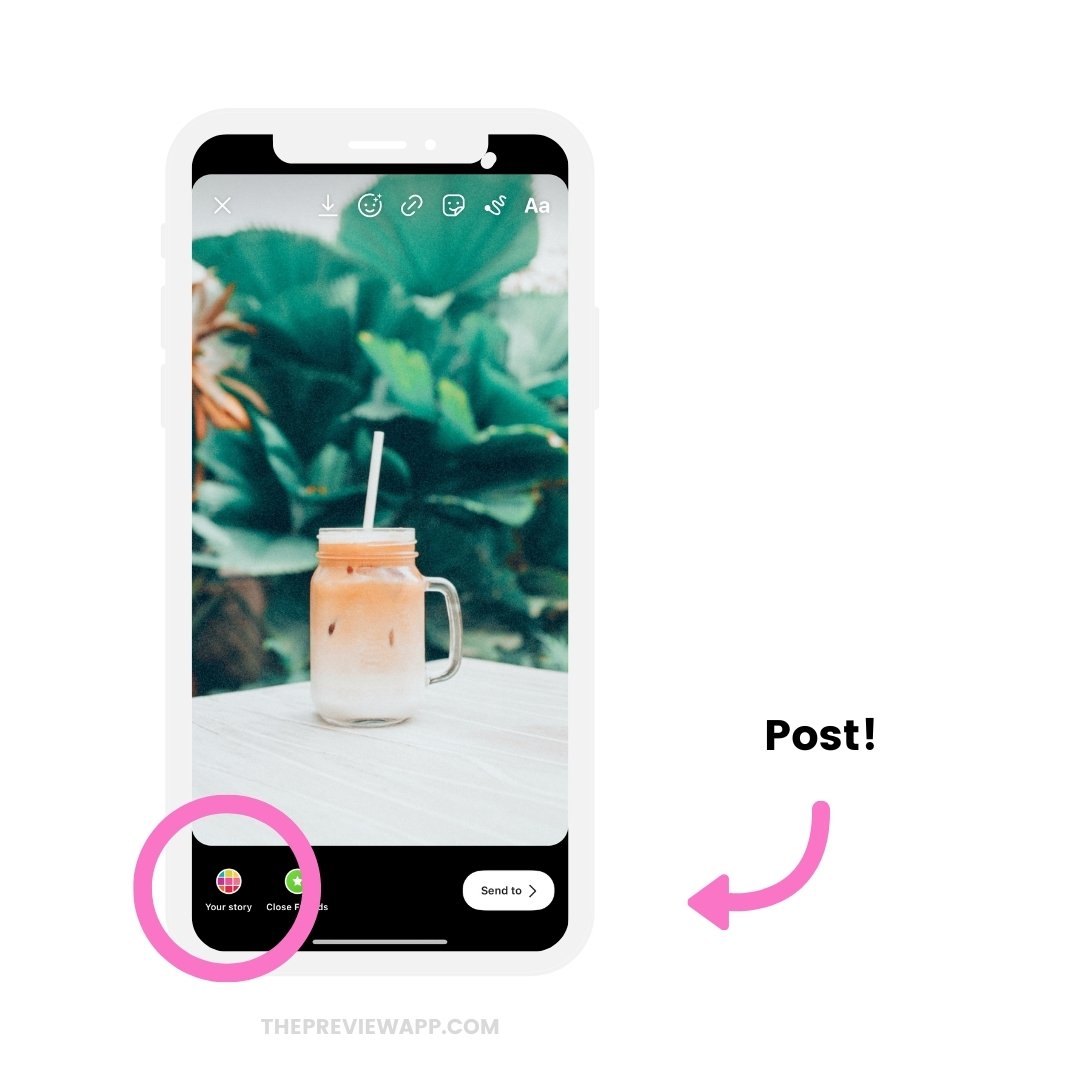
- Keep going until you’ve posted all your Stories
Like this:
That’s it! Enjoy scheduling Instagram Stories on Desktop!
Don’t hesitate to email us if you have any questions.
Otherwise, have fun planning your Stories!
You might also like:

